robsrockshop
has rocks in the head

Member since August 2012
Posts: 715
|
Post by robsrockshop on Jan 9, 2013 22:31:57 GMT -5
Cool. That's an older model too. That ones in good shape I probably wouldn't had done anything other than cleaning and changing out the oil in the front gear case and changing the belts(but those don't look bad). Of course I understand wanting to repaint. Other thing would be getting the carriage rods out and cleaned I usually put this in my lathe and sand them off real quick. I had hood building capabilities till my pittsburgh machine blew up. I can still make them but not to that standard. Oh and the shaft probably won't just "slide" out lol. One little speck on it will bind. I personally wouldn't disassemble the arbor assembly, you could always make a metal cover for it and cover up the old looking parts if you wanted to get that fancy with it. I won't say I haven't done that either lol.
|
|
robsrockshop
has rocks in the head
Member since August 2012
Posts: 715
|
Post by robsrockshop on Jan 9, 2013 22:35:01 GMT -5
Oh you already took the arbor apart, didn't see those comments. Well thats cool now you can shine her up.
|
|
Don
Cave Dweller  He wants you too, Malachi.
Member since December 2009
Posts: 2,616
|
Post by Don on Jan 9, 2013 23:13:23 GMT -5
Rob, thanks for the comments. I kind of regret tearing it all apart and repainting, part of me realizes that there was some value in that vintage, untouched condition. Oh well, my OCD couldn't stand the old oil, dirt and rust. LOL
I'm a long way from reassembling the saw, still working on it ever so slowly. I hope to finish it up this winter so I can have it going for the summer rock hounding season. Hope I remember how it all goes back together.
I hand sanded the carriage rods with 0000 steel wool to remove rust and polish. I need to fabricate a new cork gasket for the front gear case and figure out a shutoff switch to replace the missing one.
|
|
Don
Cave Dweller
He wants you too, Malachi.
Member since December 2009
Posts: 2,616
|
Post by Don on Apr 26, 2013 21:49:48 GMT -5
I've got to say, Rustoleum hammered paint is pure crap. I'm constantly having to touch it up. it can't take the slightest abuse whatsoever. Wish I went with something else now.
|
|
Don
Cave Dweller
He wants you too, Malachi.
Member since December 2009
Posts: 2,616
|
Post by Don on Apr 26, 2013 22:00:28 GMT -5
I've been able to make some good progress on this project this week. have all of the components cleaned and painted up, reassembled the vise and rails, and got them installed. I should be able to wrap this project up in the next week or so. I'm a bit worried about how I'm going to get the pulley/bearing/arbor assembly back together as nothing wants to slide on easily. I could use some advice for that. here's some pics: 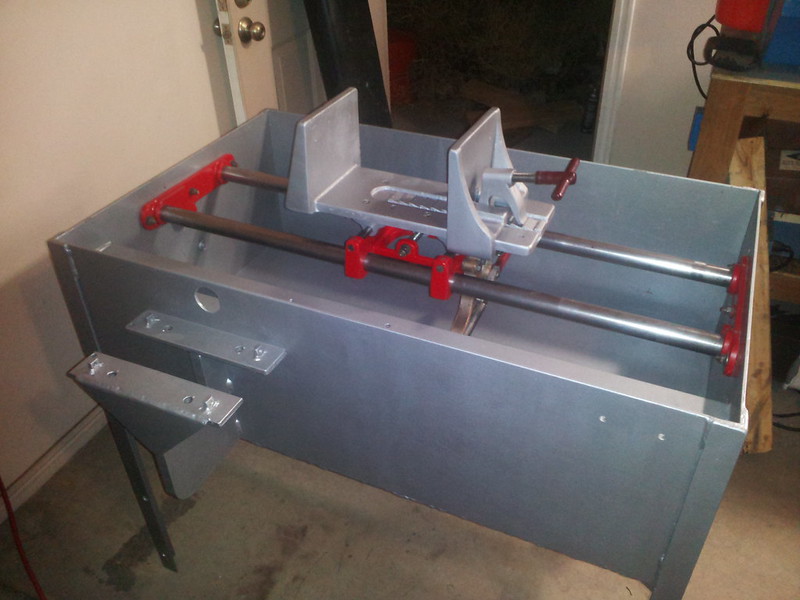 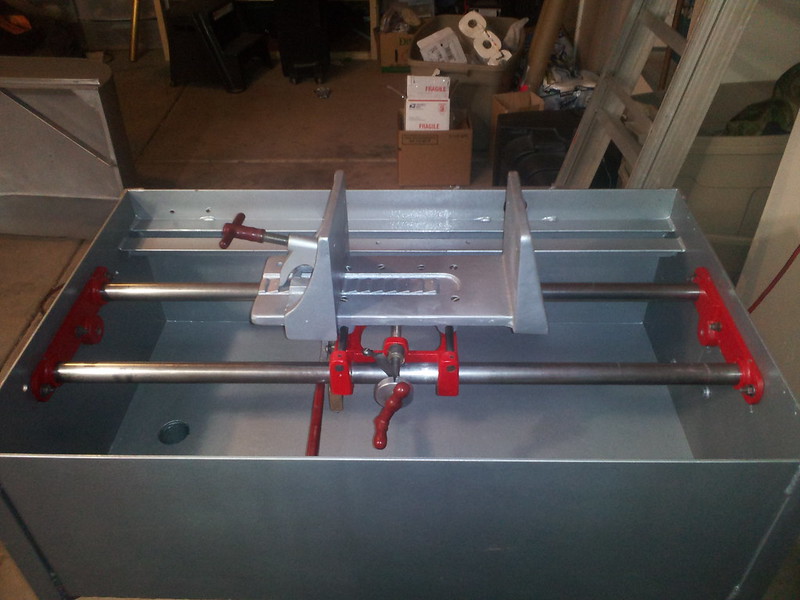 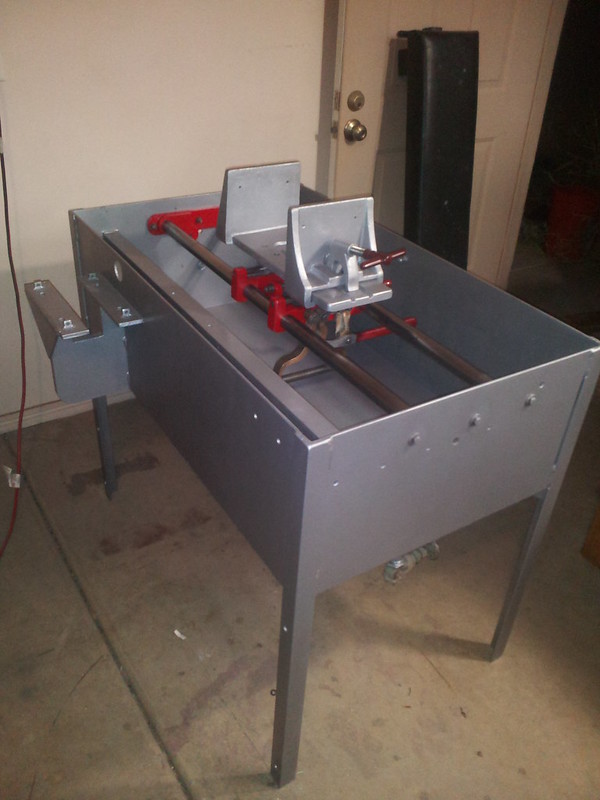 |
|
Deleted
Deleted Member
Member since January 1970
Posts: 0
|
Post by Deleted on Apr 27, 2013 1:42:42 GMT -5
Faster than I could ever try to achieve! Great work keeping focused and getting it close to done!
Don you totally rock!
|
|
Don
Cave Dweller
He wants you too, Malachi.
Member since December 2009
Posts: 2,616
|
Post by Don on Apr 28, 2013 4:46:25 GMT -5
Well, here we are! 95% finished. Just need to do some detail work on the saw, clean up and rewire the motor and figure out some kind of power switch and cutoff. I'll tell ya, this hasn't been an easy project at all. just tonight I had 2 major "Oh Sh$t!" moments. The first, was when I broke a grease zerk in half on my brand new bearings trying to get the grease gun to detach. luckily I was able to get it out and replace it...And then later when I snapped off one of the square bolts welded onto the frame for the bearing mounts, trying to align the stupid blade...so I got out my angle grinder, ground the welds smooth and JB welded the square bolt back on. SIGH My other major issue with this project is the darn paint. that hammered paint is pure crap. chips and flakes off if you look at it funny. I've been touching it up all project long, and will probably be constantly touching it up long term to keep the saw looking good. Oh, I got the wild notion to glue cork around the lid. I'm not sure why I decided that was a good idea, but it seemed like one at the time. I guess I was trying to save the paint from getting banged up. It'll probably look like crap in a couple weeks and I'll be furiously scraping it off and repainting. LOL. Here's some more pics: 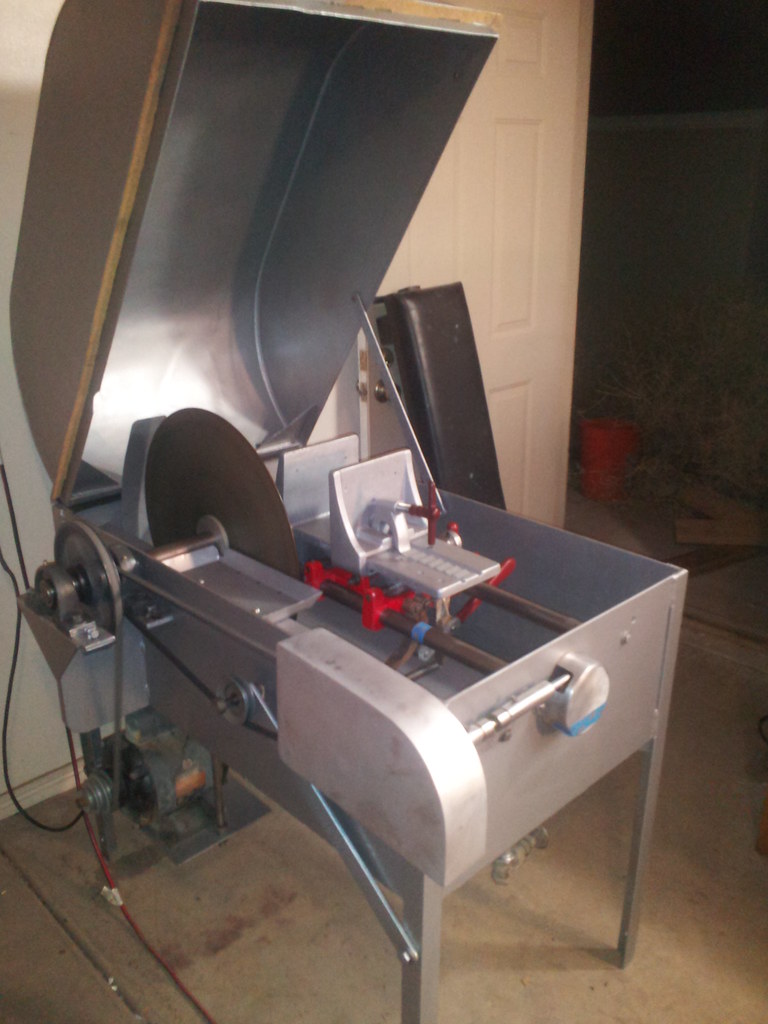 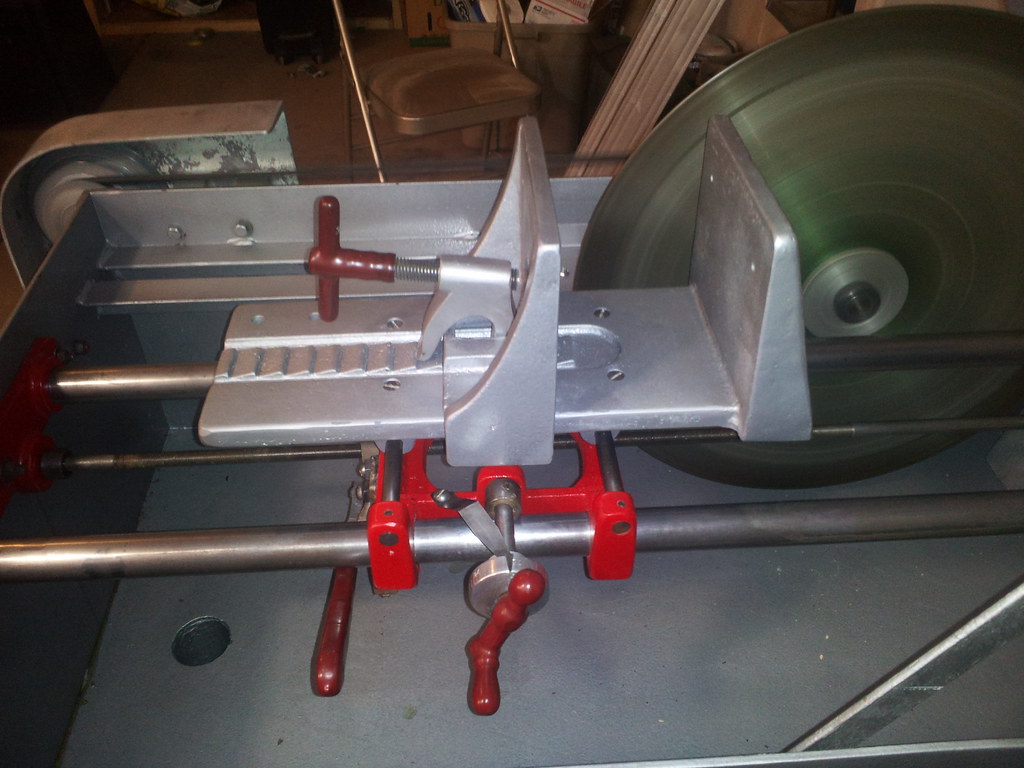 ] 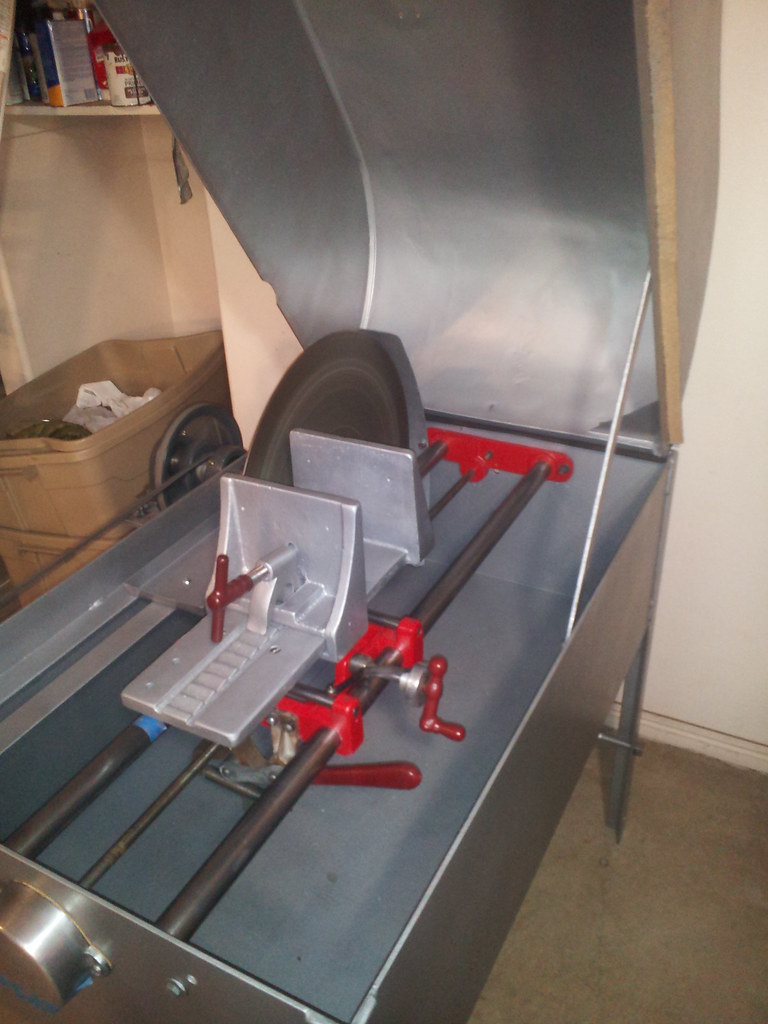 Lastly, WHERE THE HECK DO ALL OF THESE GO?  ? 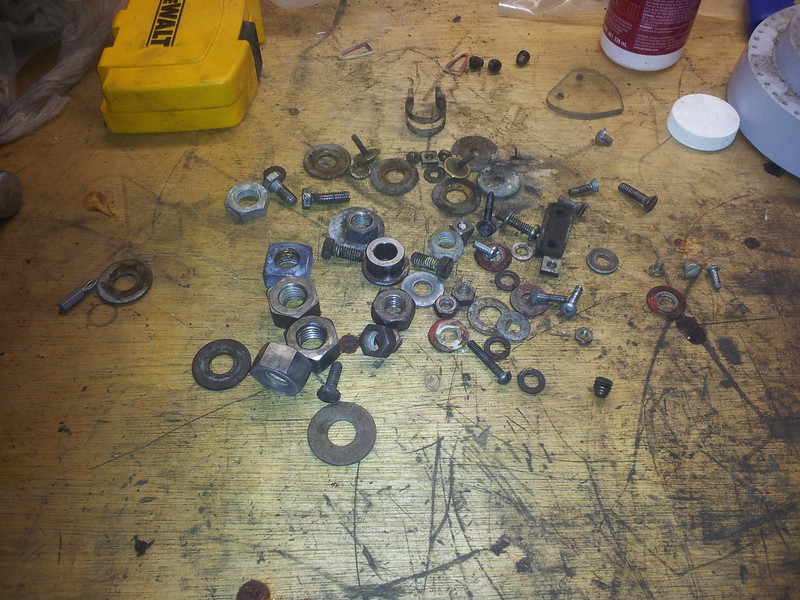 <charlie brown>AAAARRRRRRGGGHHHHHHH!!!!!!!</charlie brown> |
|
|
|
Post by Rockoonz on Apr 28, 2013 16:44:21 GMT -5
Looks like you already have a hole for your auto shut-off. Here's what I did on a HP 14 inch saw. 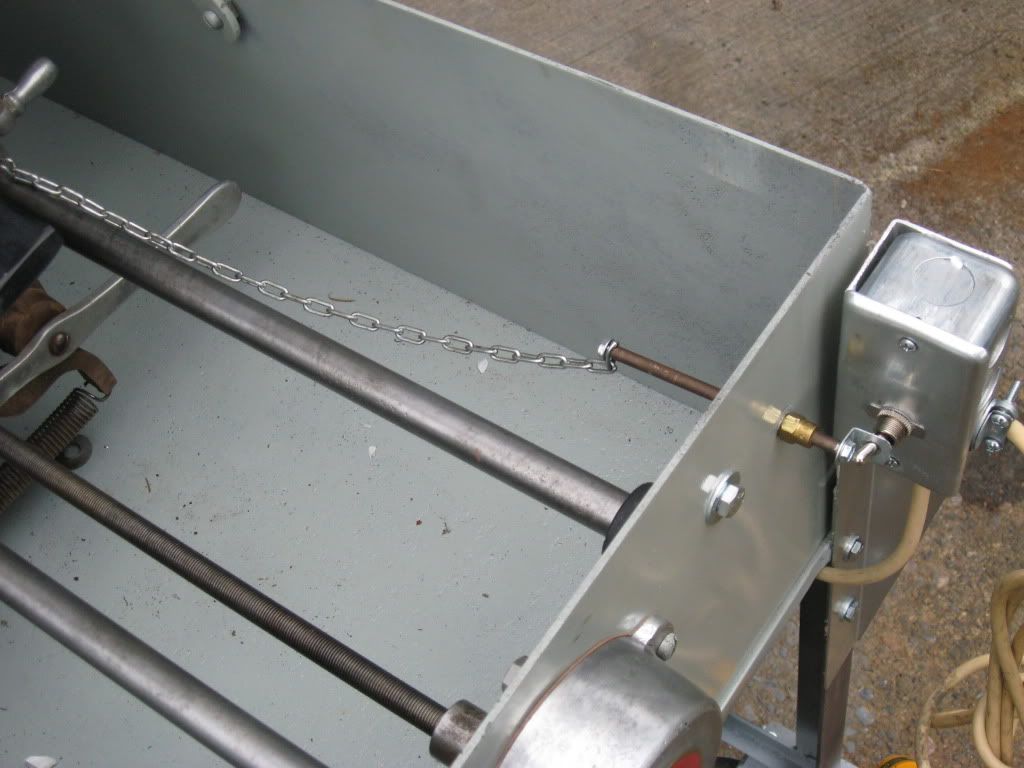 Lee |
|
Don
Cave Dweller
He wants you too, Malachi.
Member since December 2009
Posts: 2,616
|
Post by Don on Apr 28, 2013 21:07:34 GMT -5
that looks great Lee. what hardware did you use?
|
|
|
|
Post by Rockoonz on Apr 28, 2013 23:12:12 GMT -5
1/8 inch steel tubing with a self threading sheet metal screw in each end. The brass fitting was a 1/8 npt spray nozzle that I drilled out to serve as a guide. Just drilling the front of the box slightly bigger than the OD of the tubing would have been sufficient though. The problem with these shut offs is the switch shuts off electrically before it switches all the way off physically. That means if I don't check and possibly push the switch the rest of the way off before opening the saw and pulling the carriage back for another cut it could turn un and put a nice rock snot racing stripe right up the front of my shirt and face. One of the saws at our clubs shop has a limit switch installed so it won't run with the lid open.
Lee
|
|
|
|
Post by Peruano on Apr 29, 2013 7:28:31 GMT -5
Thank you Lee for that shutoff switch info. I have had the desire to design one for weeks now and you will be the stimulus for starting the process. I saw no trace of an auto shutoff on the homemade saw when it came to me, but it did have an auto no run when the lid was open (wired but no longer attached to function because no top was present either. The switch cut the electricity when it was depressed but only when depressed (i.e. it would re-engage when released). I'm assuming I'll not use the trip (autooff) switch as the primary switch, I.E. I'll keep a simple easier to use switch to turn the saw on and off and let the auto work only should I forget the saw and walk away.
Sorry to divert this thread - great job on the saw and thanks too for the detailed photos that allow us to see the details of what is present and now functional. Tom
|
|
The Dad_Ohs
fully equipped rock polisher
 Take me to your Labradorite!!
Member since September 2012
Posts: 1,860
|
Post by The Dad_Ohs on Apr 29, 2013 7:58:06 GMT -5
On my 18 inch Lortone the switch has a plastic cap/cover on it, connected to the chain, so that when the chain pulls tight it pulls the switch to the off position. I'll snag you a pic of that too... should be easy to get as it is a lortone item. If interested. 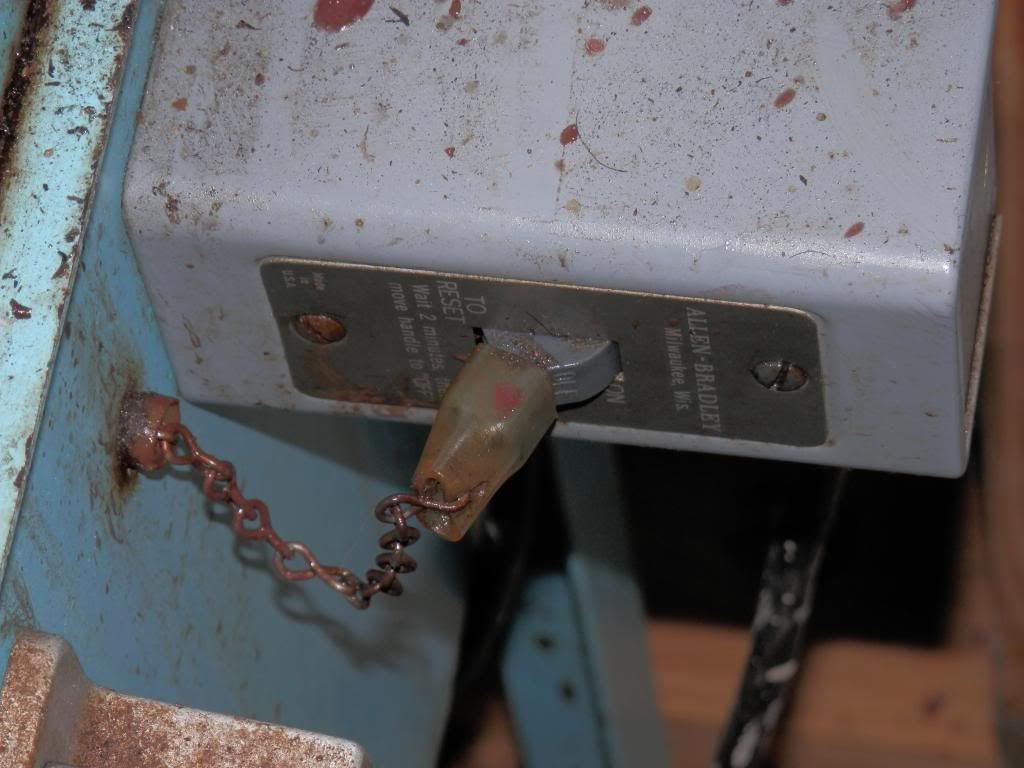 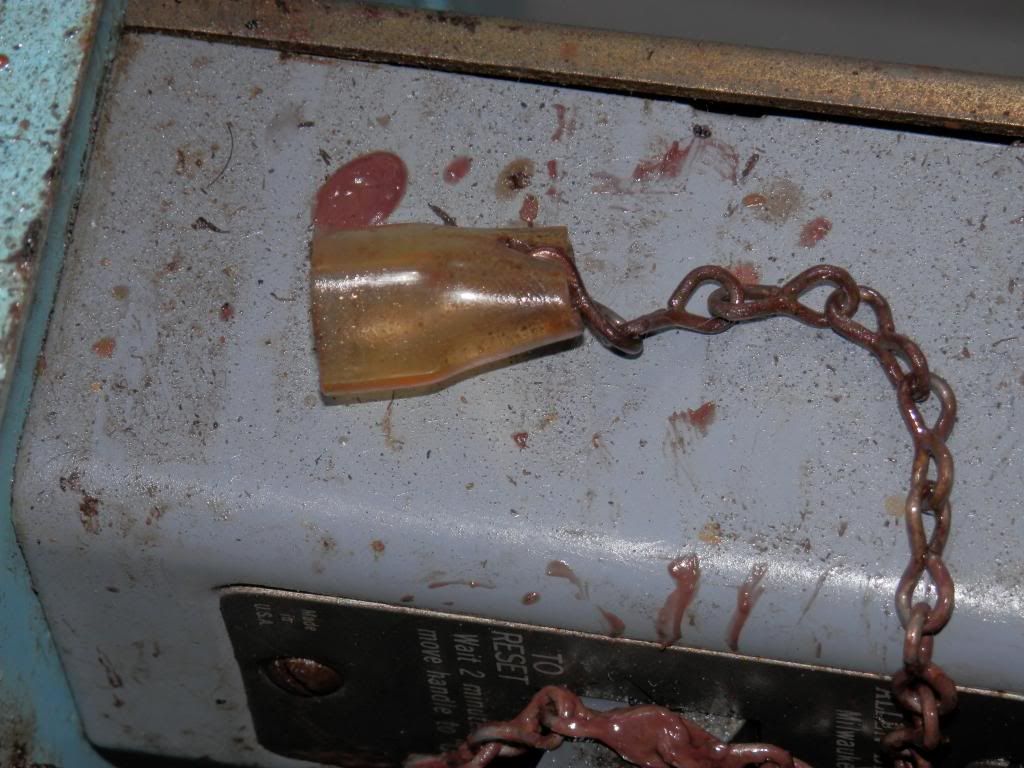 Hope this helps!!  |
|
quartz
Cave Dweller
breakin' rocks in the hot sun
Member since February 2010
Posts: 3,341
|
Post by quartz on Apr 29, 2013 13:55:37 GMT -5
I had the same "partly shut off problem" with the switch on our 16" homemader when we bought it, even racing striped myself once. I put a switch with a longer toggle on it, and drilled for puller attachment as far out on the toggle as possible, no more problems. I just measured, 7/8" from inside end of toggle to pull hole. Nice job on the rebuild, good to see care put into older machines.
|
|
|
|
Post by Dicky the Rockhunter on Apr 29, 2013 16:01:21 GMT -5
I have built many older saws and sInce you are going to regrease and or replace bearings just take it to a do it your self car wash and go to it . Nothing will be hurt just clean . Use the power clean and rinse cycles. OH YEAH WEAR A RAIN COAT!
|
|
|
|
Post by Peruano on Apr 29, 2013 18:00:41 GMT -5
I may be wrong, but I suspect the snap switches carried by Grainger would be sensitive enough to go ahead and click completely off when suspending current and hence preventing the autostart up again phenomenon. I found this one and will check it out on my next trip to town. www.grainger.com/Grainger/OMRON-Snap-Switch-6X289?Pid=searchThe longer lever and snap feature would seem to be the key as opposed to just using a simple toggle switch. I'm sure we have a resident electrician or engineer who can guide us in this design feature. Tom |
|
|
|
Post by Rockoonz on Apr 30, 2013 21:30:39 GMT -5
I had a saw that used a snap limit switch to shut off. The problem was it was in series with the power switch so if I forgot to kill the main off-on switch and pulled the carriage back to start another cut, SPLASH, oil in the face. I sold that saw.
Lee
|
|
|
|
Post by Peruano on May 1, 2013 7:46:32 GMT -5
You mean I'm supposed to be using my brain "all of the time"? I was naive and assuming the snap was in a single direction (i.e. on to off). What you describe is its off as long as its held off but snaps on when released (bad for this application I guess). I'll check with the boys at the parts counter to see what they recommend. Tom
|
|
|
|
Post by Rockoonz on May 1, 2013 23:20:59 GMT -5
I was thinking of using a motor relay with a push button to start and a limit switch hooked to the chain to stop. Got some old bits from machines at work that were upgraded, just have to do it.
Lee
|
|
|
|
Post by paulshiroma on May 2, 2013 8:33:45 GMT -5
Congrats, Don. Great job on the rebuilding project. Came out really nice.
|
|


 ?
?


