monna0000
starting to spend too much on rocks

Member since May 2016
Posts: 243 
|
Post by monna0000 on Mar 12, 2017 12:59:31 GMT -5
Been away for a while, working on our new House and the workarea are the last on the to do list, but yesterday I stumbled upon some cabs I did a while ago. So gave my self a Day of and had my first go at silversmithing. My fingers hurt like h... And there are visible mistakes on my finished piece. Especielly the point was hell to work on and i spend at least 7 hours working on this today, BUT I love it! The cab is a GYP agate and it is so pretty up close, the most amazing stone I ever worked with. Mistakes; 1. I have no burnisher and used a stainless steel rod. Need to get a burnisher. 2. To much solder inside one of the sides in the bezel so had a hard time getting the cab in and it gave me trouble to get the edge close. How do you remove to much solder? 3. The point had a big gap. No clue on how you get that to "fold" nice? Advices appreciated 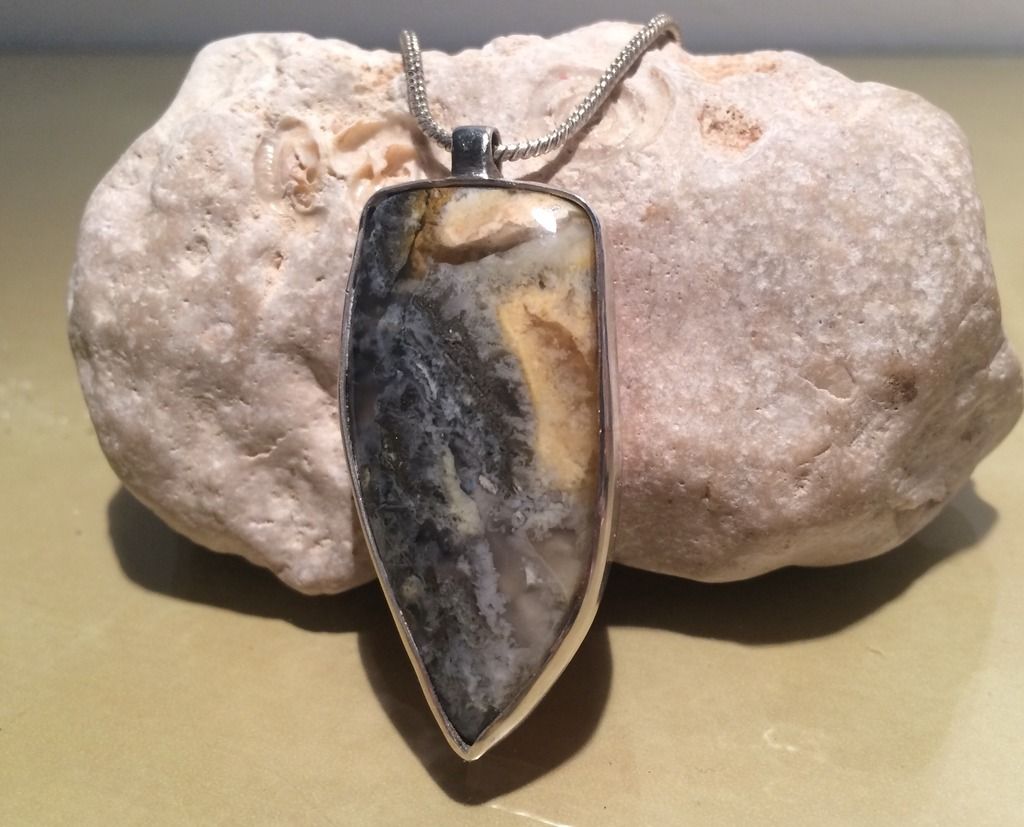 |
|
metalsmith
Cave Dweller 
Member since October 2012
Posts: 1,537
|
Post by metalsmith on Mar 12, 2017 14:03:10 GMT -5
That's a great result for your first effort! Of course you know the penalty for not getting things quite right: time, It looks like it has paid off here though. Not sure where you need to remove solder but really the only ways are filing & polishing, unless you count leaving it to soak in pickle and breaking it apart when the solder wastes.
|
|
|
|
Post by opalpyrexia on Mar 12, 2017 14:09:02 GMT -5
2. To much solder inside one of the sides in the bezel so had a hard time getting the cab in and it gave me trouble to get the edge close. How do you remove to much solder? 3. The point had a big gap. No clue on how you get that to "fold" nice? Advices appreciated That's really good work! Very well done. I remove excess solder on the inside using an inverted cone bur, both on the bezel seam and the seam between the bezel and the backplate. (I place my solder on the inside of the bezel when soldering to the plate.) To remove any solder "ghosts" on the plate, I place the spinning head on the plate near the bezel seam and walk it out and away from the bezel. It cleans it up really fast. When your stone has narrow or sharp corners that's where you want to first start pushing the bezel down. If you don't get those down close to to the stone before other, less sharp areas, you'll find that it's difficult to do it as it was in this case. I hammer set my stones, even my opals, using a brass rod that has a steel head soldered to it. In this case, you could have taken just a brass rod and polished a slightly rounded face on one end. Using that and a hammer - I know this sounds risky, but it isn't - you could have gently tapped down around the corner with more force that can be applied with a burnisher. I hope that you find this helpful. You really did a great job on that pendant. |
|
|
|
Post by Pat on Mar 12, 2017 14:43:57 GMT -5
For a burnisher, you can file down the handle of a toothbrush.
Re the folded point: using a half-round file, file the area of the point down about halfway before ending it. No folding worries.
Your first piece is something to be proud of. Congratulations!
|
|
monna0000
starting to spend too much on rocks
Member since May 2016
Posts: 243
|
Post by monna0000 on Mar 12, 2017 14:55:59 GMT -5
THIS is why I love this board so much! Thanks Pat opalpyrexia metalsmith for the cheers and most importent advices. All of them makes sence and I want to do another one right now😃 Thanks, really appreciated |
|
|
|
Post by drocknut on Mar 12, 2017 17:24:18 GMT -5
That looks great, especially for a first. Good for you.
|
|
grizman
freely admits to licking rocks

Member since July 2011
Posts: 878
|
Post by grizman on Mar 12, 2017 20:56:14 GMT -5
FIRST? I'd say you have very little need for improvement from what I see. Very nice, and thanks for sharing.
|
|
|
|
Post by Drummond Island Rocks on Mar 12, 2017 21:36:59 GMT -5
Congrats on getting going. Nice looking first piece. I found silver to be the hardest learning curve of all my rock work. Lots of tool options and lots of learning involved.
Chuck
|
|
|
|
Post by rockjunquie on Mar 12, 2017 23:08:06 GMT -5
Very nice! You did a wonderful job especially for the first. You should see mine! LOL! Not good. But fun. Your bezel wire looks heavy. What gauge did you use? I have used the toothbrush handle and it works very well. I like my steel ones better, but I keep the toothbrush for softer stones in case I slip. Can't wait to see more of your work.  |
|
monna0000
starting to spend too much on rocks
Member since May 2016
Posts: 243
|
Post by monna0000 on Mar 13, 2017 4:03:06 GMT -5
Thanks rockjunquie it's 0,6mm wire that would be around gauge 23-24 and that's the one the supplier suggested but I did look at the Supplies webpage this morning and also found that it was the only one they had. So I guess I'm looking for a new Supplies. Any suggestions on the Best gauge for a beginner? |
|
|
|
Post by Drummond Island Rocks on Mar 13, 2017 6:45:50 GMT -5
I like the bolder (more silver) look of the heavy gauge bezel but it is much more work trying to get it to behave. I think I have only used 26 and 28.
Chuck
|
|
|
|
Post by orrum on Mar 13, 2017 6:52:36 GMT -5
I think it's a grest one! First time a oval is easier.
|
|
|
|
Post by 1dave on Mar 13, 2017 7:50:44 GMT -5
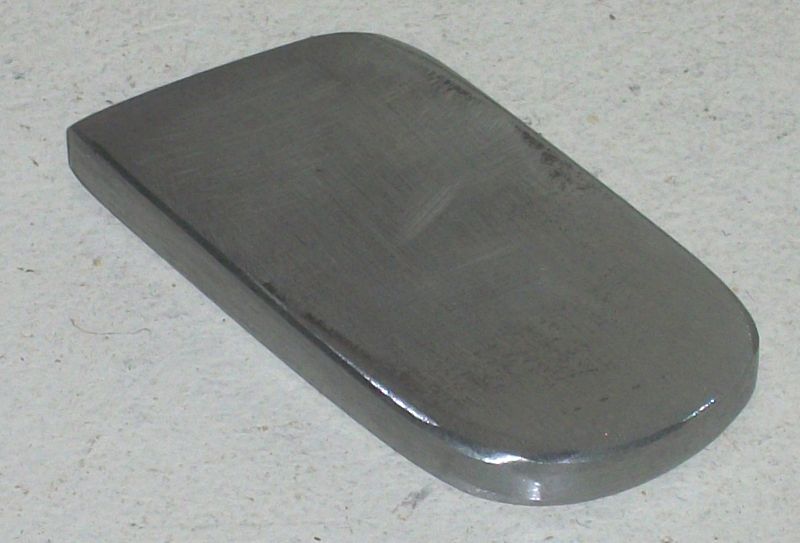
There are lots of ways to make a burnisher. A handy tool for bending and smoothing the bezel around your stone is a burnisher. 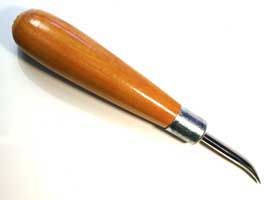 I found a 1/4" X 1 1/4 X 2" Chunk of iron stock rounded on one end and polished worked better for me. I can't find my old one, but found a blank from the last time I made a bunch for friends. Saw off the torched end and a little polishing and I may even do something again.  A handy tool for burnishing a bezel is a piece of tumbled Agate, you can actually buy one with a handle but I just grab whatever handy sized chunk of tumbled Agate I have close. If you want to make a good burnishing tool from metal the shank from a broken drill bit is tool steel, it can be ground down to shape and polished up on your rock sanding wheels then mounted in a file handle. |
|
|
|
Post by opalpyrexia on Mar 23, 2017 9:48:35 GMT -5
I almost always use 24 gauge, with the exception of 26 gauge for very tiny stones or some small earrings. I like the look of heavier bezels. Regarding the difficulty you had getting the bezel area pushed down around the stone's point, I forgot to mention something that I always do prior to setting that will make any stone points easier to deal with. After first making sure that I can remove the stone I place it in the setting. Then I take a fine Sharpie marker and, angling it down against the stone with the point on the inside of the bezel, I draw a line on the bezel. I'm trying to go as low as I can when I do this. After removing the stone I file the bezel down to where the line is just about to disappear. This ensures that the bezel follows the contours of the stone and is no higher than is absolutely required. You'll find that marking around narrow points can go quite low, almost to the point of concern (!) but there's always enough metal left - and much less metal than the original bezel height to deal with. I should add that my cabs always have continuous sloping sides. Well, except for some boulder opals. |
|
micellular
has rocks in the head
Rock fever is curable with more rocks.
Member since September 2015
Posts: 640
|
Post by micellular on Mar 23, 2017 9:59:16 GMT -5
Fantastic job! No one has complimented your bail yet, so I will! I love how unobtrusively minimalistic it is, yet it flows very well with the rest of the piece and looks quite sturdy. How did you make it?
|
|
|
|
Post by pghram on Mar 24, 2017 15:48:51 GMT -5
That's a very nice pieces, it's hard to believe that it's your first.
Peace,
Rich
|
|