adrian65
Cave Dweller  Arch to golden memories and to great friends.
Member since February 2007
Posts: 10,790
|
Post by adrian65 on Mar 17, 2011 14:27:55 GMT -5
Rhonda, the base would be a big obsidian slab, Todd sent it to me already.
The gate will be almost certain stainless steel entirely, to leave the "color play" to the cab.
Adrian
|
|
|
|
Post by Toad on Mar 17, 2011 17:35:45 GMT -5
Toad, This is turning out so flippin nice! Can't wait to see the finished project. What an heirloom you will have. Your creative vision was perfect. steve Wish I could take credit, Steve. My original plan has changed greatly by the guys that helped with the various stages. And I'm glad it did. These folks are awesome! Thanks for the update Adrian. It is coming along beautifully |
|
highplainsdrifter
fully equipped rock polisher
  
Member since December 2008
Posts: 1,266
|
Post by highplainsdrifter on Mar 17, 2011 17:53:58 GMT -5
wow, that is gonna be cool!
|
|
|
|
Post by tntmom on Mar 17, 2011 17:56:48 GMT -5
I love seeing all the steps become real on this project. It is so cool!!! I've even described your piece to the Intstructors and Sihings at the club I work for. They all want to see pictures too! It's original, beautiful and symbolic!
~Krystee
|
|
|
|
Post by tanyafrench on Mar 18, 2011 11:01:38 GMT -5
Gets better all the time. I loving this play by play as well. Keep it coming.
Tanya
|
|
adrian65
Cave Dweller  Arch to golden memories and to great friends.
Member since February 2007
Posts: 10,790
|
Post by adrian65 on Mar 19, 2011 12:17:31 GMT -5
Hi again, The lower beam is completely done, here it is:  Can you read this? ;D 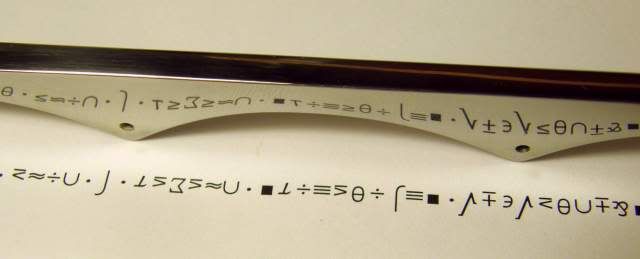 Here it is, going through the two uprights (caliper for scaling): 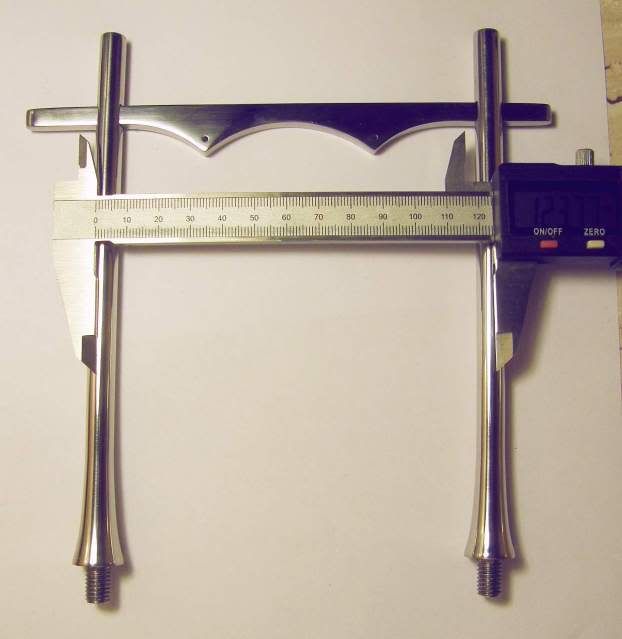 And here it is in the vertical position:  This is not THE finger! ;D Adrian |
|
|
|
Post by Toad on Mar 19, 2011 16:32:58 GMT -5
Wow, Adrian. That is quite the polish, but no I can't read it. Is it Elvish?
|
|
NDK
Cave Dweller 
Member since January 2009
Posts: 9,440
|
Post by NDK on Mar 19, 2011 21:00:30 GMT -5
Awesome polish on those pieces Adrian. Is the writing a bunch of math symbols? I recognize 2 or 3 of them lol.
Nate
|
|
|
|
Post by Toad on Mar 19, 2011 22:21:25 GMT -5
Engineerese
|
|
adrian65
Cave Dweller  Arch to golden memories and to great friends.
Member since February 2007
Posts: 10,790
|
Post by adrian65 on Mar 19, 2011 23:40:46 GMT -5
LOL, no it's "printerese" a printing error: instead of printing a doccument, my printer started "vomiting" lots of blank pages with only one or two lines of such symbols.
I had to turn it off and clear its stubborn brain.
Adrian
|
|
|
|
Post by sitnwrap on Mar 20, 2011 9:35:01 GMT -5
This whole project is flat out amazing.
|
|
adrian65
Cave Dweller  Arch to golden memories and to great friends.
Member since February 2007
Posts: 10,790
|
Post by adrian65 on Mar 25, 2011 23:35:50 GMT -5
Hello again, Time for a new update. The upper beam (which in fact consists of two sandwiched beams) is starting to take shape. The two pieces are cut to their contour and I also bent upwards the ends of the longest piece. Here it is: 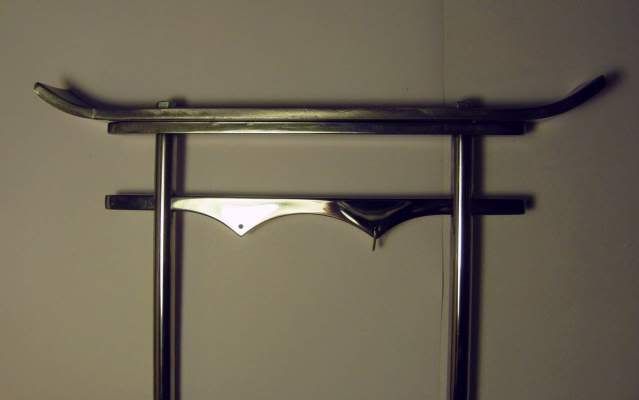 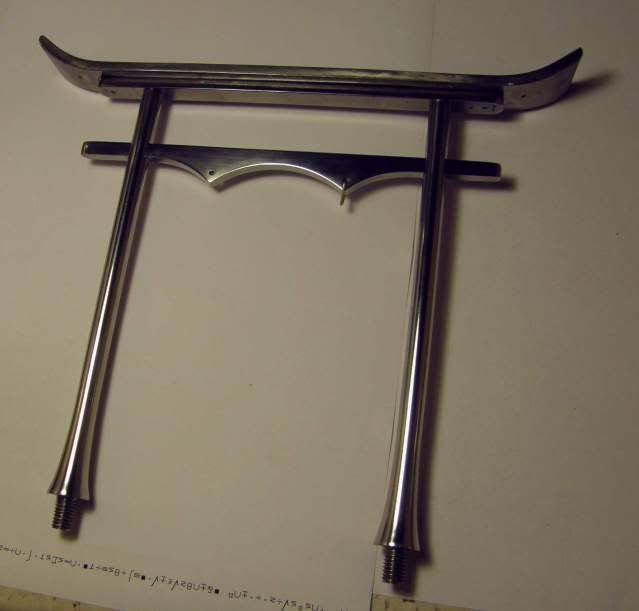 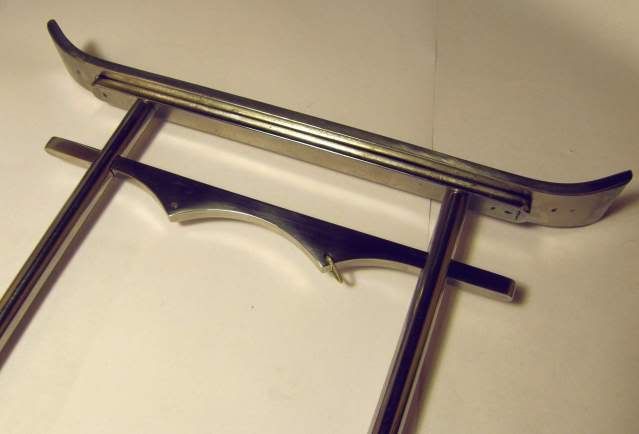 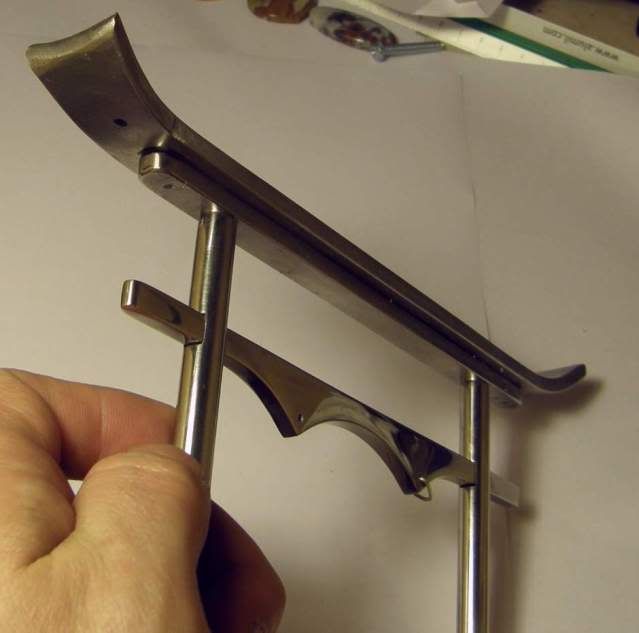 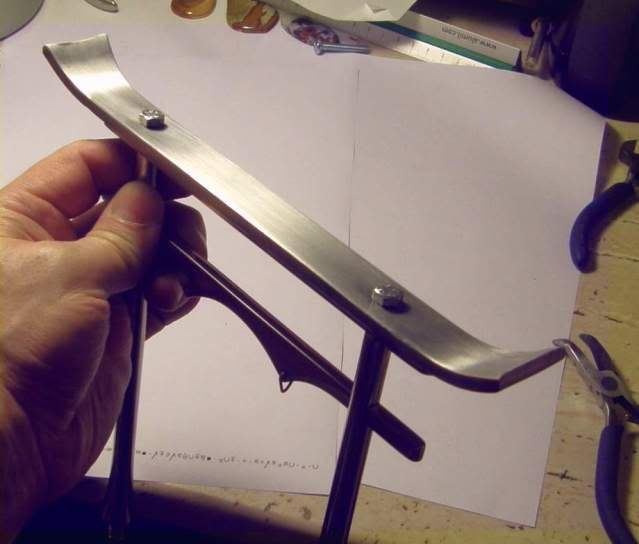 The upper beam is not polished yet. Also, the bolts you see are not the final ones, of course: there will be countersunk head bolts, masked by two small round cabs. I was planning to do these pieces from thicker plate (7 mm) but couldn't find anything but 5 mm thick plate. So, a third layer, in between of them two, could be added to add "weight". Todd and me were discussing about it and agreed about a black stone. I have a slab of obsidian which will fit (from two pieces). Problem is, let's see if I can drill those slender obsidian strips without breaking them. If this happens, I could use two small stainless steel square pieces for the bolts to go through, which would look like two "bricks" along the obsidian layer. Thoughts? Adrian |
|
|
|
Post by texaswoodie on Mar 26, 2011 6:46:15 GMT -5
If the thin obsidian breaks while drilling, you could get a thick piece, drill it first, then slab to the desired thickness.
Curt
|
|
SteveHolmes
fully equipped rock polisher
  
Member since July 2009
Posts: 1,900
|
Post by SteveHolmes on Mar 26, 2011 10:59:52 GMT -5
This is really AMAZING!! I'll bet TOAD is getting excited!!!
steve
|
|
|
|
Post by tanyafrench on Mar 27, 2011 14:04:37 GMT -5
That is awesome.
Tanya
|
|
|
|
Post by Toad on Mar 27, 2011 17:13:13 GMT -5
Isn't it though? And Adrian was concerned he wouldn't be up to the task. Ha!
Hit a snag in production though. The piece of obsidian I sent for the base is not big enough, looking for alternates now...
|
|
adrian65
Cave Dweller  Arch to golden memories and to great friends.
Member since February 2007
Posts: 10,790
|
Post by adrian65 on Jun 7, 2011 12:18:26 GMT -5
Hello, everybody! I had some time these days so I completed the metal work at the gate. Here it is: Firstly, the components. 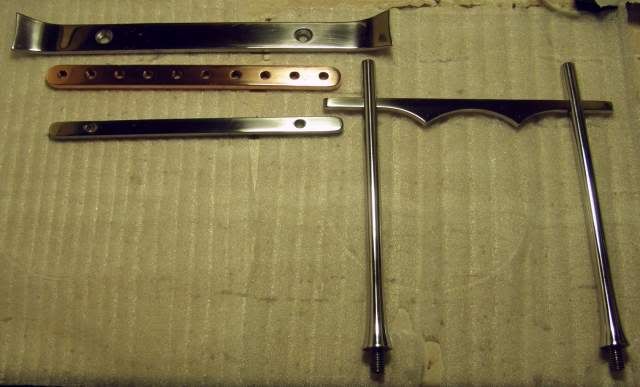 As you see, another piece (copper) appeared. Todd was thinking that the two strips sandwiched as an upper beam don't have enough "weight". I agreed and we decided to use copper as a middle layer of that upper beam. The only copper strip I found was this type, having threaded holes. 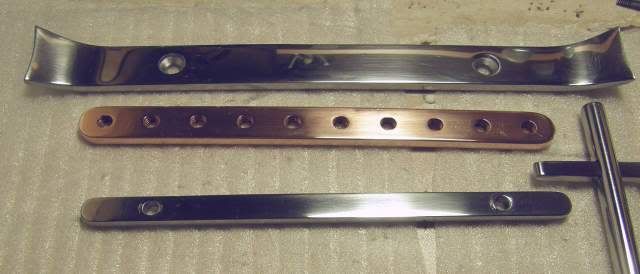 But it was OK, as they are not visible once the gate's pieces are put together. And here is the gate, finished. 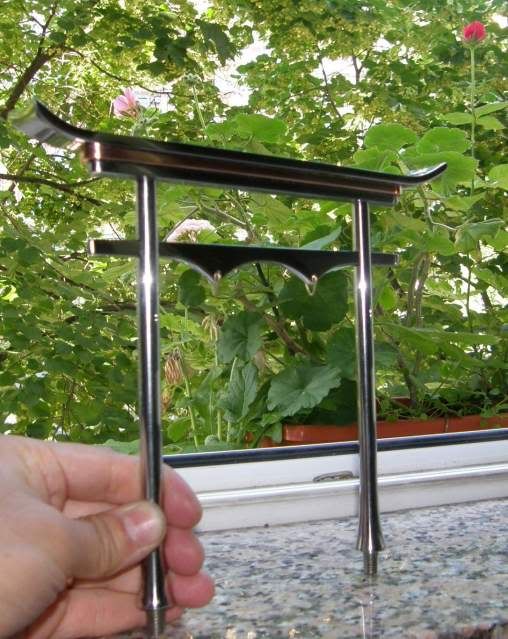 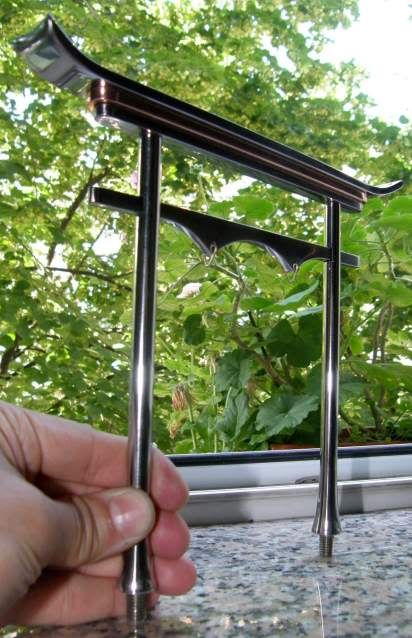 When I say finished, I mean the metal work. I still have to make two small round cabs to mask the blots which are now visible on the top of the upper beam: 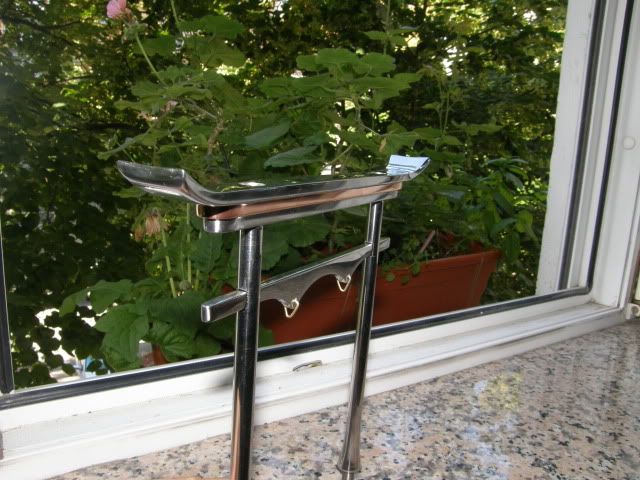 Thank you for looking, Adrian Any idea of what stone to use for those mask cabs, Todd? |
|
|
|
Post by Toad on Jun 7, 2011 12:22:35 GMT -5
Hey Adrian - looking great.
I don't know about the top cabs. Let's see if the folks here throw out any ideas...
|
|
|
|
Post by tntmom on Jun 7, 2011 13:08:41 GMT -5
I really like the copper addition!!! I think it will enhance the cab nicely and I prefer the "weightier" look! WTG Adrian!
~Krystee
|
|
|
|
Post by tanyafrench on Jun 7, 2011 13:41:01 GMT -5
Wow, that is looking great, just gets better all the time. You guys are great together.
Tanya
|
|