Post by herchenx on Jul 1, 2014 10:47:59 GMT -5
I've read several posts about replacing the threaded rod in the center of a UV10, and I did it myself and took pictures as I went.
I owe a lot to Darryl (150FromFundy) in this post although I took Gil's (gil) advice and didn't remove the entire rubber pad.
Both wingnuts on the rod (the inner one that holds the bowl and outer one that holds the lid) had gotten to the point that they were not holding. I had spaced both several times but they were just losing their grip every few minutes at the very end.
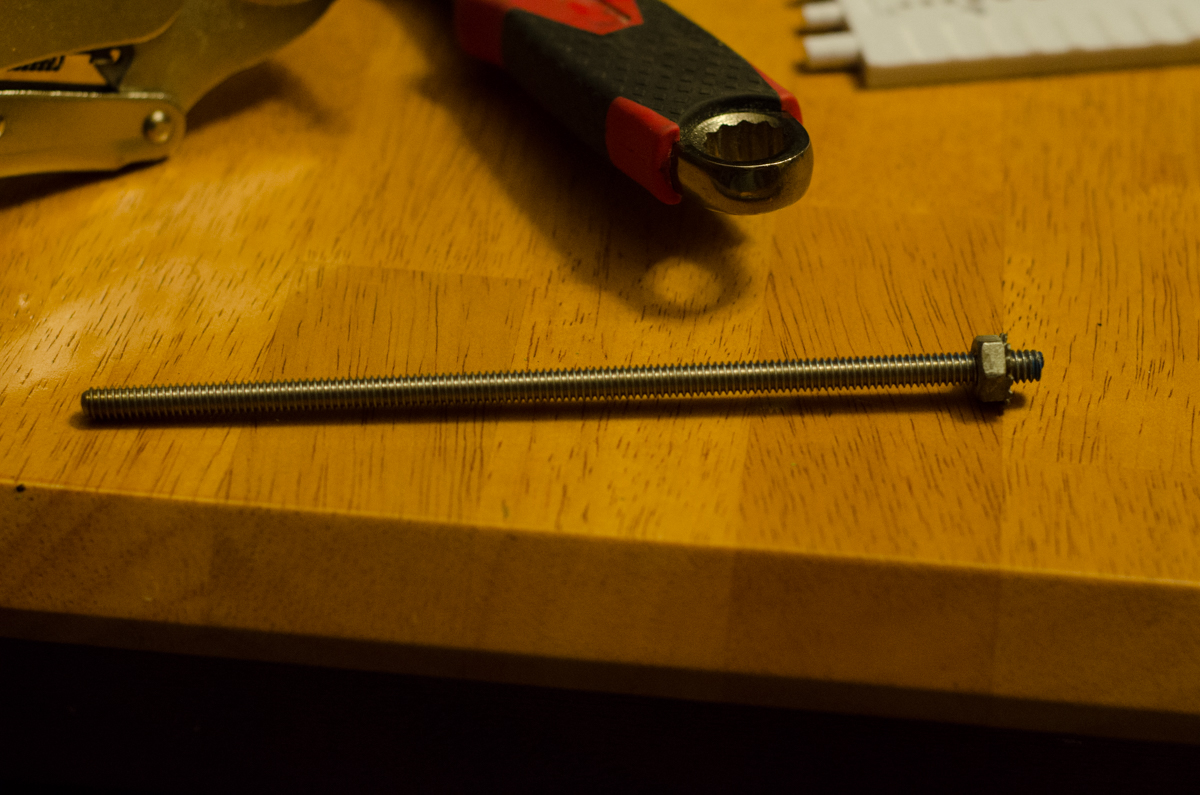
I called around looking for stainless 1/4x20 threaded rod, it took a while but there was a fastener supply place that I finally found that carried it in 3' lengths.
I got the stainless threaded rod, some stainless wingnuts and stainless washers as well. The only neoprene/plastic/vinyl washers they had were tiny. My washers are still OK but I will eventually need to cut or find some washer or gasket material to make some new washers.
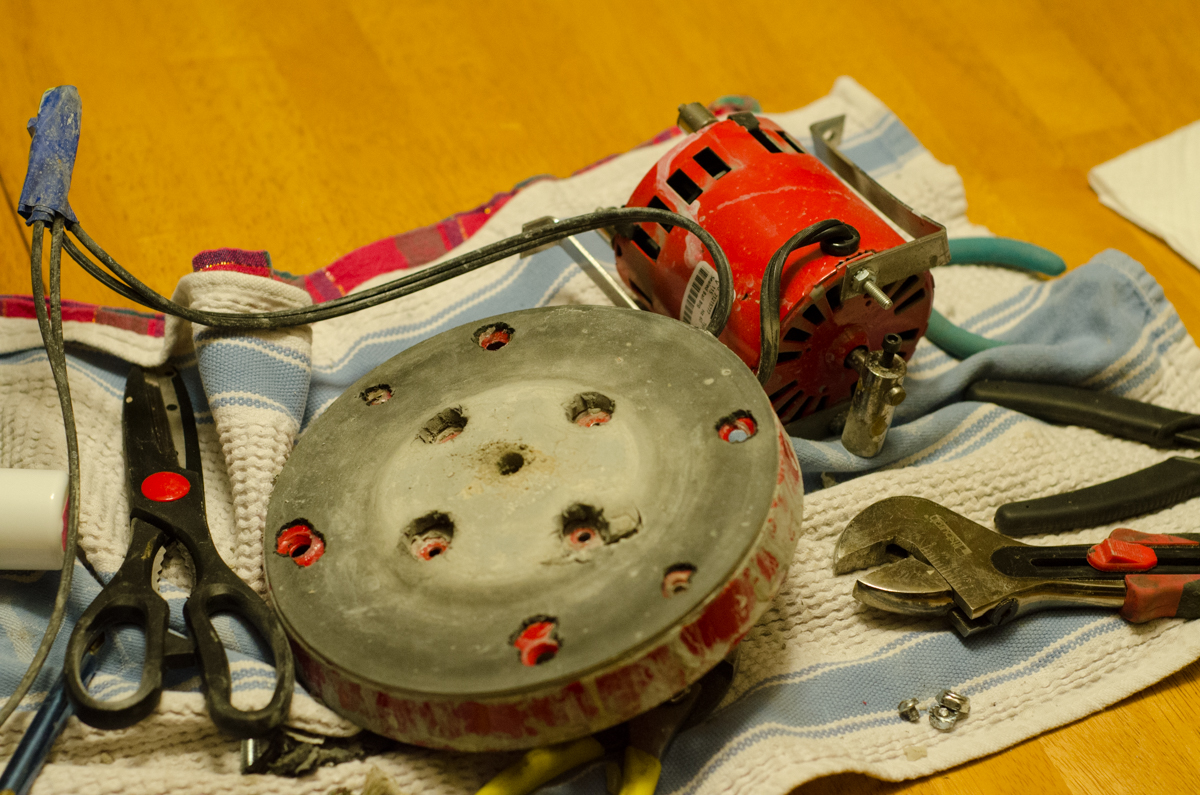
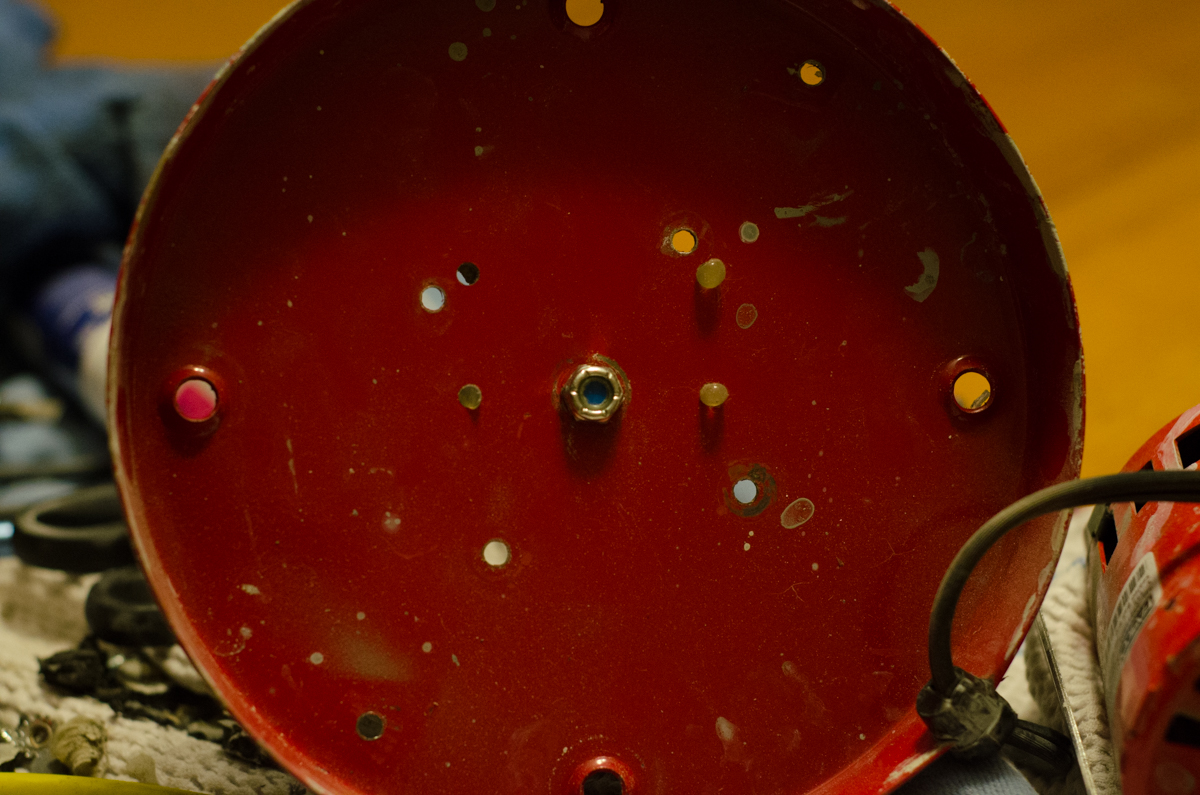
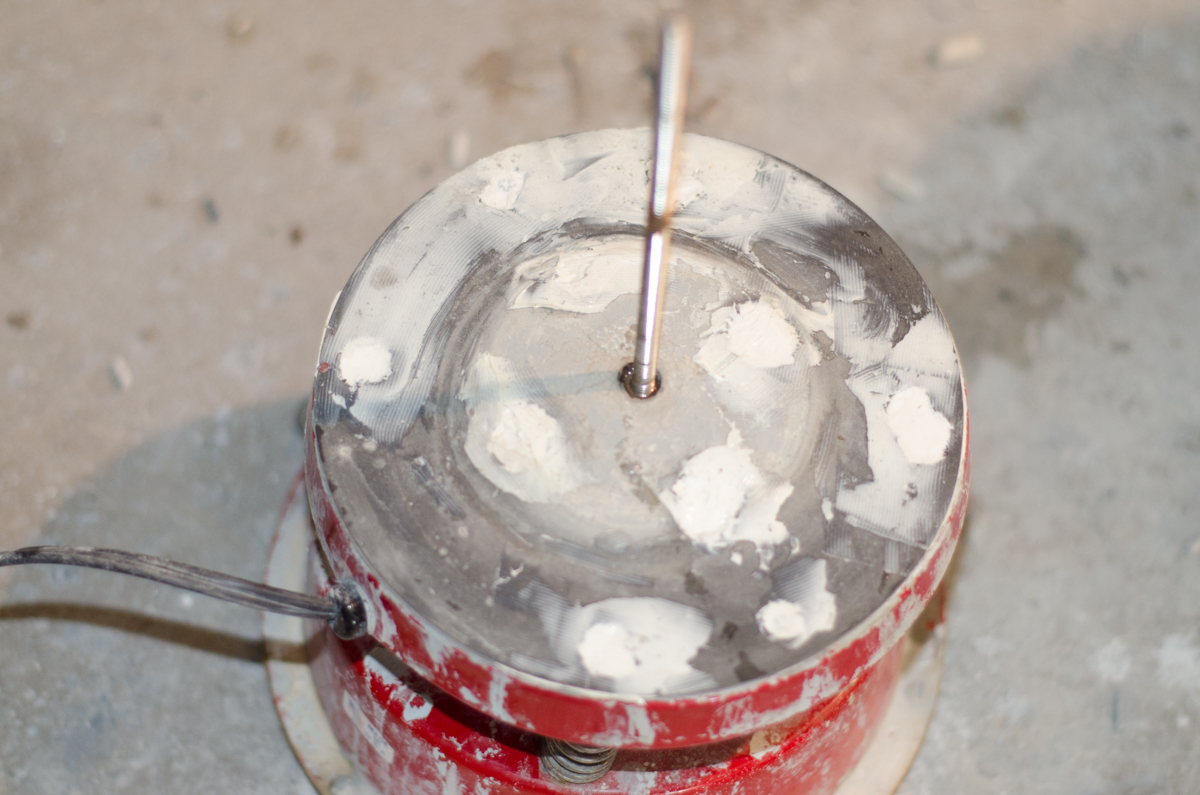
First off here is the padded base and worn rod. I see there is a buildup of rock snot on the rod, which is probably why it was wearing. I will need to do better keeping the rod clean moving forward.

Got everything I thought I might need on the table. In the end an old pair of wire cutters was very useful in cutting the foam padding around the bolt heads

I "nibbled" around the bolt heads (or the nut in this case) with the wire cutters and exposed the head. There was a thin layer of silicone caulk over the nut, you will need to remove all this. I used small pliers and the wire cutters to get it all.

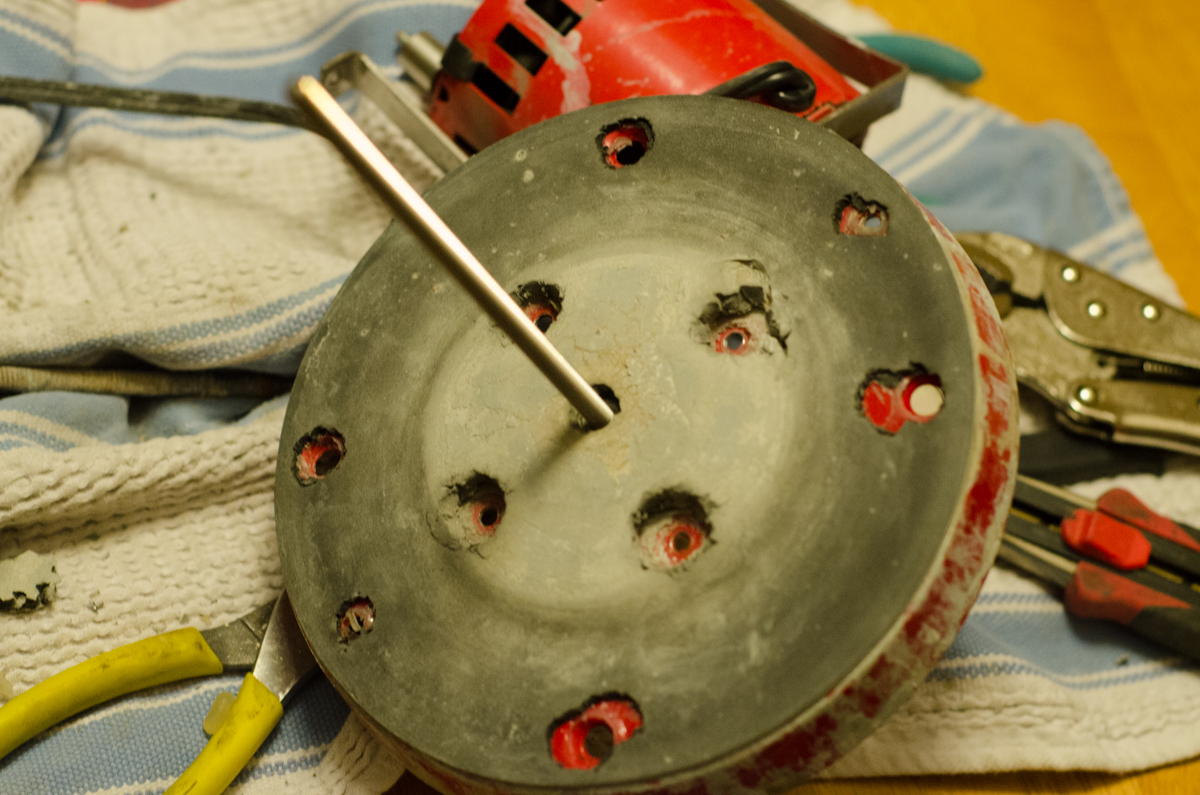
All 4 nuts exposed

There are 4 bolds that hold the base to the springs that need exposed as well. Same process as the nuts, I used the wire cutters to nibble the rubber. Just to clarify, by "nibble" I opened the cutters, pierced straight into the foam all the way to the metal, then closed the cutters snipping the foam in the process. I just did this 10-12 times per circle to cut out the hole. I then had to pry and peel the foam off the base as it is adhered. The removed circle of material got discarded.

You remove the 4 outer bolts first. This was a little bit of a pain because it is tough to grab the nut that is inside the spring to keep it from spinning. I used needle nose pliers and it was a little tricky

I then removed the nuts, but missed a step and the motor woudln't come away from the base

There are 2 steel braces that hold the motor against the bottom of the base

The first nut/bolt wouldn't come loose, apparently the bolt had been cross-threaded when it was manufactured and the bolt ended up shearing.

But I got it loose though. There are 2 and the other was easier and didn't shear. I had to remove the foam padding above the bolt here as well but didn't get a photo

This nut holds the base of the threaded center rod. This is what the top of the motor housing presses against that tranfers the vibration from the motor housing to the base and center rod

** My phone died at this point so I had to shoot the rest with my camera. **
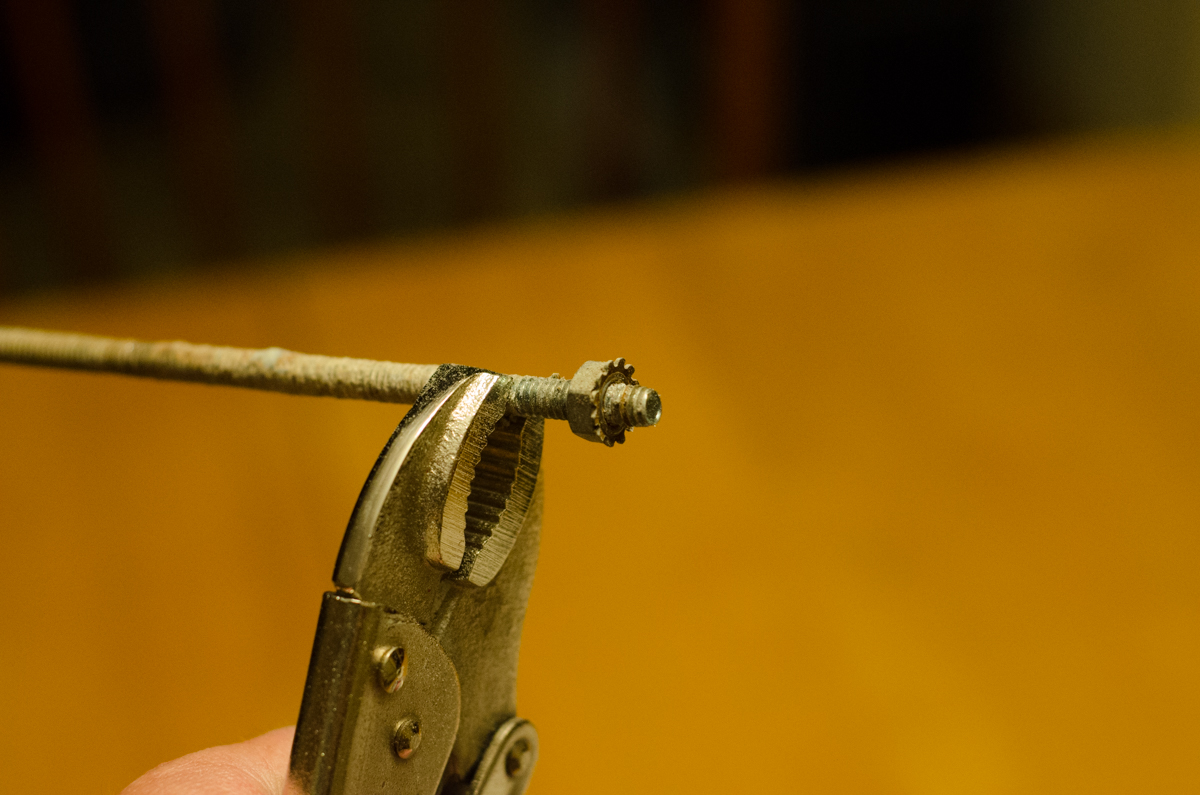
I had to grab the threaded rod with vice grips to be able to pull the locking nut off the end. Once I did, the rod popped right out of the base.
Here is the base after all the bolts and nuts were removed, and the extra holes for the metal braces had been removed
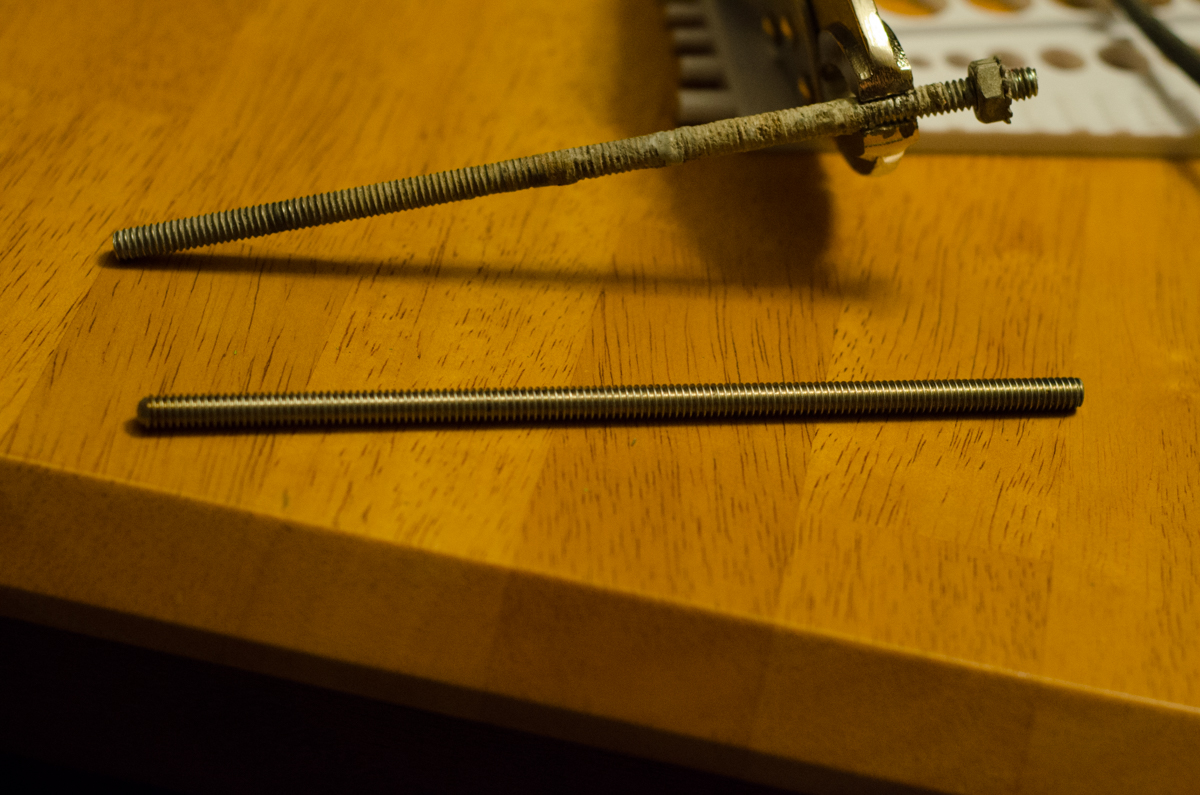
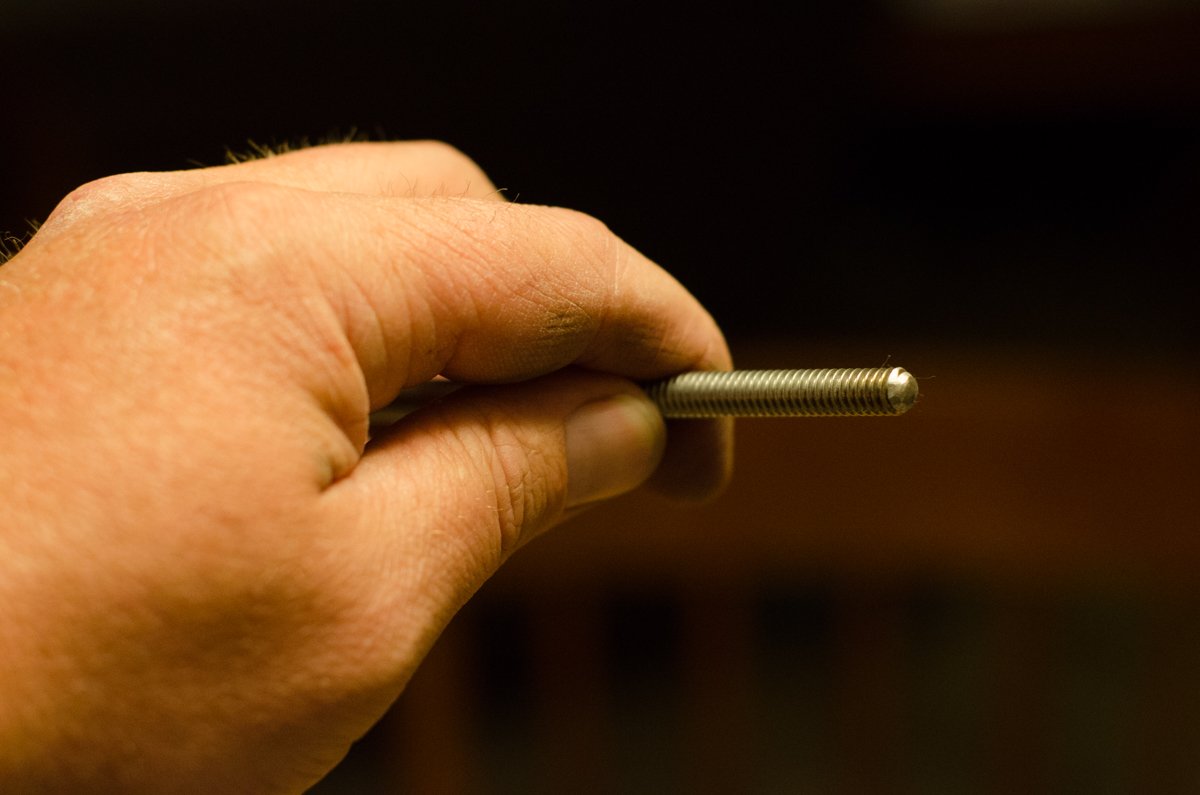
I took the old rod and used it to measure the correct length for the new rod. Cutting the stainless rod was not simple. I started with a hacksaw but I couldn't hold the rod still with my bare hand and I didn't want to damage the threads with a vice or pliers. I ended up using a diamond disc attached to my foredom. It all got very hot and took a long time but I got it. In the future I could grab it with vice grips an inch to 3 inches from the bottom end, as nothing will need to be threaded onto this section of the rod.
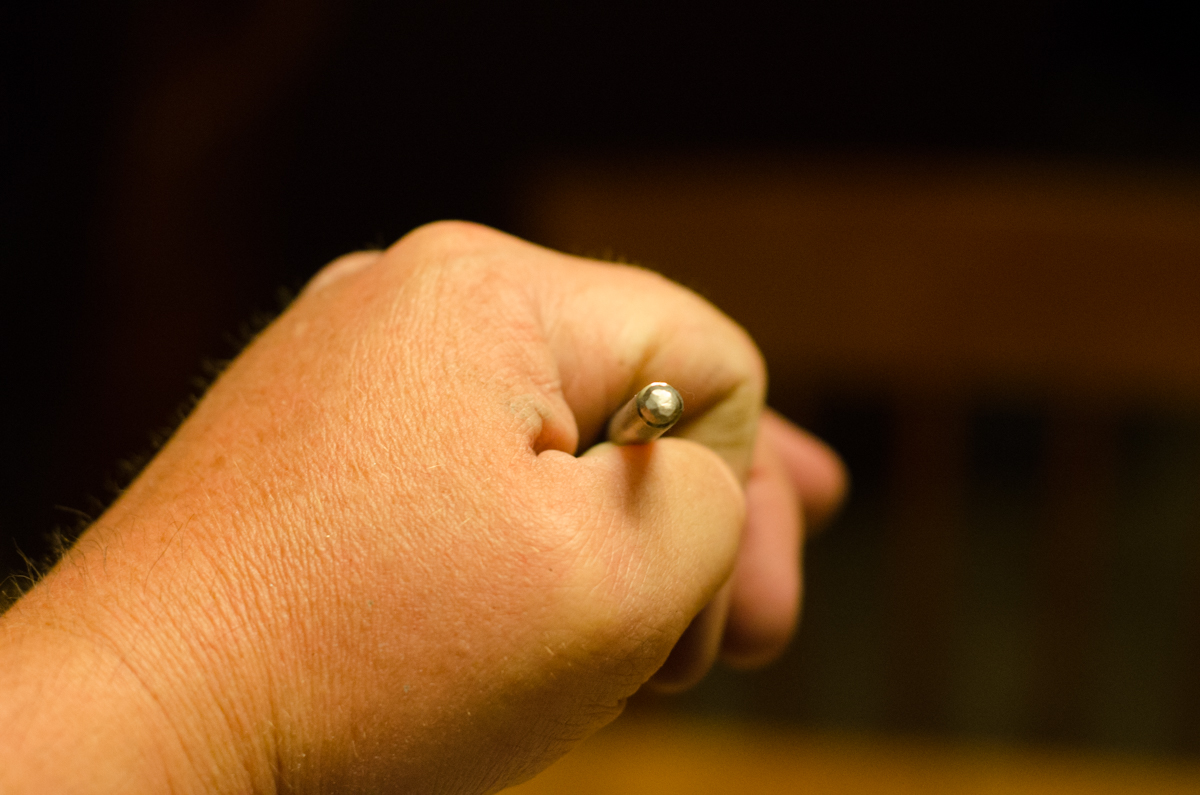
I used my coarsest diamond wheel to round the end of the new rod
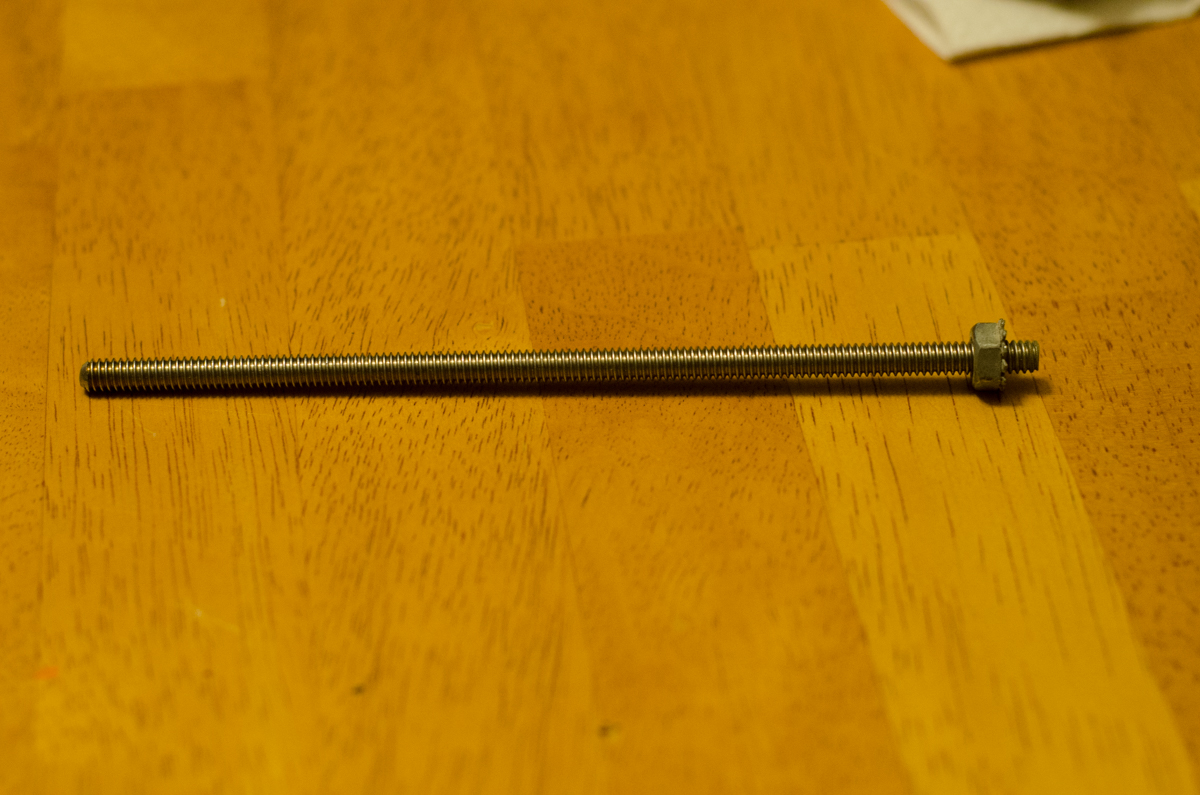
I threaded the upper locking nut onto the bottom of the new rod. It took a little trial and error to get it the correct distance from the end as I wanted the nut on the bottom of the base to rest on the motor housing, not the end of the rod.
Getting the nut on the end was a bit of a trick, it hadn't yet dawned on me that I could grab the threaded rod above the upper nut with vice grips without worrying about damage. I used my bare hand and brute force on the rod to get it secure.
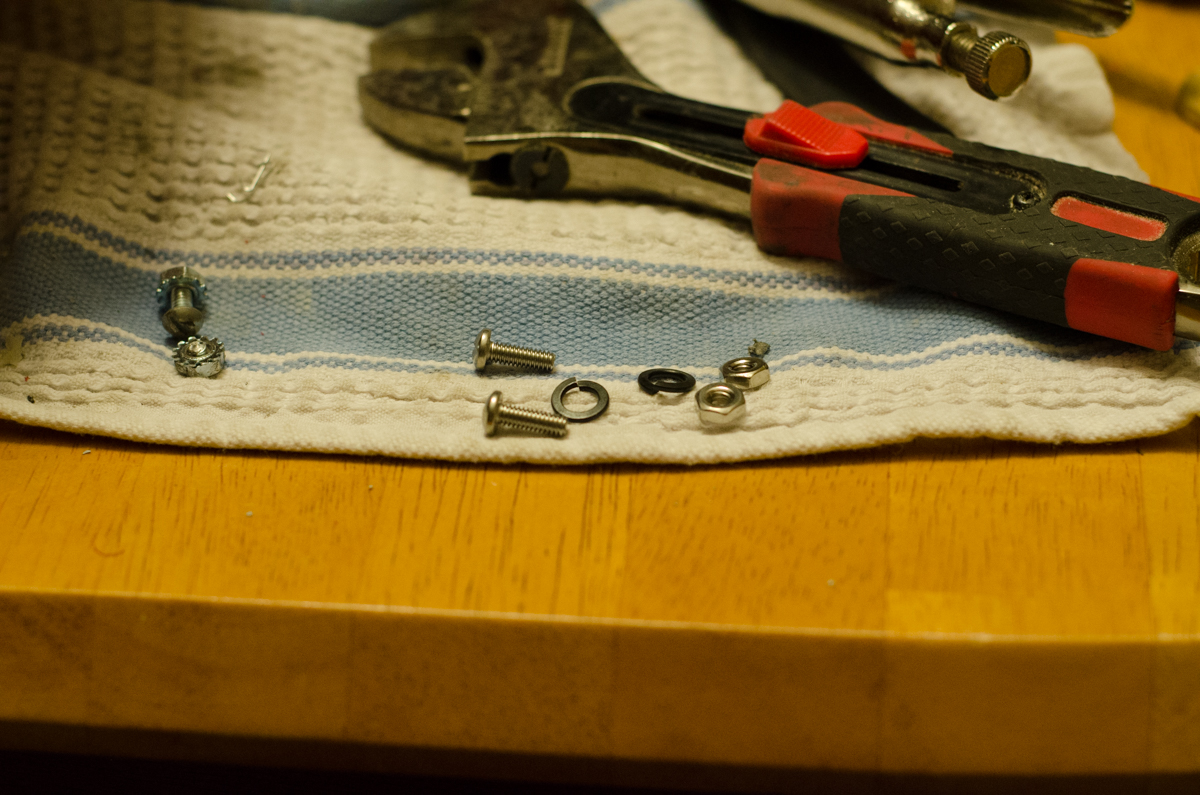
Fortunately I have an assortment of bolts, nuts, washers etc. in several kits from Harbor Freight I keep on hand in my garage. I replaced the sheared bolt and its mate with new hardware
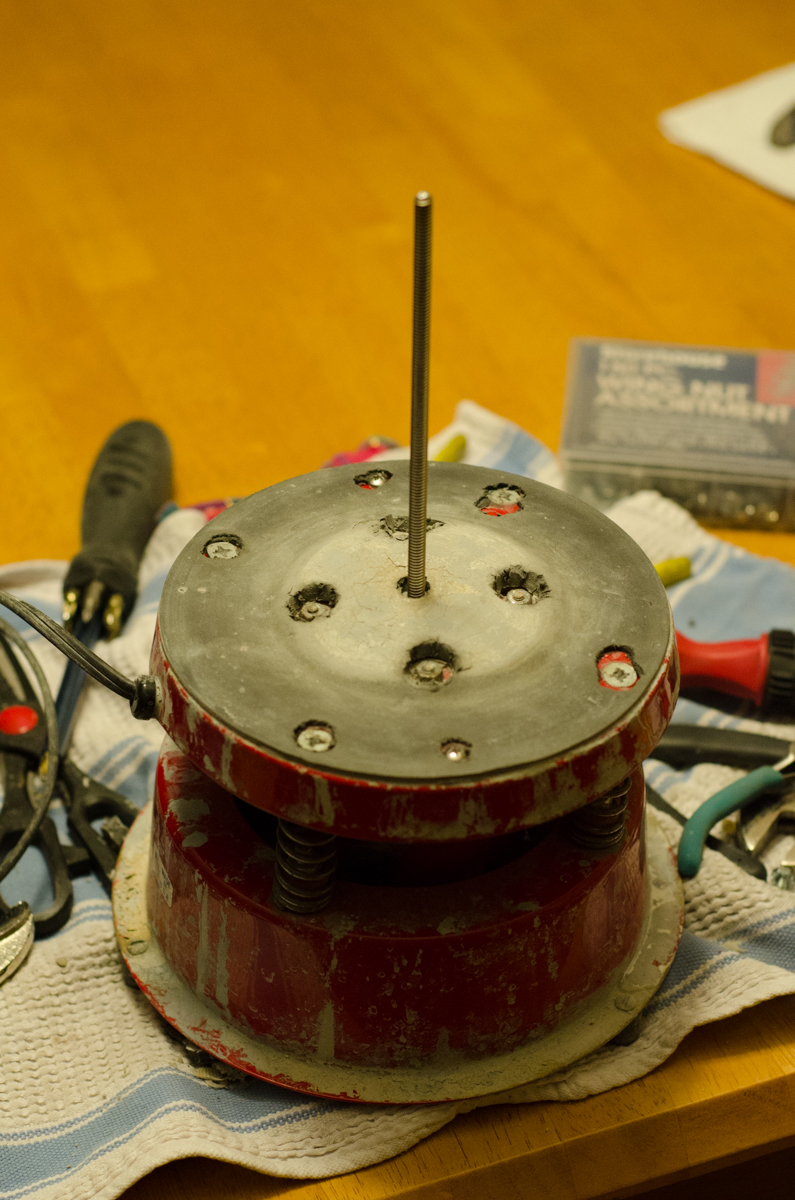
I put everything back together. Getting the motor mount (the steel strips) was tricky as they are pressing the motor housing very tightly against the bottom of the base, I got them both barely threaded and then tightened them both. Also the bolts that thread into the nuts within the springs are tricky as there is no easy way to secure the nuts while you thread and tighten them. As I mentioned earlier I just used needle nosed pliers but this step took the longest
The last step was the one I was least sure one. I had some white silicone caulk and just cleaned the cut out foam well and gooped it into the cavities. I waited a week to take a photo to make sure it was holding and not coming apart under the vibe. This is after a solid 7 days of use and everything is holding fine. I let it sit overnight before I put it back under a bowl as I didn't want the bowl to stick to the caulk
There you go, hopefully this will make the process less daunting for someone else. It isn't too bad - getting the material (threaded rod) and re-attaching the base to the motor mounts and springs were the only things that might take a little time.
Please post questions or recommendations in the comments!
I owe a lot to Darryl (150FromFundy) in this post although I took Gil's (gil) advice and didn't remove the entire rubber pad.
Both wingnuts on the rod (the inner one that holds the bowl and outer one that holds the lid) had gotten to the point that they were not holding. I had spaced both several times but they were just losing their grip every few minutes at the very end.
I called around looking for stainless 1/4x20 threaded rod, it took a while but there was a fastener supply place that I finally found that carried it in 3' lengths.
I got the stainless threaded rod, some stainless wingnuts and stainless washers as well. The only neoprene/plastic/vinyl washers they had were tiny. My washers are still OK but I will eventually need to cut or find some washer or gasket material to make some new washers.
First off here is the padded base and worn rod. I see there is a buildup of rock snot on the rod, which is probably why it was wearing. I will need to do better keeping the rod clean moving forward.
Got everything I thought I might need on the table. In the end an old pair of wire cutters was very useful in cutting the foam padding around the bolt heads
I "nibbled" around the bolt heads (or the nut in this case) with the wire cutters and exposed the head. There was a thin layer of silicone caulk over the nut, you will need to remove all this. I used small pliers and the wire cutters to get it all.
All 4 nuts exposed
There are 4 bolds that hold the base to the springs that need exposed as well. Same process as the nuts, I used the wire cutters to nibble the rubber. Just to clarify, by "nibble" I opened the cutters, pierced straight into the foam all the way to the metal, then closed the cutters snipping the foam in the process. I just did this 10-12 times per circle to cut out the hole. I then had to pry and peel the foam off the base as it is adhered. The removed circle of material got discarded.
You remove the 4 outer bolts first. This was a little bit of a pain because it is tough to grab the nut that is inside the spring to keep it from spinning. I used needle nose pliers and it was a little tricky
I then removed the nuts, but missed a step and the motor woudln't come away from the base
There are 2 steel braces that hold the motor against the bottom of the base
The first nut/bolt wouldn't come loose, apparently the bolt had been cross-threaded when it was manufactured and the bolt ended up shearing.
But I got it loose though. There are 2 and the other was easier and didn't shear. I had to remove the foam padding above the bolt here as well but didn't get a photo
This nut holds the base of the threaded center rod. This is what the top of the motor housing presses against that tranfers the vibration from the motor housing to the base and center rod
** My phone died at this point so I had to shoot the rest with my camera. **
I had to grab the threaded rod with vice grips to be able to pull the locking nut off the end. Once I did, the rod popped right out of the base.
Here is the base after all the bolts and nuts were removed, and the extra holes for the metal braces had been removed
I took the old rod and used it to measure the correct length for the new rod. Cutting the stainless rod was not simple. I started with a hacksaw but I couldn't hold the rod still with my bare hand and I didn't want to damage the threads with a vice or pliers. I ended up using a diamond disc attached to my foredom. It all got very hot and took a long time but I got it. In the future I could grab it with vice grips an inch to 3 inches from the bottom end, as nothing will need to be threaded onto this section of the rod.
I used my coarsest diamond wheel to round the end of the new rod
I threaded the upper locking nut onto the bottom of the new rod. It took a little trial and error to get it the correct distance from the end as I wanted the nut on the bottom of the base to rest on the motor housing, not the end of the rod.
Getting the nut on the end was a bit of a trick, it hadn't yet dawned on me that I could grab the threaded rod above the upper nut with vice grips without worrying about damage. I used my bare hand and brute force on the rod to get it secure.
Fortunately I have an assortment of bolts, nuts, washers etc. in several kits from Harbor Freight I keep on hand in my garage. I replaced the sheared bolt and its mate with new hardware
I put everything back together. Getting the motor mount (the steel strips) was tricky as they are pressing the motor housing very tightly against the bottom of the base, I got them both barely threaded and then tightened them both. Also the bolts that thread into the nuts within the springs are tricky as there is no easy way to secure the nuts while you thread and tighten them. As I mentioned earlier I just used needle nosed pliers but this step took the longest
The last step was the one I was least sure one. I had some white silicone caulk and just cleaned the cut out foam well and gooped it into the cavities. I waited a week to take a photo to make sure it was holding and not coming apart under the vibe. This is after a solid 7 days of use and everything is holding fine. I let it sit overnight before I put it back under a bowl as I didn't want the bowl to stick to the caulk
There you go, hopefully this will make the process less daunting for someone else. It isn't too bad - getting the material (threaded rod) and re-attaching the base to the motor mounts and springs were the only things that might take a little time.
Please post questions or recommendations in the comments!