jasperfanatic
spending too much on rocks

Member since January 2019
Posts: 456
|
Post by jasperfanatic on Sept 8, 2019 14:20:56 GMT -5
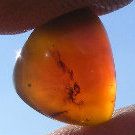
I took a silversmithing ring stone setting workshop a few months ago to see if silversmithing would be interesting to me, and wanted to use one of my own stones for the experience of it. While it wasn't as hands on as I hoped, it at least gave me a glimpse and had the surprising benefit of teaching more about my cab technique. I didn't feel I had enough exposure to decide if I liked smithing, so I recently bought a little silver and a few of the basic tools I would need - bezel pusher/roller/burnisher, files and a little jeweler saw. I didn't want to spend too much and end up with a bunch of tools I'd never use if I wasn't into it, and now I can see where a lot of new tools would be really helpful  I think I'll be messing with this one for a bit, trying to get some input on a few things, but here is what came of my first attempt since the little ring I made in the workshop.  IMG_E1819 IMG_E1819 by Kevin, on Flickr |
|
NDK
Cave Dweller 
Member since January 2009
Posts: 9,439
|
Post by NDK on Sept 8, 2019 14:25:36 GMT -5
I'd say you have it figured out.
Looks awesome to me!
|
|
|
|
Post by rockjunquie on Sept 8, 2019 14:31:04 GMT -5
Dang! That looks really great! I like the heavier twist wire on it. Looks like you are a natural to me.  |
|
|
|
Post by Pat on Sept 8, 2019 15:58:50 GMT -5
👍🏻
|
|
|
|
Post by toiv0 on Sept 8, 2019 17:16:42 GMT -5
I'm impressed for the first time
|
|
|
|
Post by hummingbirdstones on Sept 8, 2019 17:32:55 GMT -5
Oh yeah, you got it all going on! Your first one by yourself is pretty dang impressive!
|
|
|
|
Post by Drummond Island Rocks on Sept 8, 2019 17:47:19 GMT -5
That's a good looking piece. One of the first things I look for is how the bezel meets the stone at the top. Yours look very uniform with no visible gaps. Nice work.
Chuck
|
|
|
|
Post by accidentalrockhound on Sept 8, 2019 18:46:40 GMT -5
Great job on that.
|
|
|
|
Post by Donnie's Rocky Treasures on Sept 9, 2019 18:45:07 GMT -5
All right then, just keep on. Yes you will probably need a few more tools & then a few more after that.
|
|
jasperfanatic
spending too much on rocks
Member since January 2019
Posts: 456
|
Post by jasperfanatic on Sept 10, 2019 17:05:23 GMT -5
That's a good looking piece. One of the first things I look for is how the bezel meets the stone at the top. Yours look very uniform with no visible gaps. Nice work. Chuck Thanks, Chuck. There are a few things about it that I'm not happy with, thankfully the major flaws are in areas an observer is not likely to ever see. Some issues I've sorted out since I took the photo. The area on either side of the point at the bottom had some small dents or were otherwise not as smooth as they could be which really became noticeable in the reflected light (even in this picture). Some more time massaging with the burnisher sorted that out. Near the top I had a similar issue in that the line wasn't as clean as I wanted it to be, but the fix there isn't so apparent (or maybe not possible). I'm pretty sure the core issue is the bezel was thinner in that area because I had trouble smoothing out the solder joint and once pushed/rolled/burnished it flared out further, but not uniformly due to varying thickness. I can use the tip of the burnisher to clean it a little, but it still doesn't look perfect. Any tips or other critique are vigorously welcomed since constant improvement is kind of the whole point For a first solo attempt I'm mostly happy with it, the best part is that I learned a TON! |
|
|
|
Post by hummingbirdstones on Sept 10, 2019 18:28:34 GMT -5
Here is a little tip and something you should always do when making a bezel: Make sure the solder join is on one of the sides and not near the top of your stone.
That will alleviate the problem you had up there. |
|
jasperfanatic
spending too much on rocks
Member since January 2019
Posts: 456
|
Post by jasperfanatic on Sept 10, 2019 19:14:30 GMT -5
Here is a little tip and something you should always do when making a bezel: Make sure the solder join is on one of the sides and not near the top of your stone.
That will alleviate the problem you had up there. Thanks, Robin. It seems like I'd still have the problem because of the thickness issue, just on the side though. Am I missing something? I've been practicing on filing the joints along with solder practice. I just had a bunch of trouble getting the joint to blend on this one, but I think it was the way I was filing. |
|
|
|
Post by hummingbirdstones on Sept 10, 2019 19:53:43 GMT -5
If you are having to file solder joins that much, I suspect you may be using too much solder. Try using a bit less solder so you don't have so much clean-up. Everyone has their own way of doing things, but when I'm soldering a bezel, I will put a small pallion of hard solder directly under the join and when the solder flows, it will flow up the join as you move your flame up. I also will heat it from the back to make sure the solder comes all the way through to the back. Just a sanding stick will usually clean it up for me.
|
|
|
|
Post by opalpyrexia on Sept 10, 2019 21:07:49 GMT -5
First piece all on your own?! That is impressive!
You might try this bezel soldering method and see if you like it. I almost always solder a bezel by holding it with tweezers (or a third hand) so that the join is at the very bottom. I place solder on the inside of the join and heat from below, drawing the solder through the join. It happens quickly and if the edges fit well there shouldn't be much, if any, solder on the outside of the bezel.
The amount of solder has to be fairly limited or, when it comes to setting, you might find the bezel to be a little tight. I must confess that on a few occasions, when a bezel was too tight at setting time, having the lapidary tools to remove a little material from a girdle can come in handy.
|
|
|
|
Post by fernwood on Sept 11, 2019 2:20:30 GMT -5
That is excellent. Looks better than some made by those with experience.
|
|
|
|
Post by miket on Sept 11, 2019 9:23:16 GMT -5
I'd say you did an excellent job!  |
|
adrian65
Cave Dweller
Arch to golden memories and to great friends.
Member since February 2007
Posts: 10,773
|
Post by adrian65 on Sept 26, 2019 21:45:33 GMT -5
Beautifully done! It has a classy look.
Adrian
|
|
Deleted
Deleted Member
Member since January 1970
Posts: 0
|
Post by Deleted on Sept 27, 2019 3:58:41 GMT -5
Looks really good. I think the stone and the metal compliment each other.
|
|
|
|
Post by fernwood on Sept 27, 2019 4:36:05 GMT -5
I agree with everyone else. An excellent pendant.
|
|
jasperfanatic
spending too much on rocks
Member since January 2019
Posts: 456
|
Post by jasperfanatic on Sept 27, 2019 17:30:19 GMT -5
Thanks for the kinds words, everyone!
|
|