|
|
Post by 1dave on Oct 28, 2013 17:26:00 GMT -5
I've come close to purchasing a flat lap many times over the past 50 years, even bought a 220 grit charged 8" aluminum lap back in the 60's. A glance around my workshop assured I had enough scrap to at least build the box. I made it out of Formica coated mdf with biscuit connected oak corners and edges. 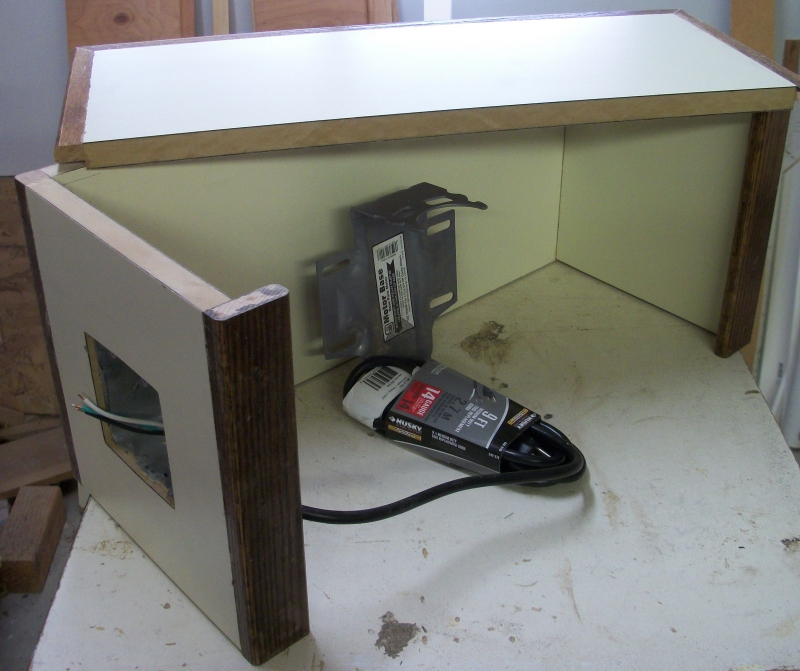 Now for a pan for the lap to set in. I was fortunate to find a 9" aluminum cake pan for the lap to sit inside of. I used a 1 1/4" hole saw to cut the hole in the bottom, a 2" rigid coupling on the inside and a trailer hitch ball on the outside to make a rim with a 1 1/2" raised opening.  A 1 1/2" to 1 1/4" PVC reducer fit perfectly in my pan. I sanded the bottom of the reducer to a taper so it starts easily into the table top hole. 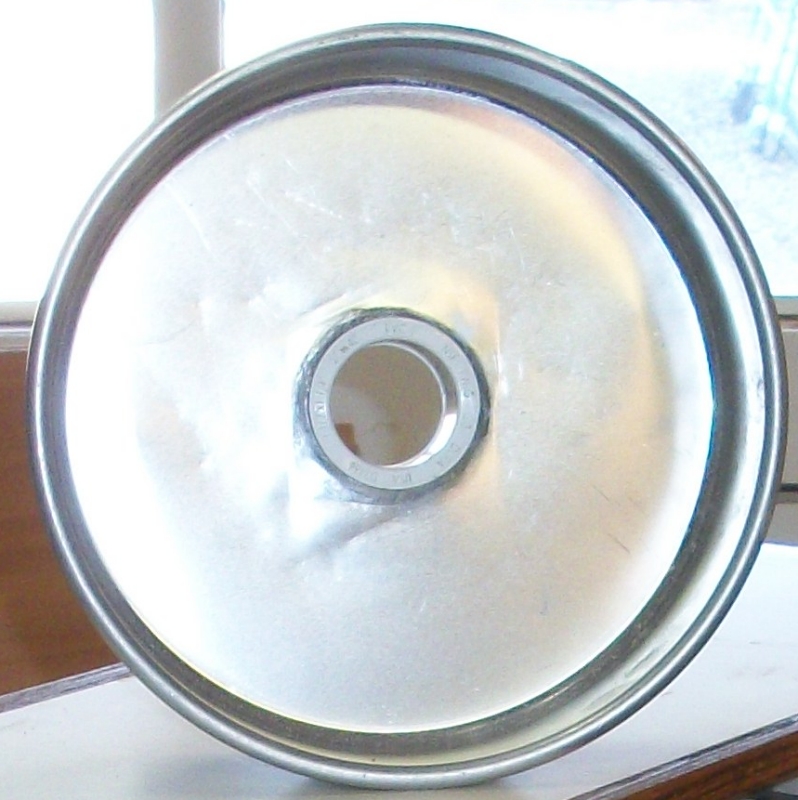 I have a two speed motor (Home Depot swamp cooler motor) and will have a switch to turn the motor and light on and off, a switch for high or low speed, and a switched outlet and one that is always hot when the cord is plugged in. The wire rack is to hold grit charged old CD's for grinding and polishing. 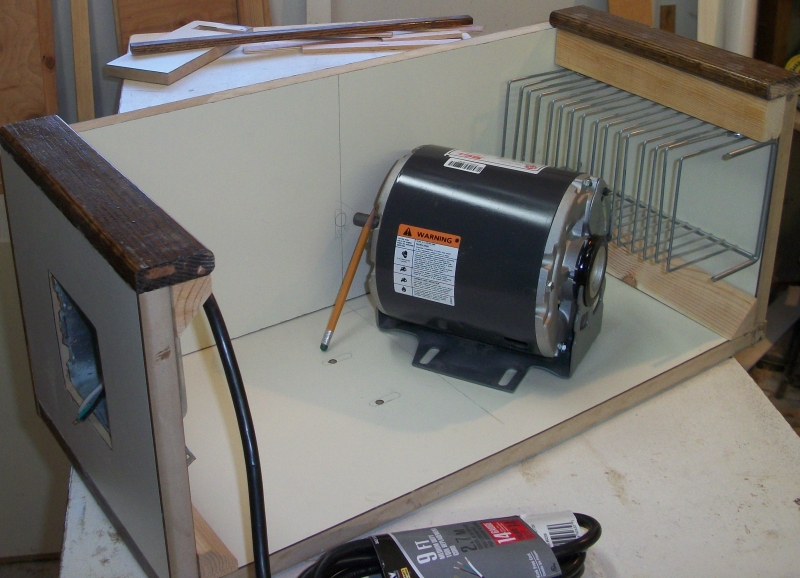 My holesaw cut a hole a tad too large, but gluing in 4 strips of emery cloth (grit side to the wood) made a perfect tight fit! With the motor wired, wire Ty-wrapped in place and glide feet gorilla-glued in place. 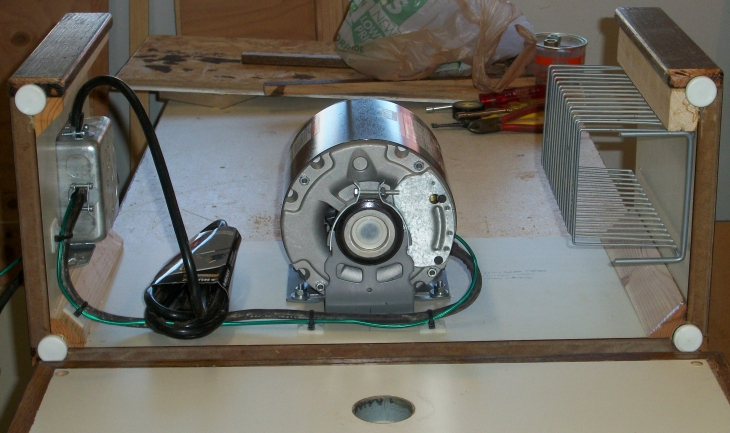 My holesaw cut a hole a tad too large, but gluing in 4 strips of emery cloth (grit side to the wood) made a perfect tight fit! With the motor wired, wire Ty-wrapped in place and glide feet gorilla-glued in place, the end is near. Slipping the pan into place. I needed to lift my lap 9/16" so the lap would clear the PVC fitting. I didn't have enough 1/2" flat washers, so I drilled the threads out of a 1/2" nut. That + the one washer I had worked perfectly. 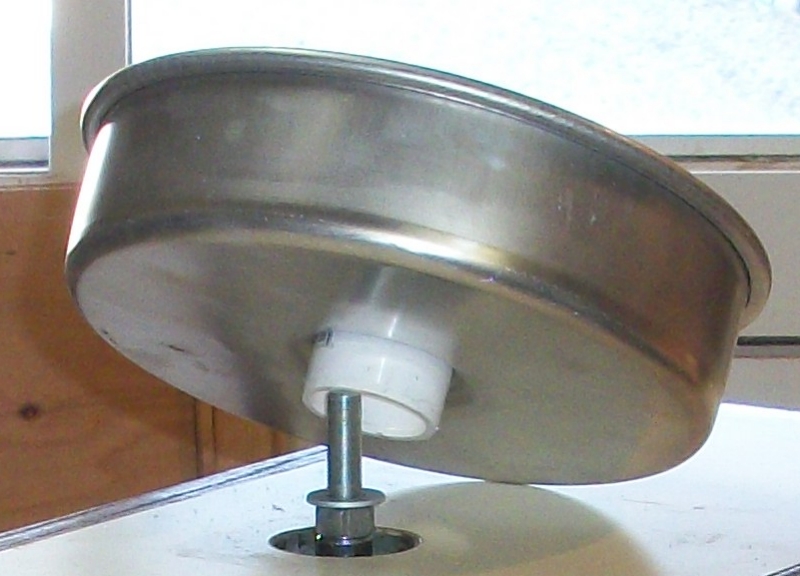 Some screws to hold the top secure, the end is near. 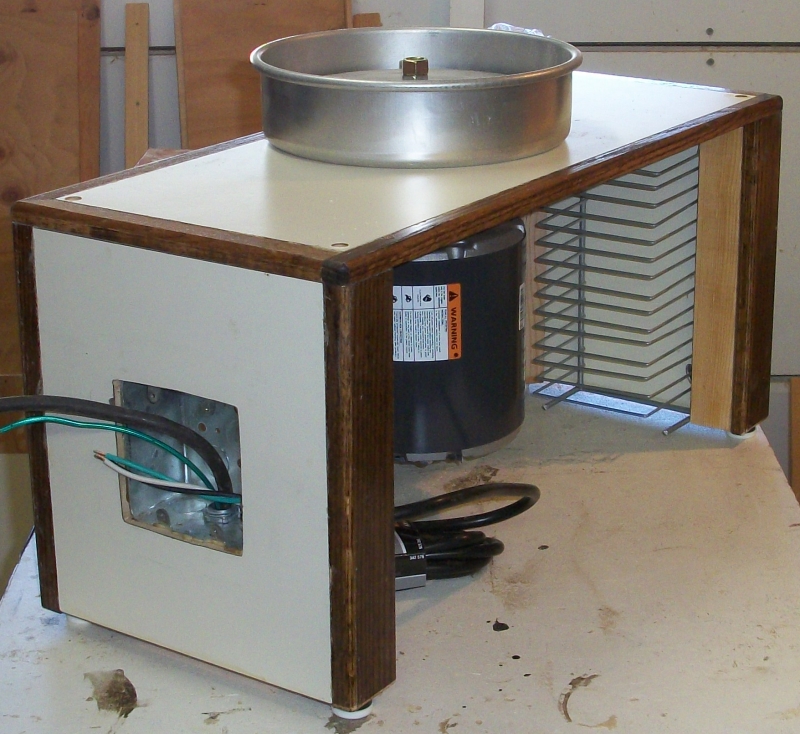 |
|
|
|
Post by 1dave on Oct 28, 2013 17:36:05 GMT -5
As a retired Master Electrician, the wiring was a snap. As previously mentioned, I want to have the top half of the outlet switched, the bottom half hot all the time the unit is plugged in, so the first step is to break off the tab that connects the two brass screws together. 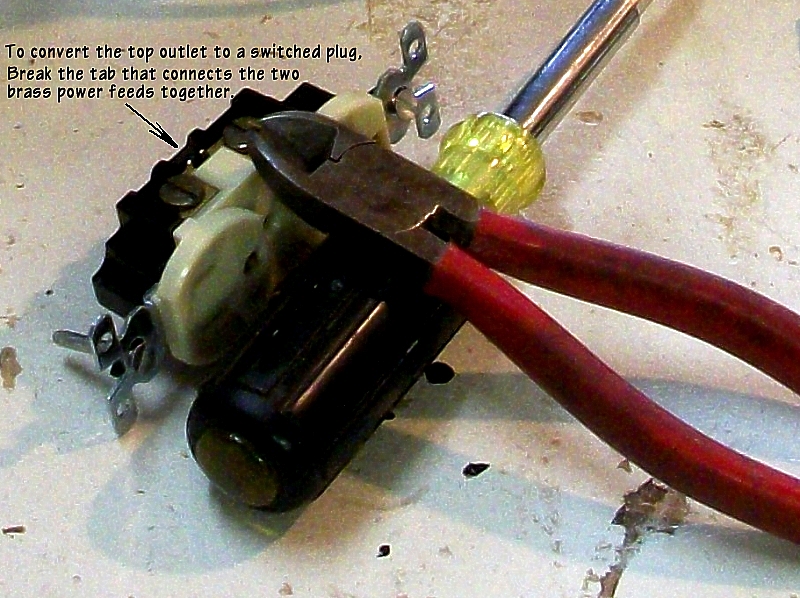 Next I need to know which 3-way switch screw becomes hot when the bottom switch is in the same position as the top switch when it is off. This will be the low speed position. A continuity tester gives me this information. 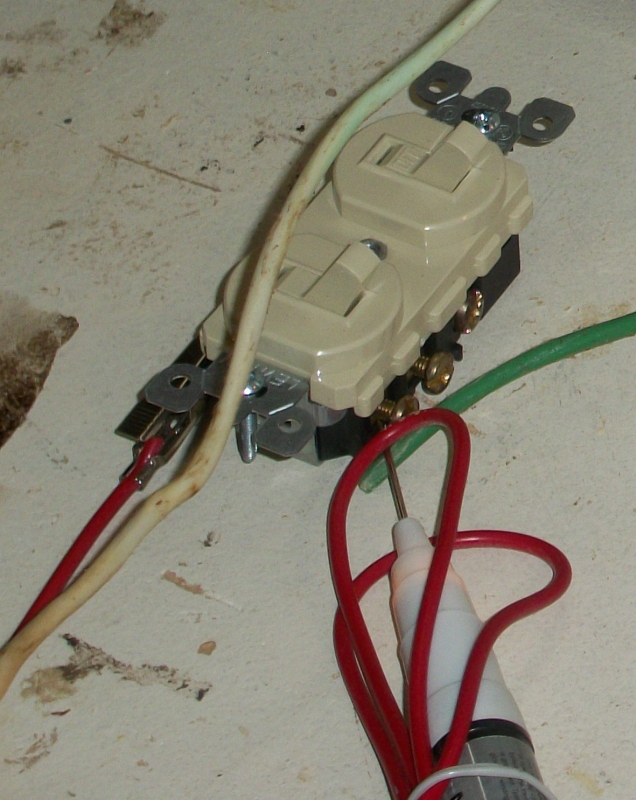 The green ground wires from the power cord, motor, and a jumper to the outlet tie together under a 10-32 screw tightened into the tapped hole in the back of the junction box. Make the connections.  For those of you that prefer a wiring diagram: 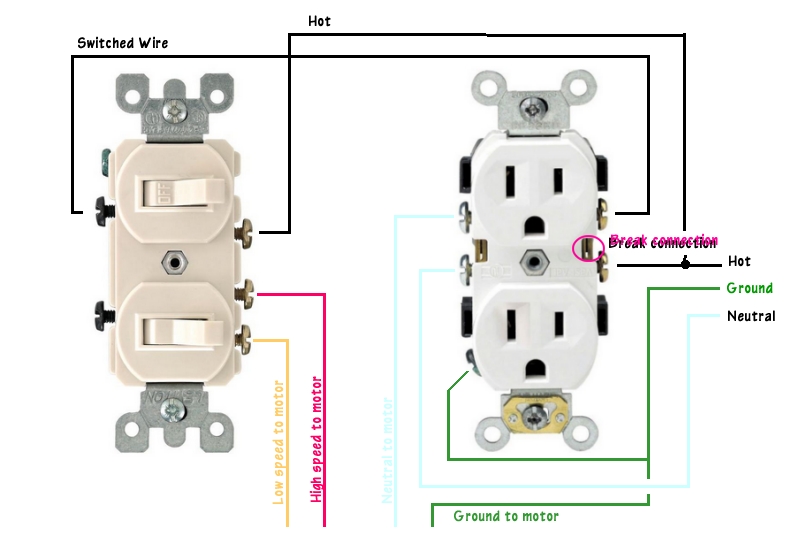
EDIT 8/3/2017 after being schooled by Tommy on grouping ALL the tutorial near the front. Too many projects! I finally got around to installing the pan drain. First I needed to pound out a flat lower place to drill the hole: 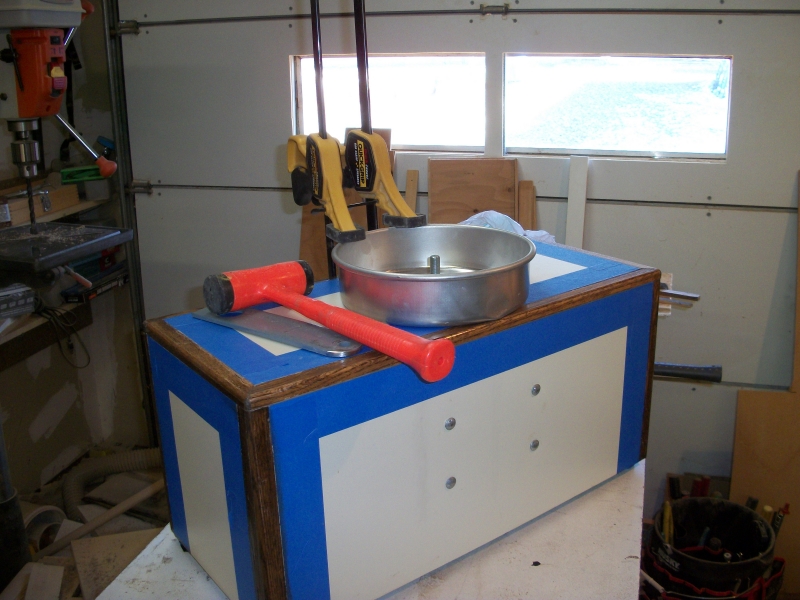 Next, find a 3/8" hole somewhere and drag it to the right place: 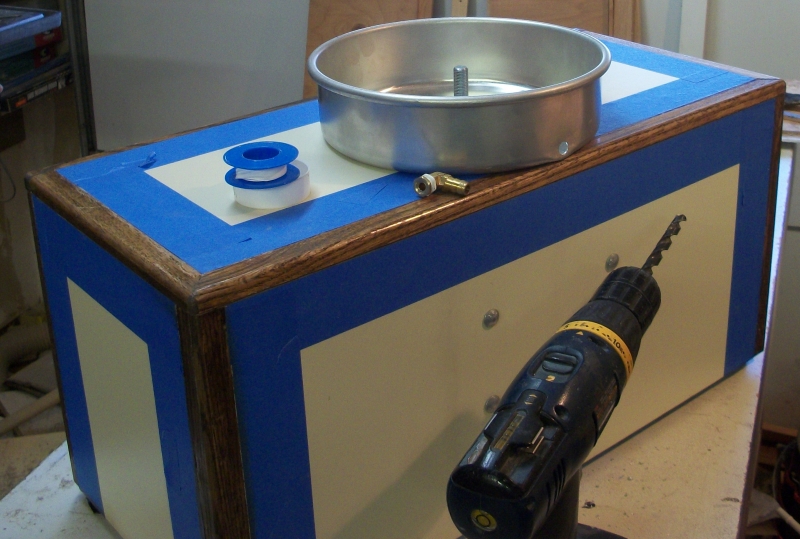 Then waterproof the threads and tighten in the drain:  Several coats of poly-urethane and on to the next project.
EDIT 8/3/2017 I drilled a hole and forced in a 16 penny nail to keep the cord out of the way when not in use, and a magnet to keep the 3/4" wrench handy. 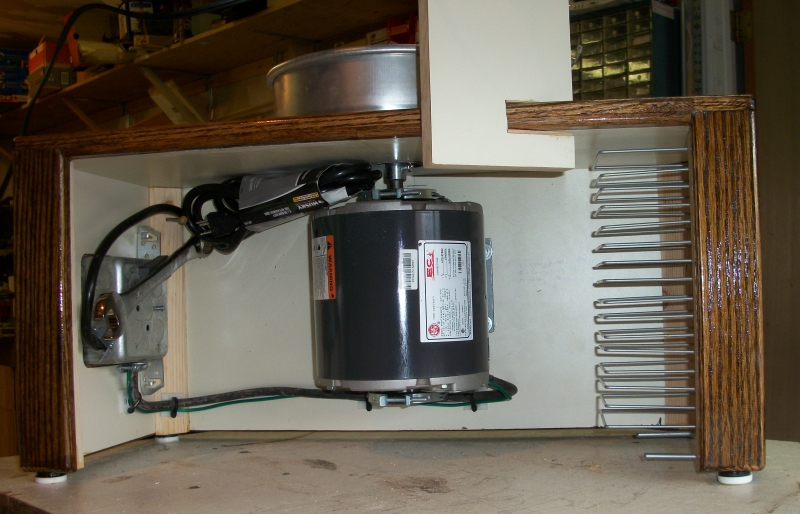 And a view of the finished unit. 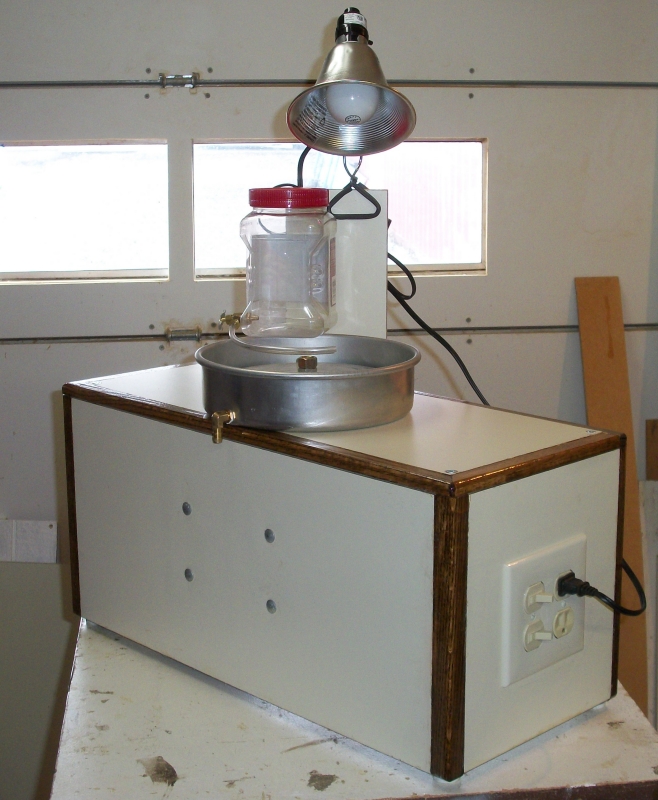 I'm thinking about installing a latch that will slide up against the shaft extender to stop the bolt from rotating for tightening or removing the nut and disk. I faked the water support platform In the last photo, but real life requires it, so I had to build it. The main support board just needed a slice taken out for the platform to slip into, and a bolt to tighten and hold it in place. I drilled a 1/4" hole on a 45 o angle, enlarged the lower end to hold a T-nut with two of the brads clipped off. That was gorilla glued into place. I glued some trim around the edges of a thin sheet of plywood to keep the water supply (a cashew container) from rattling off, then painted it white. 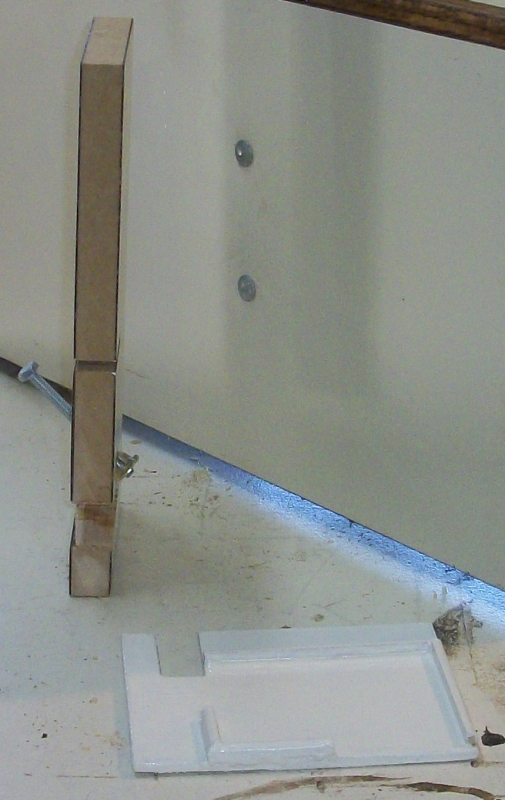 Wedged the two pieces together. 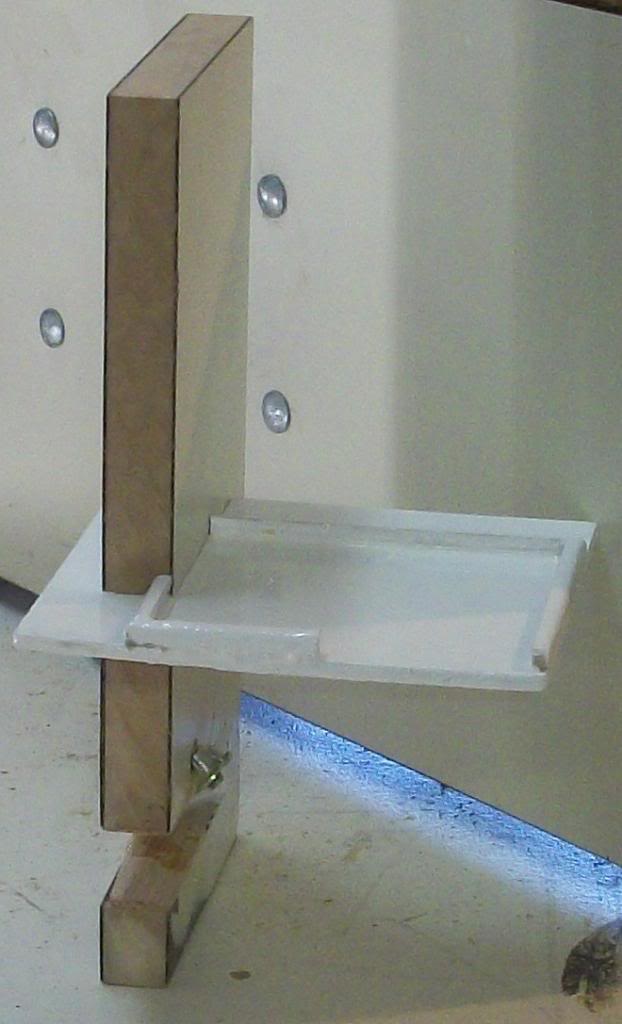 And there it is for real. 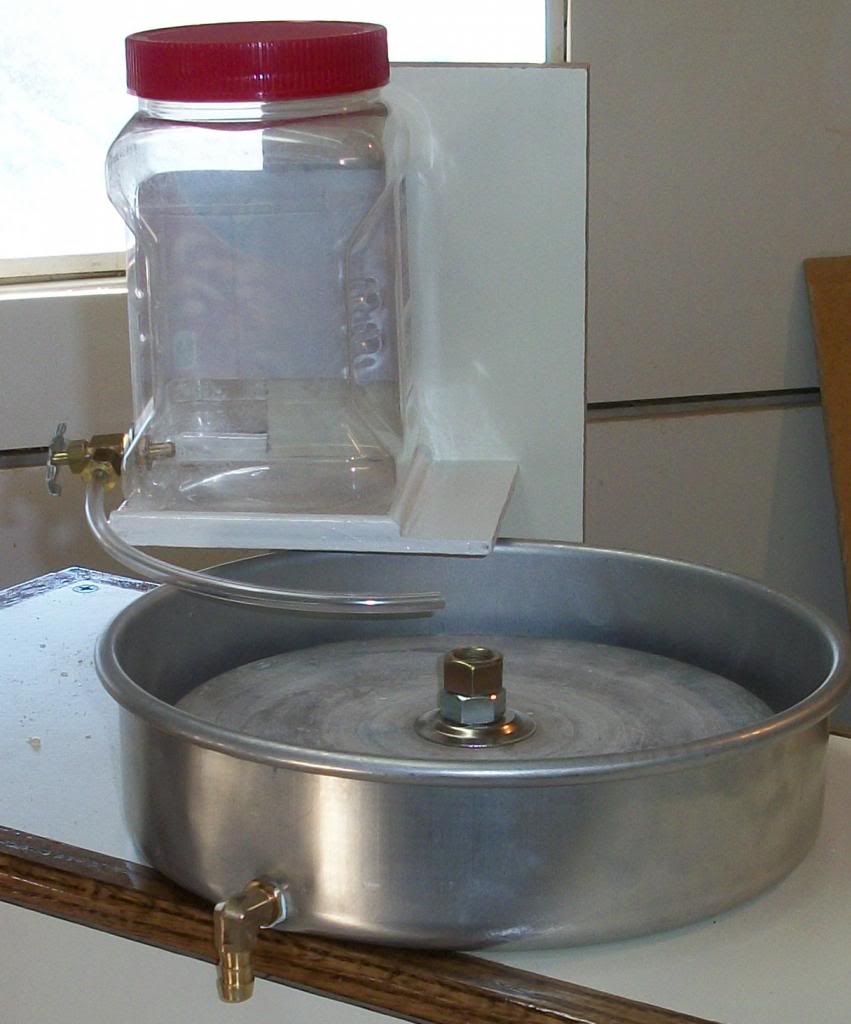 |
|
kaldorlon
spending too much on rocks
 
Member since October 2013
Posts: 413 
|
Post by kaldorlon on Oct 28, 2013 19:13:38 GMT -5
Very nice...however, pics now showing up..
|
|
|
|
Post by 1dave on Oct 29, 2013 9:15:53 GMT -5
Very nice...however, pics now showing up.. Hi John (did I get that right?) Was that "pics NOT showing up?" Dave |
|
|
|
Post by rockpickerforever on Oct 29, 2013 9:42:42 GMT -5
Dave, yes, photos not showing up. Until you get a photobucket or flickr account, photos you post will continue to "disappear" as space for storing them goes away. Best thing to do, get a free hosting accout, then post links to those photos. Then they will remain for as long as you have the account.
Personally, I have a photobucket account, have had no problems with it. Jean
|
|
Don
Cave Dweller  He wants you too, Malachi.
Member since December 2009
Posts: 2,616
|
Post by Don on Oct 29, 2013 9:51:05 GMT -5
The pics are showing fine for me.
|
|
|
|
Post by rockpickerforever on Oct 29, 2013 11:22:42 GMT -5
As a retired Master Electrician, the wiring was a snap. As previously mentioned, I want to have the top half of the outlet switched, the bottom half hot all the time the unit is plugged in, so the first step is to break off the tab that connects the two brass screws together.  Next I need to know which 3-way switch screw becomes hot when the bottom switch is in the same position as the top switch when it is off. This will be the low speed position. A continuity tester gives me this information.  The green ground wires from the power cord, motor, and a jumper to the outlet tie together under a 10-32 screw tightened into the tapped hole in the back of the junction box. Make the connections.  For those of you that prefer a wiring diagram:  Still not getting them - this is what it looks ike to me. I did see them when it was first posted. Edit - even if they show now (to some of you), they will disappear when the space is full, rendering the information in the post less than helpful without pictures. And when they are gone that time, they will be gone forever. |
|
|
|
Post by 1dave on Oct 29, 2013 11:48:48 GMT -5
The pics are showing fine for me. They still show for me too. Too bad this site has run out of attachment space. I thought I had solved the problem by posting from our club website: www.southernutahrockclubforum.us/I suppose I still have a photobucket account, haven't used it in years. I'll check it out and re post the photos. |
|
jamesp
Cave Dweller 
Member since October 2012
Posts: 36,605
|
Post by jamesp on Oct 29, 2013 11:56:44 GMT -5
Ok that was like a pro manual but better. This man needs a photo host site.
|
|
kaldorlon
spending too much on rocks
 
Member since October 2013
Posts: 413 
|
Post by kaldorlon on Oct 29, 2013 12:19:39 GMT -5
not showing up for me...will check my settings, etc.
|
|
|
|
Post by rockpickerforever on Oct 29, 2013 12:29:41 GMT -5
Is Don the only one that can see the photos? Might it have something to do with the fact that you are a member of that same forum, Don? Just wondering, trying to figure this out.
Even on that site, Dave, I see a few things like this "The attachment 1999-Moquis.JPG is no longer available" and this "The attachment moq1-2.jpg is no longer available". I guess it happens everywhere, space is limited.
C'mon, Dave, pry open that old photobucket acct! It'll be good for everybody. Jean
|
|
Don
Cave Dweller  He wants you too, Malachi.
Member since December 2009
Posts: 2,616
|
Post by Don on Oct 29, 2013 13:09:36 GMT -5
I don't have hot linking protection enabled on my webhost so dave should be able to share pictures from there unless there's a bandwidth issue. might be best for everyone if the pics are hosted on phtotbucket instead.
|
|
Deleted
Deleted Member
Member since January 1970
Posts: 0
|
Post by Deleted on Oct 29, 2013 13:34:33 GMT -5
Flickr is better. If you have a yahoo email address you have flickr.
|
|
|
|
Post by 1dave on Oct 29, 2013 14:49:31 GMT -5
Is Don the only one that can see the photos? Might it have something to do with the fact that you are a member of that same forum, Don? Just wondering, trying to figure this out. Even on that site, Dave, I see a few things like this "The attachment 1999-Moquis.JPG is no longer available" and this "The attachment moq1-2.jpg is no longer available". I guess it happens everywhere, space is limited. C'mon, Dave, pry open that old photobucket acct! It'll be good for everybody. Jean Done! Do they show now? My fossil brain finally figured it out. Had to start a new account, the old one was a few email addresses back. |
|
|
|
Post by rockpickerforever on Oct 29, 2013 14:50:48 GMT -5
Yay, Dave!! Yes, they do show now, good job! Jean
|
|
grizman
freely admits to licking rocks
  
Member since July 2011
Posts: 878
|
Post by grizman on Oct 29, 2013 15:01:43 GMT -5
They sure do for me! What a great project. Now I want to see shots of it in operation. Thanks, by the way!
|
|
RocksForBrains
off to a rocking start

Member since October 2013
Posts: 23 
|
Post by RocksForBrains on Nov 1, 2013 12:57:57 GMT -5
I want one of these. I'll have to start prompting hubby to "help" me build one, he's an electrician.
|
|
|
|
Post by 1dave on Nov 1, 2013 17:59:43 GMT -5
I want one of these. I'll have to start prompting hubby to "help" me build one, he's an electrician. An electrician? No problem. Just like the cobbler's kids are the last to get shoes! |
|
RocksForBrains
off to a rocking start

Member since October 2013
Posts: 23 
|
Post by RocksForBrains on Nov 2, 2013 16:48:59 GMT -5
Right.
|
|
|
|
Post by Rockoonz on Nov 2, 2013 21:58:52 GMT -5
Observations:
Are the bearings in your motor suitable for a direct drive application? I don't know a lot about all the options available in single phase AC motors, but none that I have seen have thrust bearings, only light axial bearings intended for a pully and belt or coupler to isolate it from excessive forces.
Where will your water drain to?
Lee
|
|


