barclay
has rocks in the head
 Lowly Padawan of rocks
Member since November 2011
Posts: 510
|
Post by barclay on Apr 28, 2018 9:08:08 GMT -5
I use JB Weld 5 Min epoxy from Home Depot. It cleans up nicely with alcohol (it is a bear to find that fact in their documentation)
|
|
barclay
has rocks in the head
Lowly Padawan of rocks
Member since November 2011
Posts: 510
|
Post by barclay on Apr 16, 2018 21:51:00 GMT -5
Found it! It was hiding in my daughter's car It's a blueish purple Only reason I saw it was it was sparkling in the sun     I vote for blue schiest. Given all the plate tectonics in that area i would not be surprised to find something that got sucked under and forced back up (like all the brecciated stuff in Area 54) |
|
barclay
has rocks in the head
Lowly Padawan of rocks
Member since November 2011
Posts: 510
|
Post by barclay on Apr 15, 2018 17:36:59 GMT -5
i think the green crystalline one is actinolite
|
|
barclay
has rocks in the head
Lowly Padawan of rocks
Member since November 2011
Posts: 510
|
Post by barclay on Apr 15, 2018 11:12:30 GMT -5
Large Rock Estate Sale!
50+ years of rock must go!
April 22, 10:00am – 5:00 pm
10179 Madrid Way, Spring Valley, CA, 91977
Here is a partial list of what is available: Old Stock Holley Blue agate, Burro Creek purple jasper, Morrisonite, Biggs and Bruneau. Extensive collection of obsidian and petrified wood from all over the country. Also many kinds of jade, rhyolite, geodes, dino bone, corprolite, crazy lace, dumortierite, septarian, mariposite, rhodenite, rhodochrosite, tiger eye, tiger iron, sodalite, bloodstone, blue lace agate, turritella, llanite, leopard skin, Horse Canyon agate, faceting quartz, rutilated quartz, Graveyard Point agate, Regency Rose agate, silver lace onyx, New Mexico agates, druzy pieces, snake skin agate, lizard skin, malachite, lapis, varisite, picture jaspers, idocraze and Brazilian agates, chrysocolla, azurite. Bulk rock $1/lb.
Cash Only, No Early Birds please.
|
|
barclay
has rocks in the head
Lowly Padawan of rocks
Member since November 2011
Posts: 510
|
Post by barclay on Apr 6, 2018 7:45:44 GMT -5
I will be heading to Dayton Ohio in a few weeks and will be taking some time off. Besides the Nether's Farm flint what else is in the area?
|
|
barclay
has rocks in the head
Lowly Padawan of rocks
Member since November 2011
Posts: 510
|
Post by barclay on Apr 3, 2018 19:44:51 GMT -5
Beautiful stuff! I picked some up at Quartzsite this year and I can't wait to make knife handles out of them.
|
|
barclay
has rocks in the head
Lowly Padawan of rocks
Member since November 2011
Posts: 510
|
Post by barclay on Apr 3, 2018 18:24:33 GMT -5
i liked my Hi Tech until the body cracked. The tray was a pain to clean with all those ridges. The Ameritool is much sturdier and easier to clean. I like my ameritool better.
|
|
barclay
has rocks in the head
Lowly Padawan of rocks
Member since November 2011
Posts: 510
|
Post by barclay on Apr 1, 2018 9:38:00 GMT -5
Greetings from SoCal. Lots of cool rocks on the ground out here if you are in the neighborhood.
|
|
barclay
has rocks in the head
Lowly Padawan of rocks
Member since November 2011
Posts: 510
|
Post by barclay on Mar 30, 2018 22:05:01 GMT -5
Damn, wish it was not so far away.
|
|
barclay
has rocks in the head
Lowly Padawan of rocks
Member since November 2011
Posts: 510
|
Post by barclay on Mar 30, 2018 11:28:59 GMT -5
I have seen boxes of flourescent minerals at our local rock shows and county fair. I know these folks are not laying down $2,000 for a display. I can see needing a very powerful lamp for a room sized display and at a certain point you cross the line from equipment made for the hobby to industrial and all bets are off for cost.
|
|
barclay
has rocks in the head
Lowly Padawan of rocks
Member since November 2011
Posts: 510
|
Post by barclay on Mar 29, 2018 20:39:29 GMT -5
I am looking to buy an ultraviolet light to take with me into the field for hounding and probably another to mount in a display case for the club's flourescent minerals we are creating to take into the class room. If I could pool the collective knowledge of the board for make/model recommendations as well as a vendor I would appreciate it.
|
|
barclay
has rocks in the head
Lowly Padawan of rocks
Member since November 2011
Posts: 510
|
Post by barclay on Mar 13, 2018 18:34:26 GMT -5
I am with the free form cab crowd. Get the beauty from both sides of the stone.
|
|
barclay
has rocks in the head
Lowly Padawan of rocks
Member since November 2011
Posts: 510
|
Post by barclay on Feb 23, 2018 21:25:28 GMT -5
If you pop it in the freezer CA glue becomes brittle
|
|
barclay
has rocks in the head
Lowly Padawan of rocks
Member since November 2011
Posts: 510
|
Post by barclay on Feb 21, 2018 21:25:30 GMT -5
I love your intarsia project. That is a very lucky friend! Intarsia is something that I really want to try someday. Thank you for the step by step! The hardest part was getting everything flush and square. That takes some practice and I am far from a master. I think it would be a lot easier if I had a faceting machine where I could dial in all the angles (or one of grumpy Sesona's intarsia machines). Adding the strips of brass between the stones actually gave me a little wiggle room on the flush and square issues so that last minute embellishment helped out a lot. |
|
barclay
has rocks in the head
Lowly Padawan of rocks
Member since November 2011
Posts: 510
|
Post by barclay on Feb 20, 2018 23:44:47 GMT -5
could be either or both. good point.
|
|
barclay
has rocks in the head
Lowly Padawan of rocks
Member since November 2011
Posts: 510
|
Post by barclay on Feb 20, 2018 23:21:15 GMT -5
From Satellite City website (maker of Hot Stuff) How do Satellite City instant glues hold up to heat? Tested by exposure for 5000 hours, our instant glues retain: 100% initial bond strength at 140 F (60 C) 75% at 176 F (80 C) 25% at 212 F (100 C). Our CA glue will melt at 330 F and start to soften before that. That's the facts on heat. Didn't see anything on cold. In your experience, how cold is too cold? It rarely hits freezing here. A couple times it came off in the 40 or so degree water in my garage. i had some on a dopped stone i threw in the freezer quickly to get the wax off and the glue came off before the wax. |
|
barclay
has rocks in the head
Lowly Padawan of rocks
Member since November 2011
Posts: 510
|
Post by barclay on Feb 19, 2018 14:30:21 GMT -5
Thank you for this step-by-step display. Some good ideas here! Your use of the brass looks like an excellent idea, as does your use of two different textures --- shiny for the amethyst, and not so shiny lapis. I'm also still working on my first piece. HOT STUFF ca glue (orange label) dries quickly --- about a minute or two at most, and then you can go about the next step. Just have to clean all edges with acetone prior to applying the Hot Stuff. Looks like your bail is part of the backplate, or did you solder the bail onto the backplate? Congratulations on a fine finished piece, and happy customers! The bail is glued to the backplate with E6000 adhesive. I like that for bails because it is thick so you can get a decent size bead and it is flexible. I was also concerned about soldering discoloring the back plate. One of these days I need to learn how to solder jewelry. It is probably similar to soldering wires, but there are probably some important differences. I like the idea of using a CA glue for fitting up the stones and epoxying the whole thing to the back plate for the "real" adhesion. My only concern with CA glues is that they get very brittle in the cold. |
|
barclay
has rocks in the head
Lowly Padawan of rocks
Member since November 2011
Posts: 510
|
Post by barclay on Feb 19, 2018 14:25:45 GMT -5
Thank you so much for sharing! I love process pictures. I, also, started an intarsia that I am STILL working on. I had to get more discs for my grinder. I like your choice of stones. The amethyst is very nice and the overall piece is gorgeous. I can see why she is happy. I like the metal you added. One thing I am finding with intarsia is that the piece gets large rather quickly. What size did yours end up being? I was using super glue to hold it together before backing. It is about 2" at the bottom, slightly less at the top and about 3" long. I did not think to measure it. Originally I wanted to back it with agate, but I was concerned that the extra weight would leave bruises on her chest  |
|
barclay
has rocks in the head
Lowly Padawan of rocks
Member since November 2011
Posts: 510
|
Post by barclay on Feb 18, 2018 23:09:35 GMT -5
Back in November I was talking with a good friend and found that she was going through some tough times so I offered to make pendants for her and her daughter. I asked what colors and materials were their favorites. She liked amethyst (her birthstone) and dark blue. Her daughter liked pink. I had a few different materials that fit the bill so I commenced planning. I thought about combining materials and making a composite piece. This is called intarsia. I had never done intarsia before, but heck, I have been doing lapidary for about 20 years now. How hard could it be. (*Ominous music plays*). Thus began the longest running lapidary project I have ever set out to do. I had a nice trapezoid of chevron amethyst already cut. Chevron amethyst is a combination of quartz and amethyst (quartz colored by iron). I thought about grinding it down to a rectangle, but decided to embrace the asymetry. The amethyst also has a lot going on inside (picture #1). I had some good lapis from Afganistan. I think the deep saturated medium blue is much prettier than the dark blue. The iron pyrite (fool's gold) bands also added to the linearity of the overall piece. The lapis would be a rectangular border around the amethyst. Originally i thought about putting lapis on the top, but I decided I wanted a lighter color as a counter point so I used some emerald for the top stone. Picture #2 is the original mock up. My friend said she liked it and away I went. The flat grinder i have is basically a record player with different sanding grit records and i was grinding everything by hand. I discovered that gravity is very reliable. When I tried to clamp the lapis on the sides it kept sliding towards the top of the stone. If the sides of the stone were not exactly square and flat things started sliding. I learned to clamp by hand. I used 5 minute epoxy so I thought things would go quickly. Wishful thinking. The label said it sets in 1 hour, but sometimes the glue was not sticking. At this point I put my sailor's vocabulary to good use shall we say. 😁 When that did not help I tried reading ALL of the directions on the epoxy. It sets in 1 hour, but it cures in 24 hours. Funny how reading the directions makes things work better. Picture #3 is another shot of the mock up after polishing the center stone. Love that dark purple. I decided just gluing rocks together wasn't giving me the look I wanted so I decided to put strips of brass between the stones. Of course when you cut sheet metal it bends so I used the clamps to flatten it out again. Picture #4 are the parts for the first stage. Since I was doing all of the grinding by hand I had to glue each strip of lapis or emerald on and then grind it flush with the next side. I was able to clamp some of the stages which saved my fingers (pictures #5, #6). I got the lapis glued on the two long sides of the stone and ground it flush with the top and bottom (picture #7, #8). Next it was time to glue the brass on the top and bottom (pictures #9, #10). Next I added the lapis on the bottom and emerald on the top. One piece of lapis cracked so I needed to cut another. I wasn't happy with the one large piece of emerald so I cut two smaller stones and put brass between them. Finally it was all glued together (picture #11) and I could work on grinding the face perfectly flat and polishing it. I had to be careful not to over grind the soft lapis while grinding the harder emerald and amethyst. That took some time and a few finger nails. I took picture #12 before I finished polishing the stone and the final cleaning. Lapis usually does not take a mirror shine, but I wanted to get a really good shine on the amethyst so you can see what his going on inside. To do this I got some diamond polishing compound on a felt bit on a dremel tool and polished the center stone. I backed the whole piece with sheet brass to give the piece more strength and reflect light back through the amethyst. I started this piece in late November and finished in late January. Between the holidays and a family funeral this was a busy time to get anything done. My friend was very happy with the piece and if the customer is satisfied that is all that really matters. Original fit up 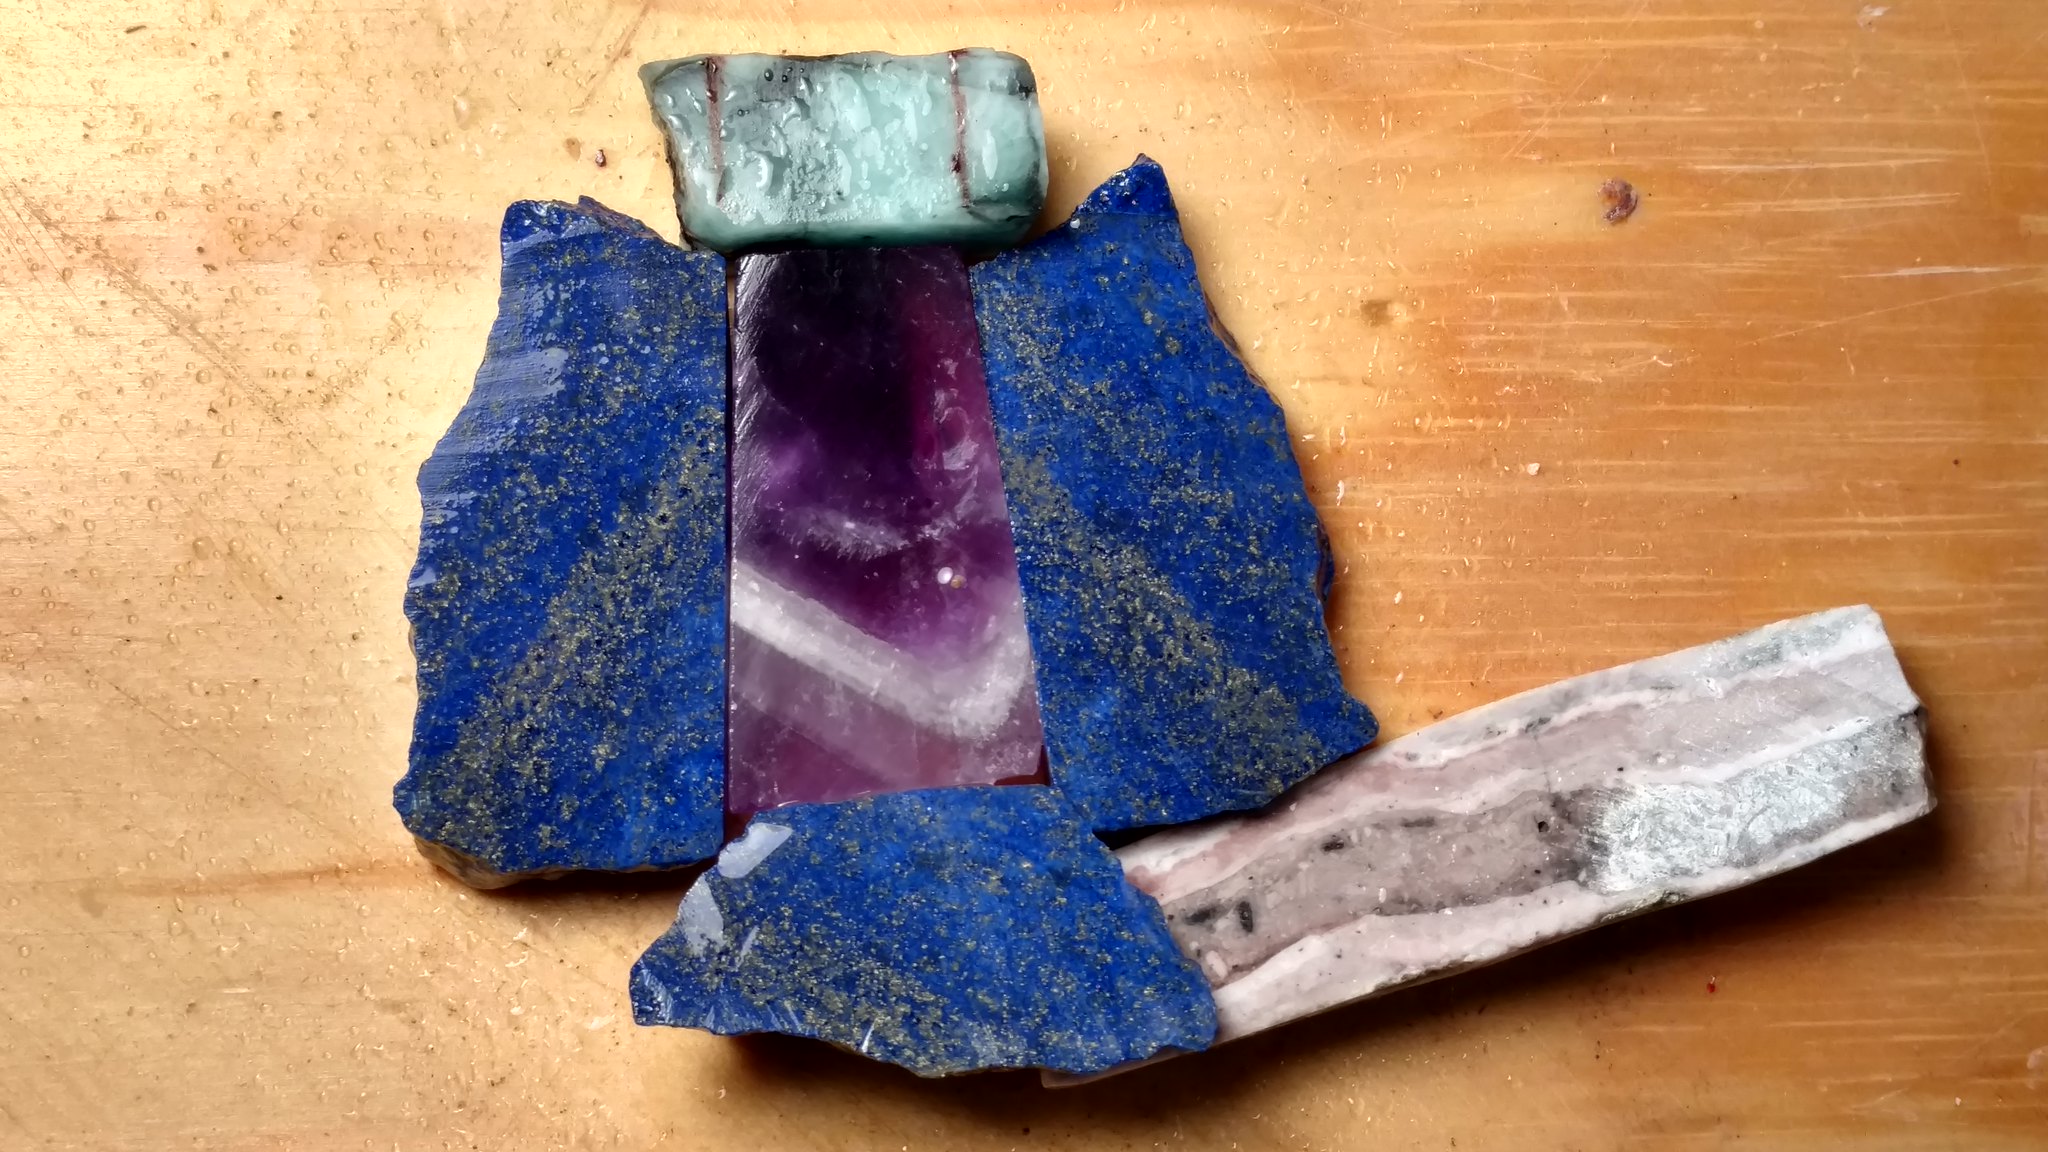 IMG_20171224_122321129_HDR IMG_20171224_122321129_HDR by Paul Clifford, on Flickr Amethyst center 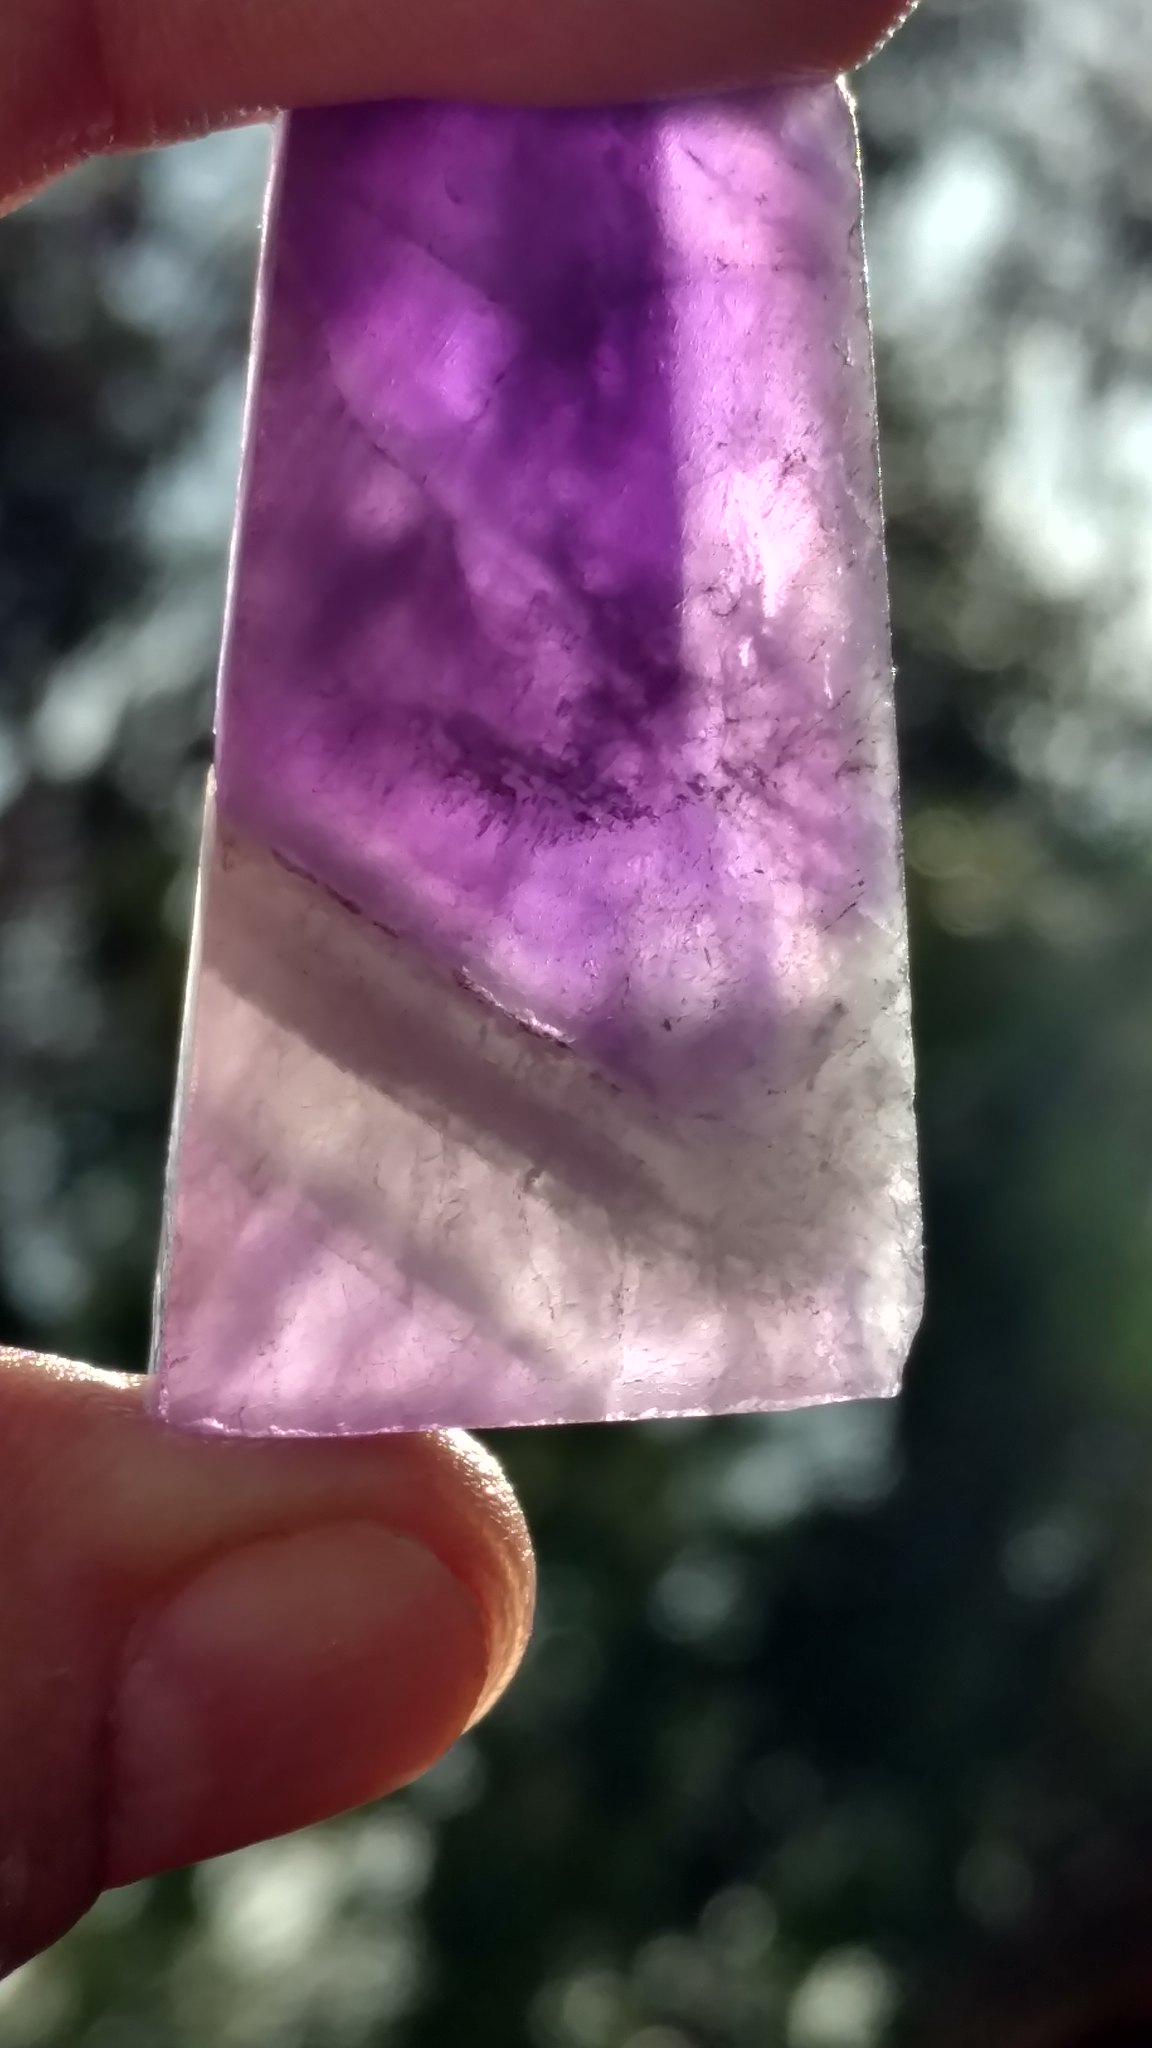 IMG_20171223_130733239_HDR IMG_20171223_130733239_HDR by Paul Clifford, on Flickr First pieces 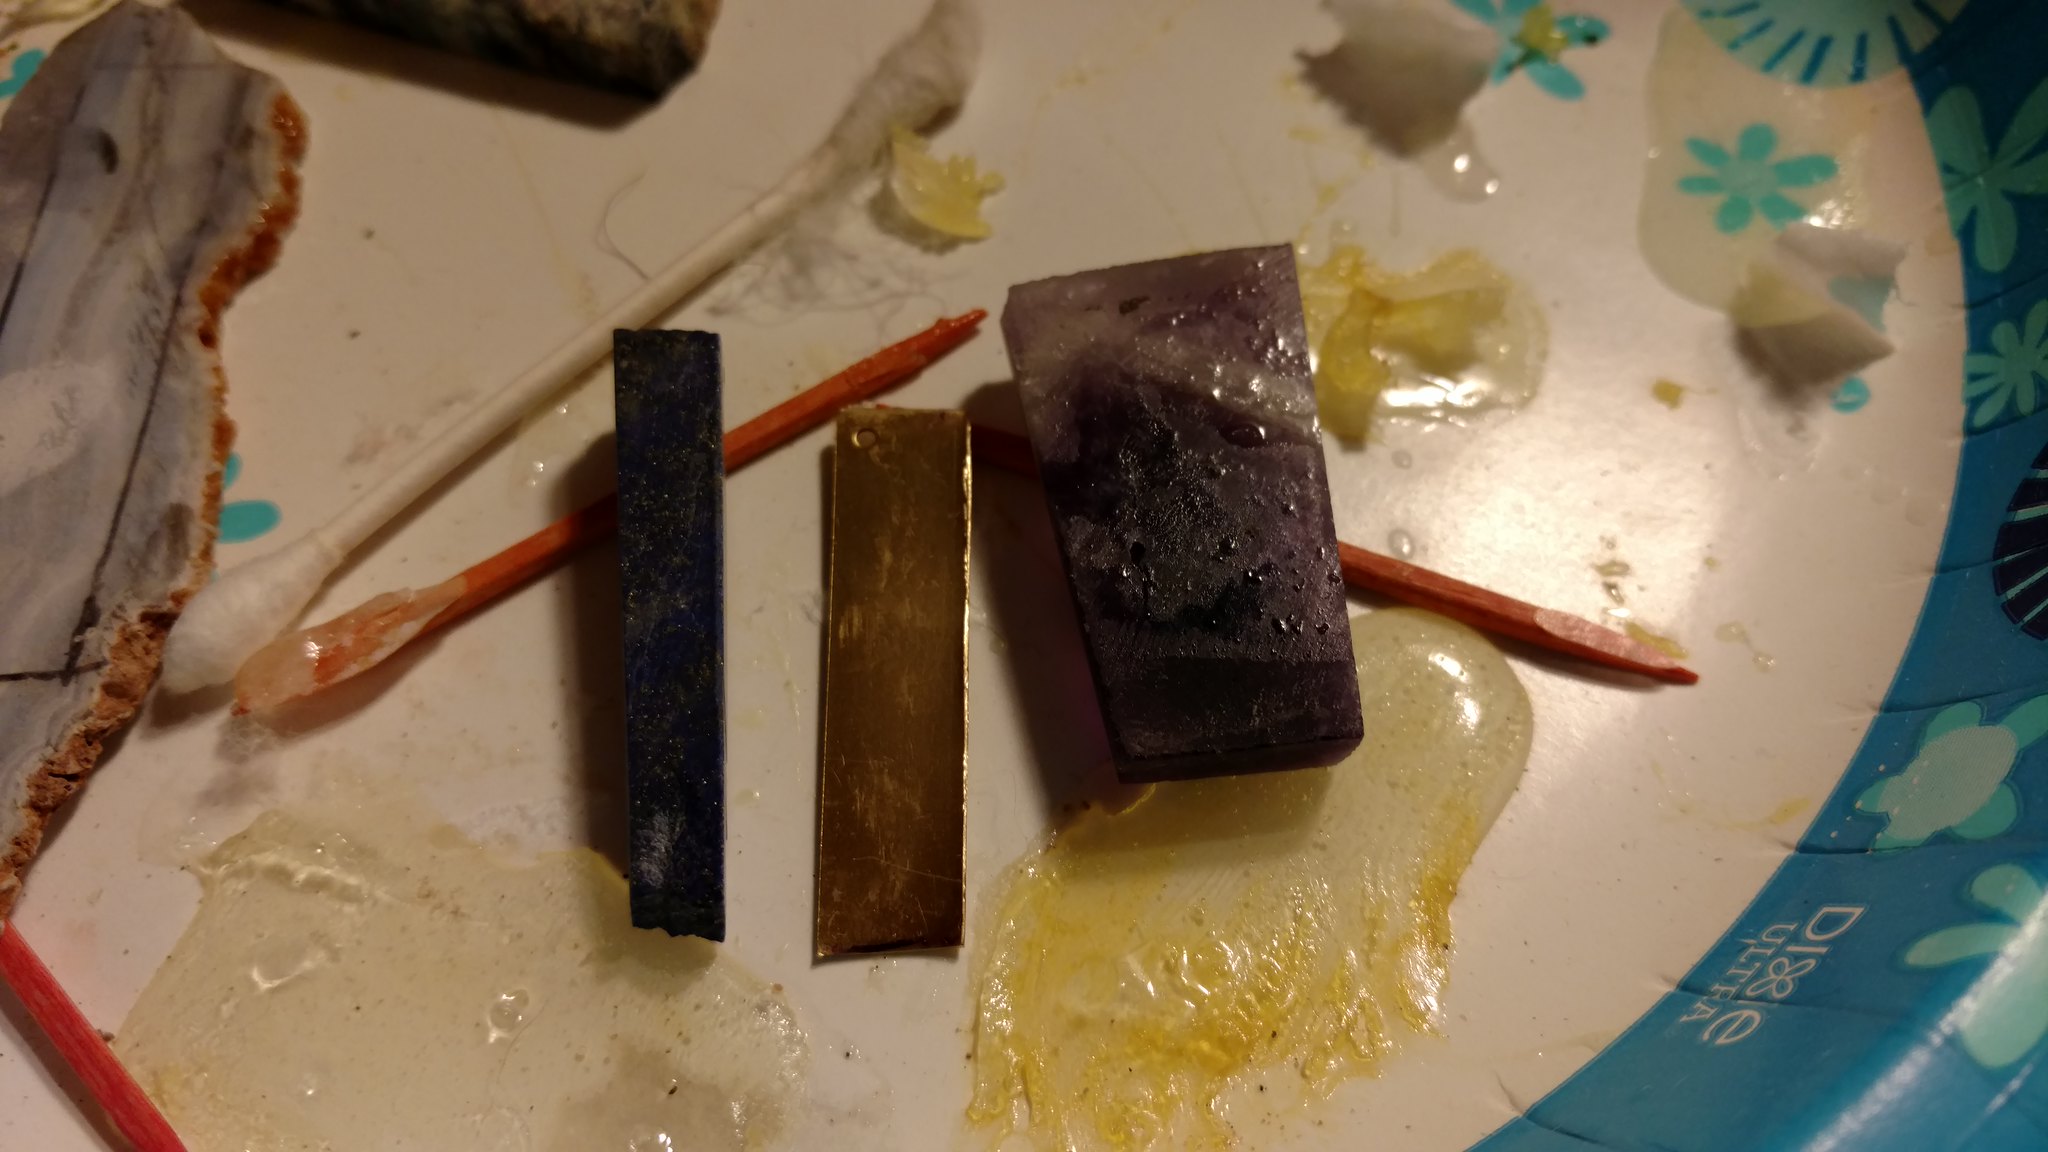 IMG_20171229_204005838 IMG_20171229_204005838 by Paul Clifford, on Flickr First glue-ups 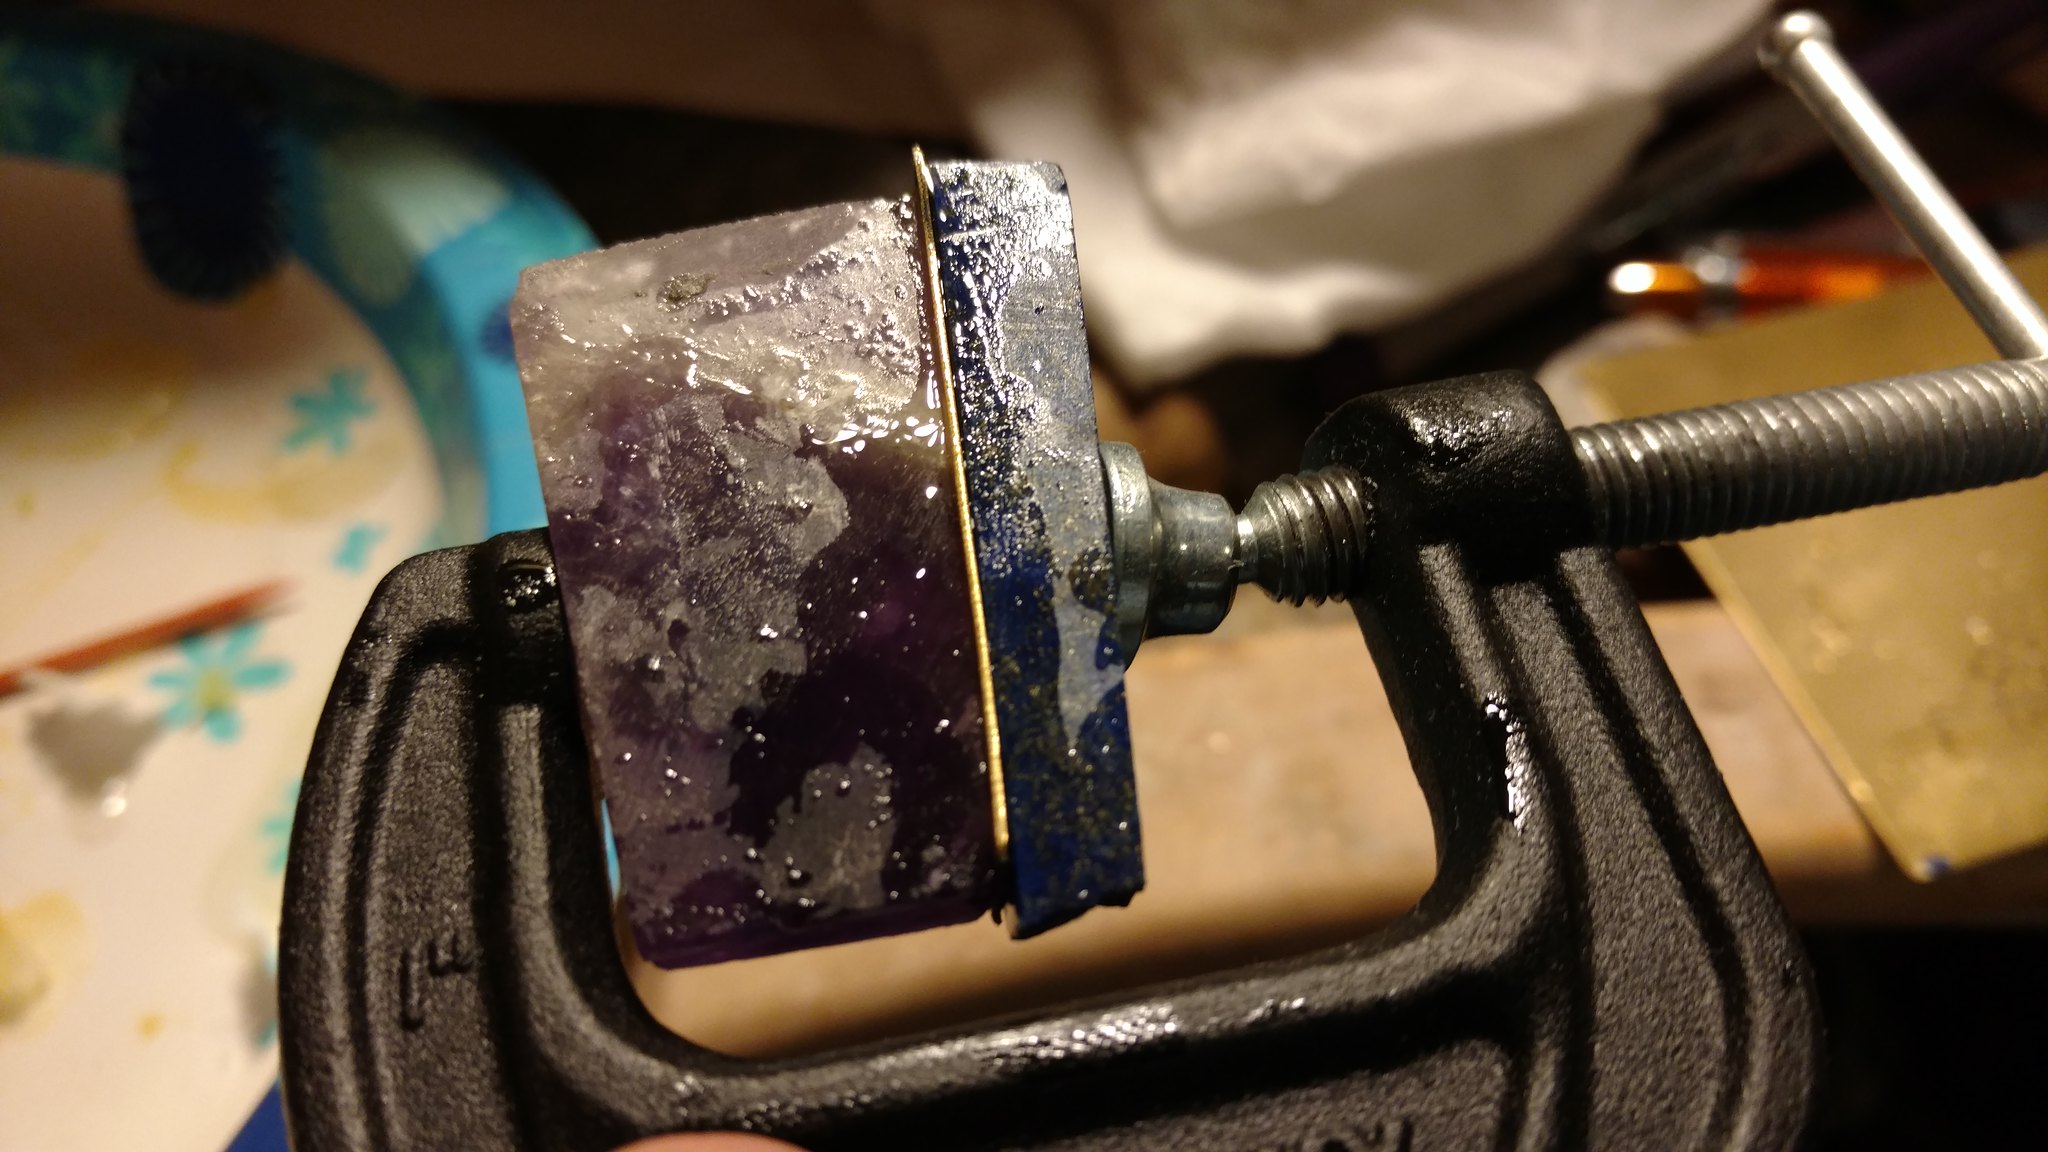 IMG_20171229_205820199 IMG_20171229_205820199 by Paul Clifford, on Flickr Two lapis sides added 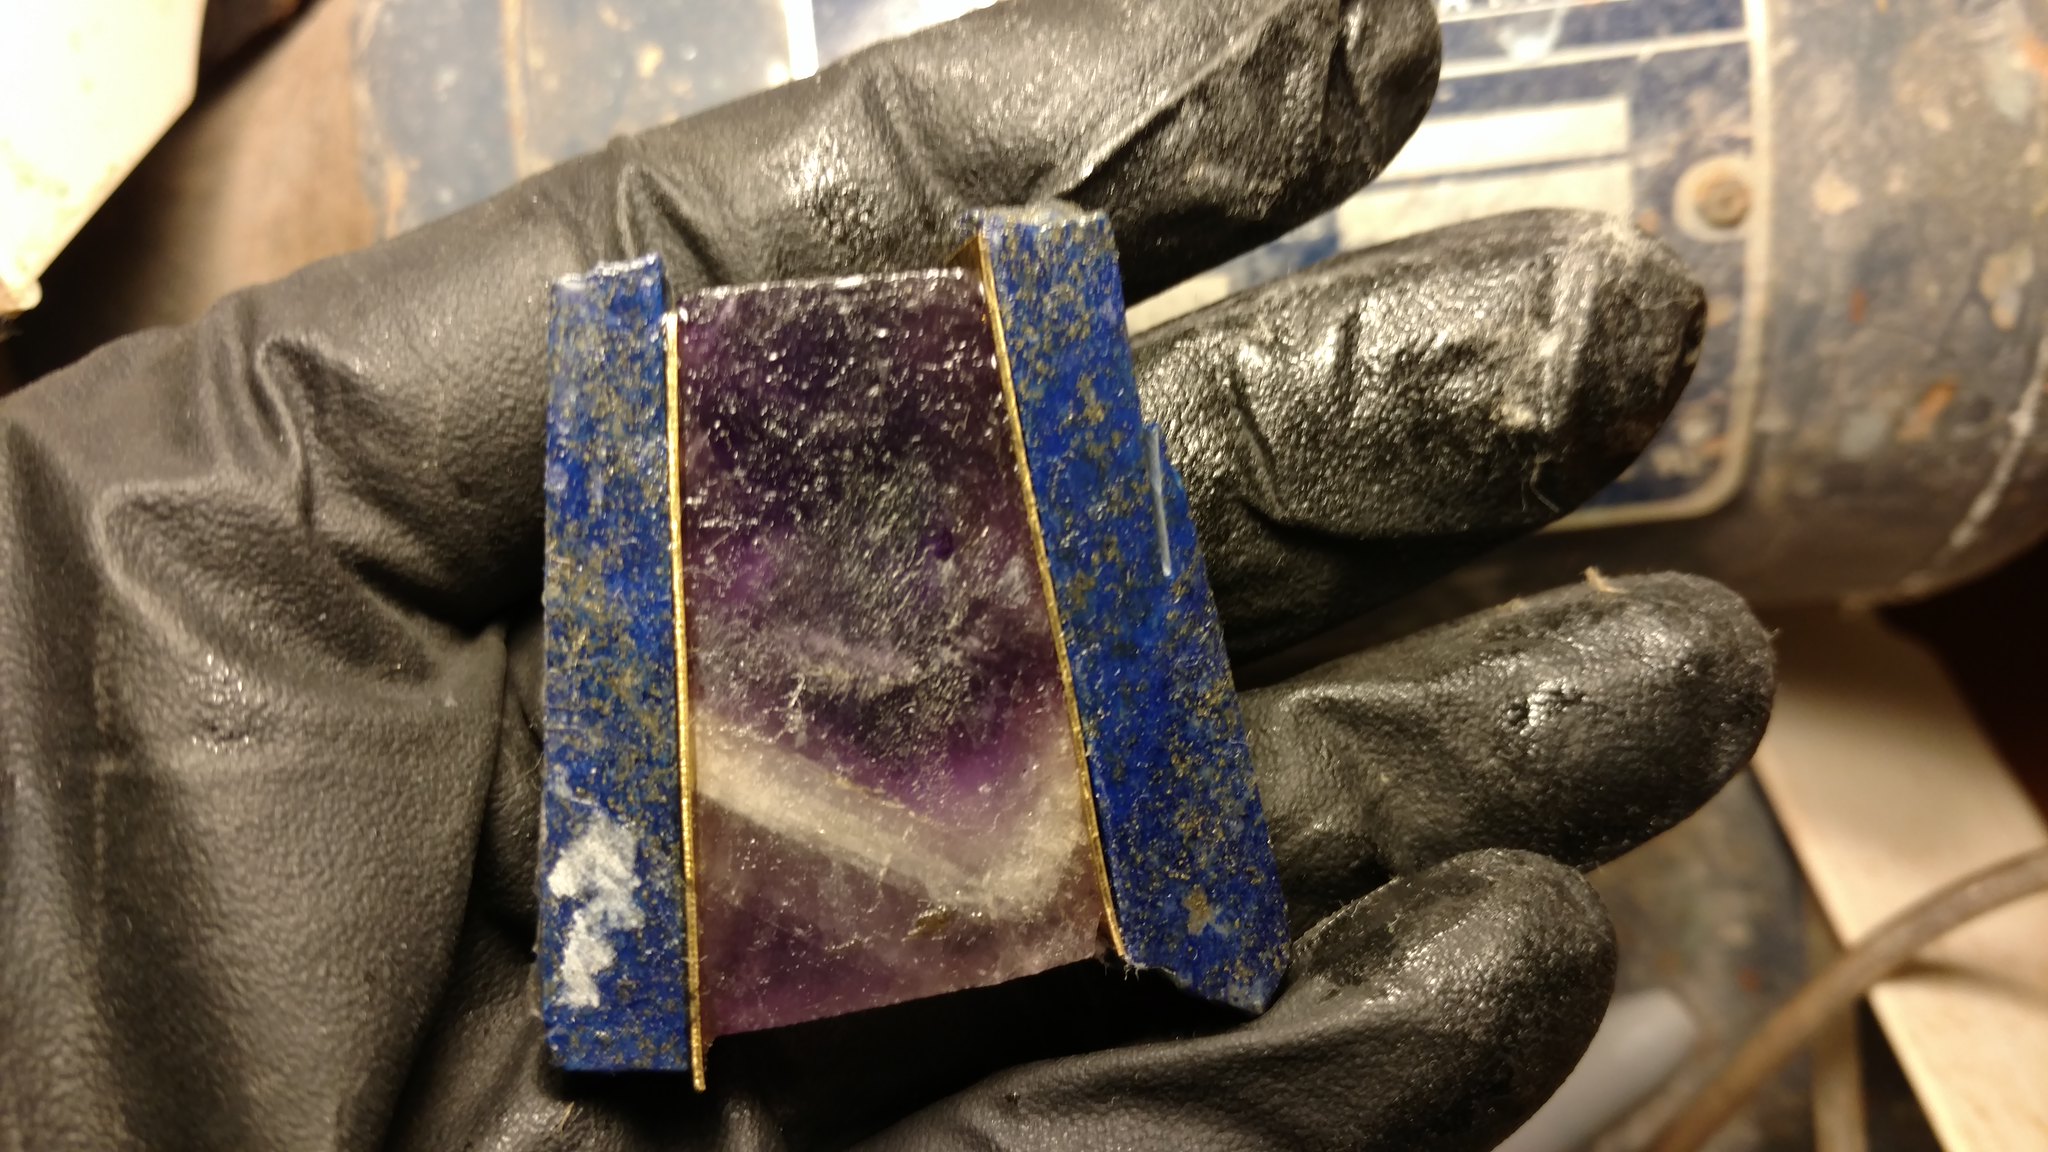 IMG_20171230_175607520 IMG_20171230_175607520 by Paul Clifford, on Flickr Top and bottom ground flat 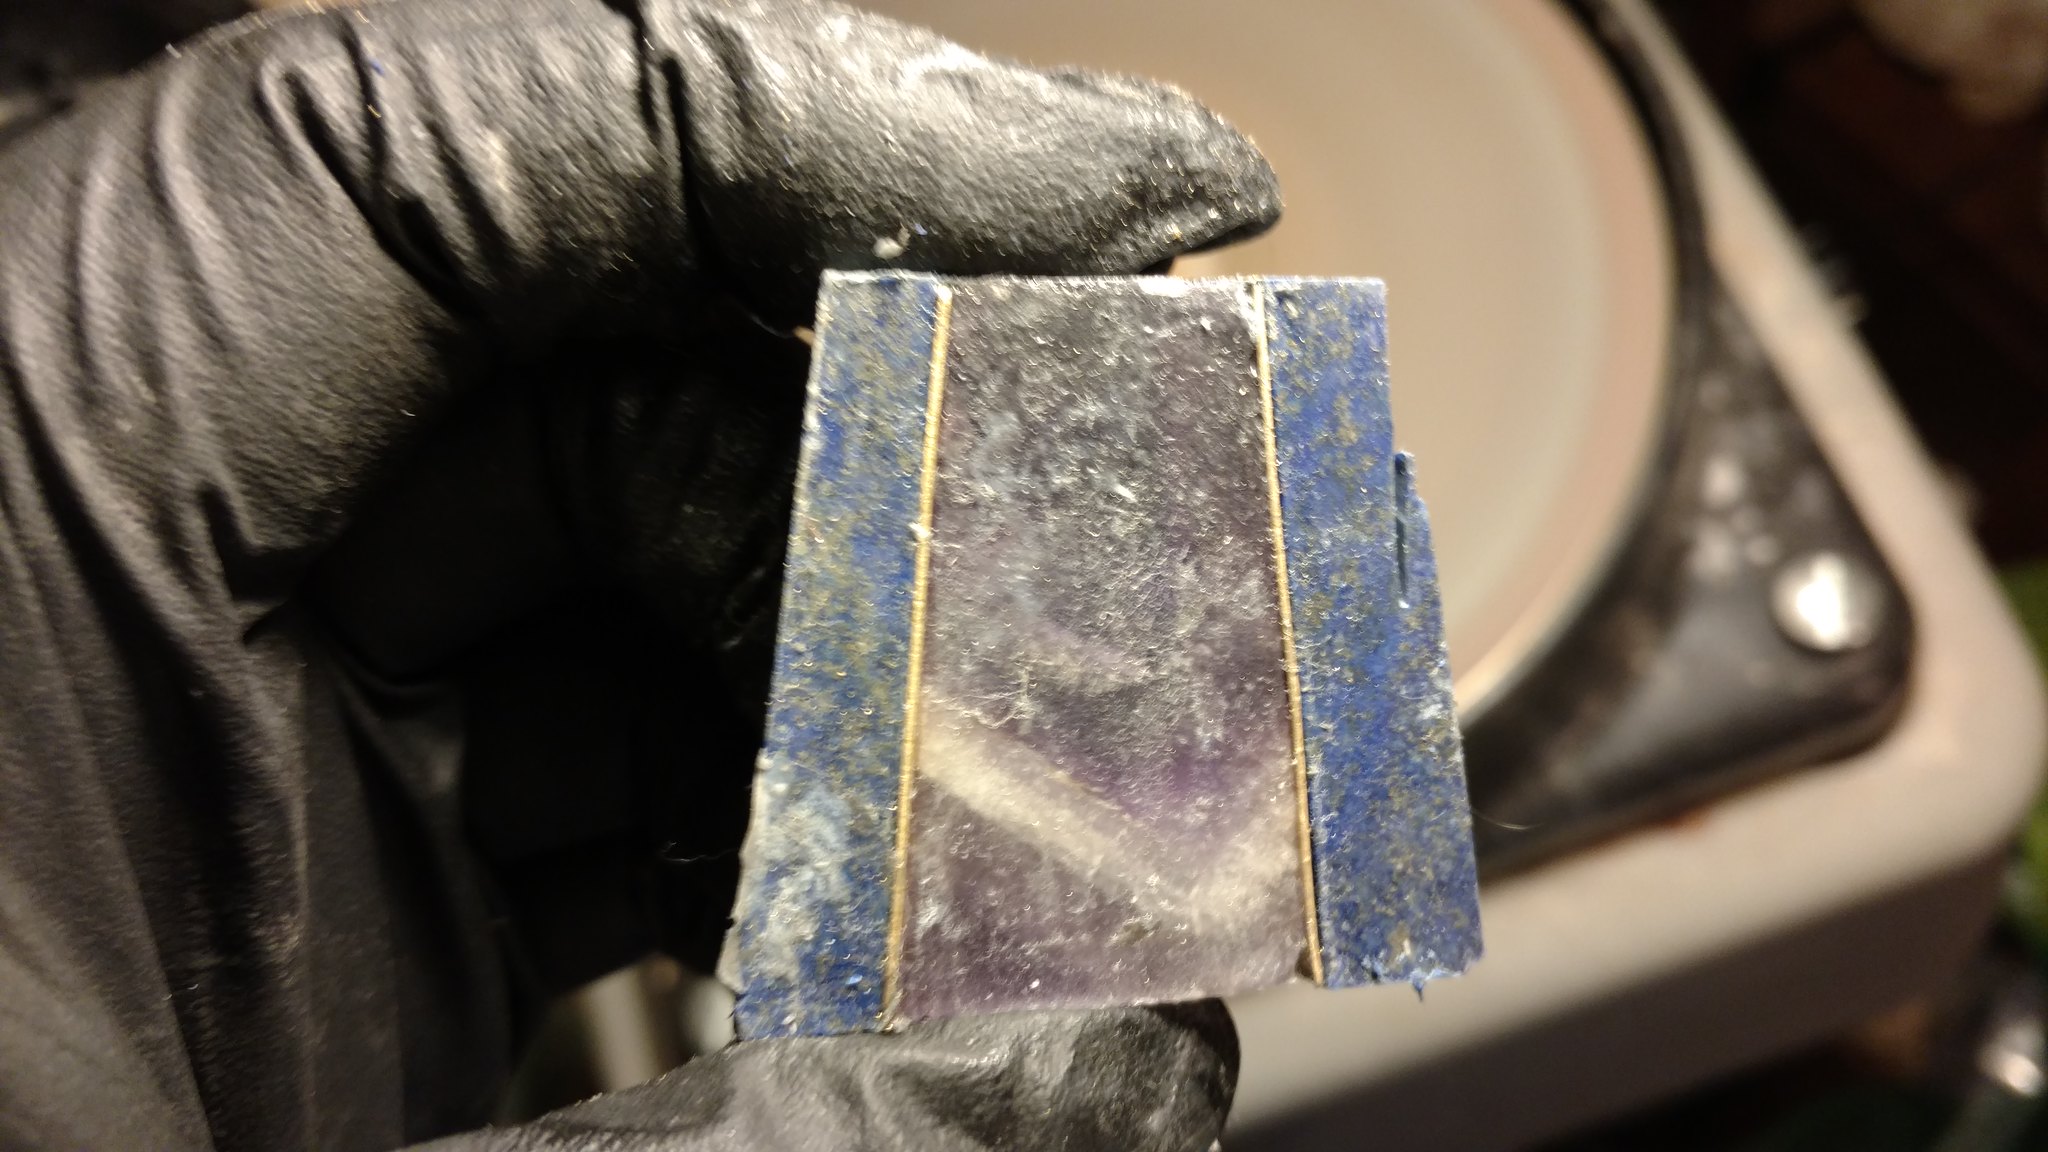 IMG_20171230_181007801 IMG_20171230_181007801 by Paul Clifford, on Flickr Top and bottom brass strips added 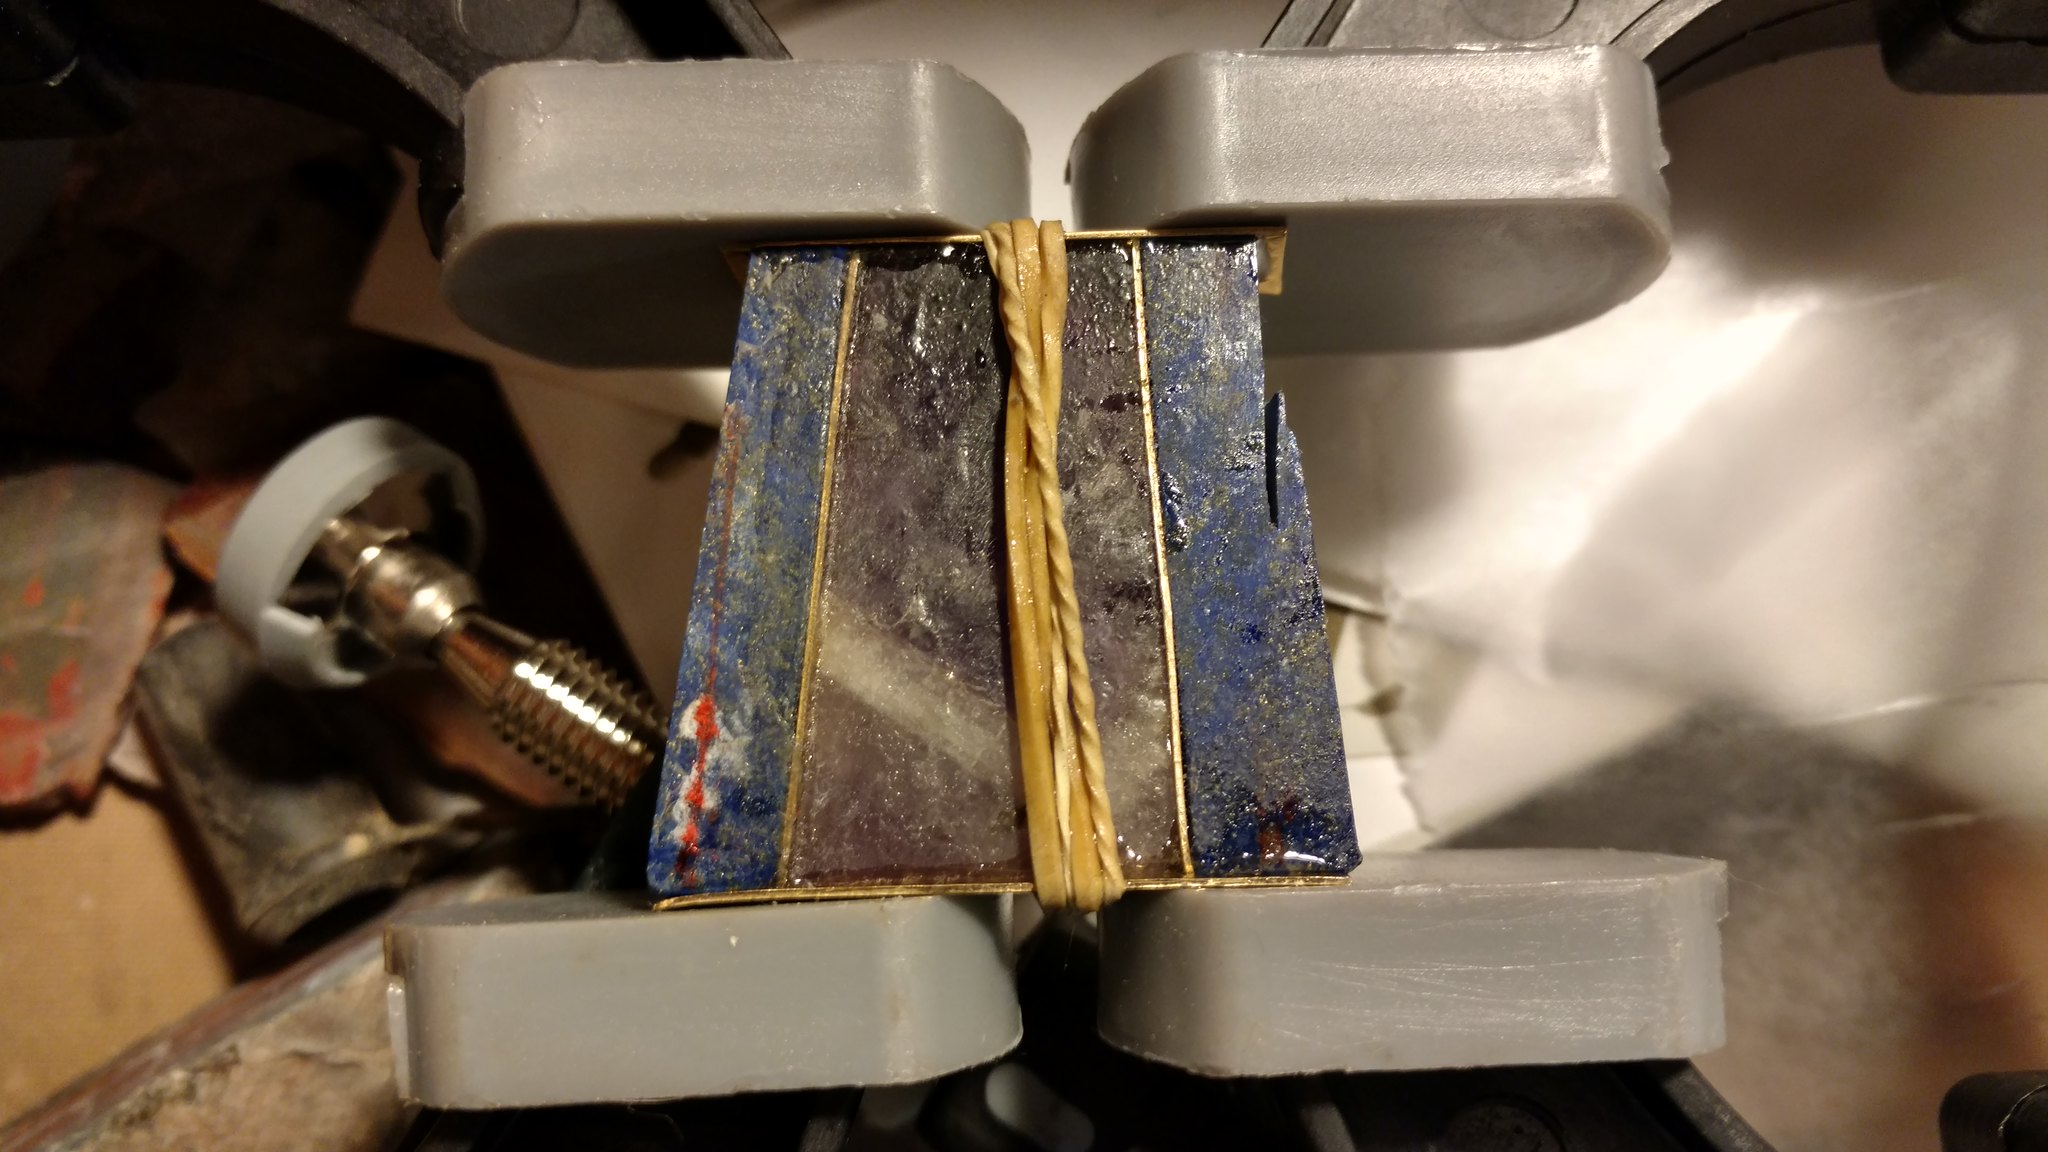 IMG_20171230_184430031_HDR IMG_20171230_184430031_HDR by Paul Clifford, on Flickr Final piece 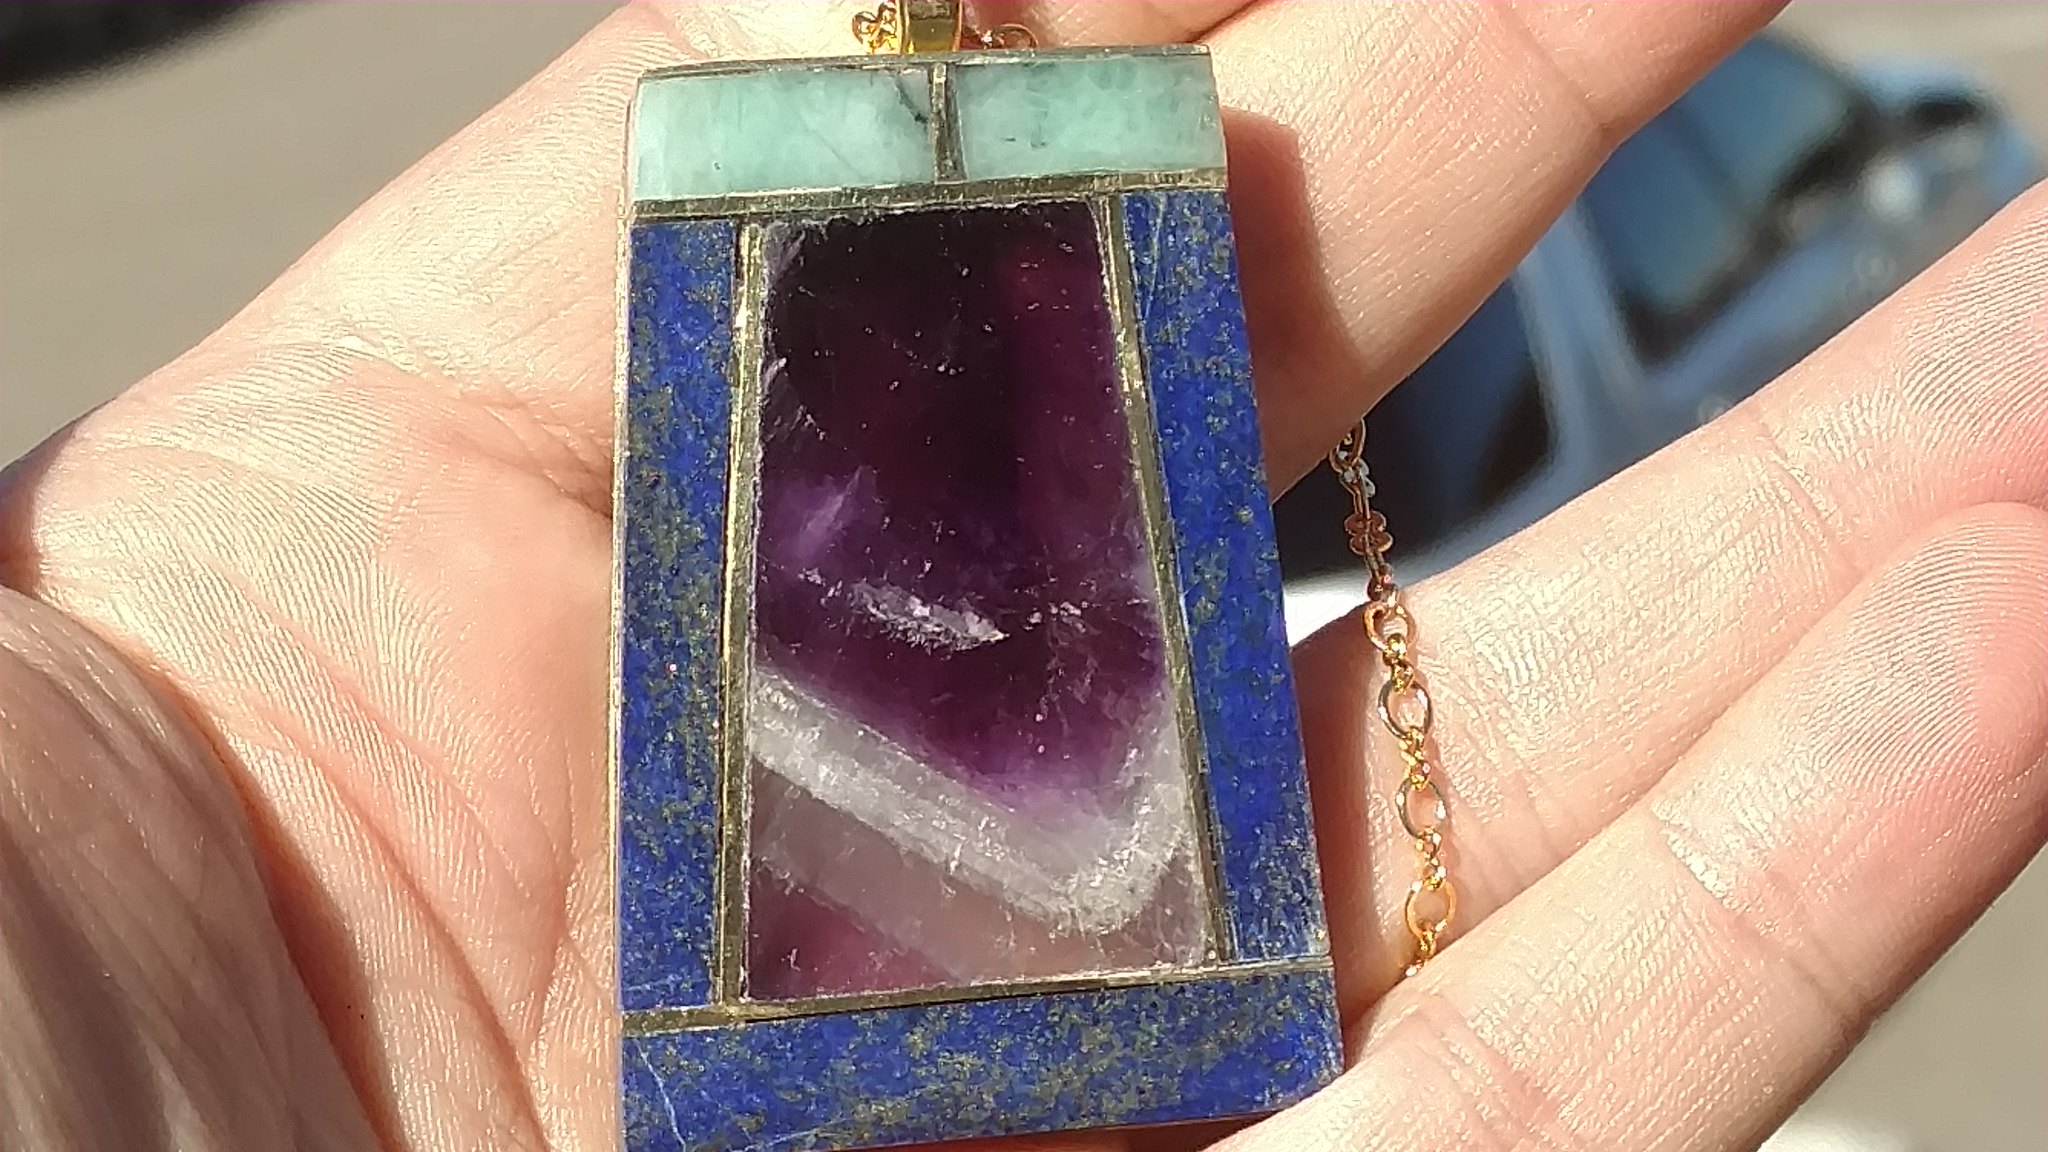 IMG_20180129_110719892 IMG_20180129_110719892 by Paul Clifford, on Flickr |
|
barclay
has rocks in the head
Lowly Padawan of rocks
Member since November 2011
Posts: 510
|
Post by barclay on Feb 17, 2018 20:59:39 GMT -5
i have a Gryphon and they are really meant for glass more than stone. If you were to try and cut out a cabochon in one pass I think it would take more time than making a number of reasonable cuts with a trim saw.
|
|


 Al Falfa


