Getta Grip
noticing nice landscape pebbles

Member since November 2016
Posts: 81 
|
Post by Getta Grip on Apr 5, 2017 13:27:31 GMT -5
HOLD IT! RIGHT THERE! I don't think the law allows you to have THAT MUCH fun. Better stop enjoying that new toy so much. You may get in trouble! 8^)
|
|
Getta Grip
noticing nice landscape pebbles
Member since November 2016
Posts: 81
|
Post by Getta Grip on Apr 4, 2017 12:32:01 GMT -5
How do you get AC from your battery? The power packs have a user interface with outlets and usb ports. So do the solar panels. I use an inverter. They change the 12V DC to 115 V AC. Here's a link to some Harbor Freight inverters. Just as a point of reference, 750 Watts = 1 horsepower. www.harborfreight.com/catalogsearch/result?q=inverter |
|
Getta Grip
noticing nice landscape pebbles
Member since November 2016
Posts: 81
|
Post by Getta Grip on Apr 3, 2017 15:17:17 GMT -5
I'm pretty new to slabbing. I'm curious how thick you cut your slabs? I'm guessing different thicknesses for different purposes. Maybe specimen slabs would be thicker than cab slabs and maybe large cabs will be thicker than small ones.
What thicknesses do you cut?
Thanks
Glen
|
|
Getta Grip
noticing nice landscape pebbles
Member since November 2016
Posts: 81
|
Post by Getta Grip on Mar 31, 2017 20:44:23 GMT -5
OK, I have learned many rock things from RTH and that is some names of rocks. I think some of look like "leaverite". HA Don't test me because it is a guess. Yea, My piece of Uglisite was ugly on the outside too. I should have posted a picture of it too. It is black and kind of poop looking. I should have called it leaverite then, but when my knife wouldn't scratch it, I had to know. |
|
Getta Grip
noticing nice landscape pebbles
Member since November 2016
Posts: 81
|
Post by Getta Grip on Mar 31, 2017 14:32:48 GMT -5
Two out of the three don't look that ugly to me. Peace, Rich Maybe ugly is in the eye of the beholder? This is evidenced in the fact that my wife still likes me. (and her vision is good! go figure)  |
|
Getta Grip
noticing nice landscape pebbles
Member since November 2016
Posts: 81
|
Post by Getta Grip on Mar 31, 2017 14:20:51 GMT -5
Similar to this stuff maybe? super hard material. I think it's kinda pretty but it really taxed my saw.

That looks like Pet wood. Nice piece. I like the colors |
|
Getta Grip
noticing nice landscape pebbles
Member since November 2016
Posts: 81
|
Post by Getta Grip on Mar 31, 2017 12:41:38 GMT -5
Here is another Mr. Ugly.........I threw it into the "Grandkids" pile..  Yea, It's the same kind of ugly too. It has lots of interesting features and colors but they just don't seem to look good together. |
|
Getta Grip
noticing nice landscape pebbles
Member since November 2016
Posts: 81
|
Post by Getta Grip on Mar 31, 2017 12:38:26 GMT -5
Im thinking if that was polished it would look pretty nice. Is the image a dry stone? No it's wet and there are a lot of voids full of what appears to be rust. |
|
Getta Grip
noticing nice landscape pebbles
Member since November 2016
Posts: 81
|
Post by Getta Grip on Mar 31, 2017 9:18:00 GMT -5
You should see some of the ugly crap I have discovered inside some very promising looking rocks. OK! Let's see 'em.  |
|
Getta Grip
noticing nice landscape pebbles
Member since November 2016
Posts: 81
|
Post by Getta Grip on Mar 31, 2017 9:03:02 GMT -5
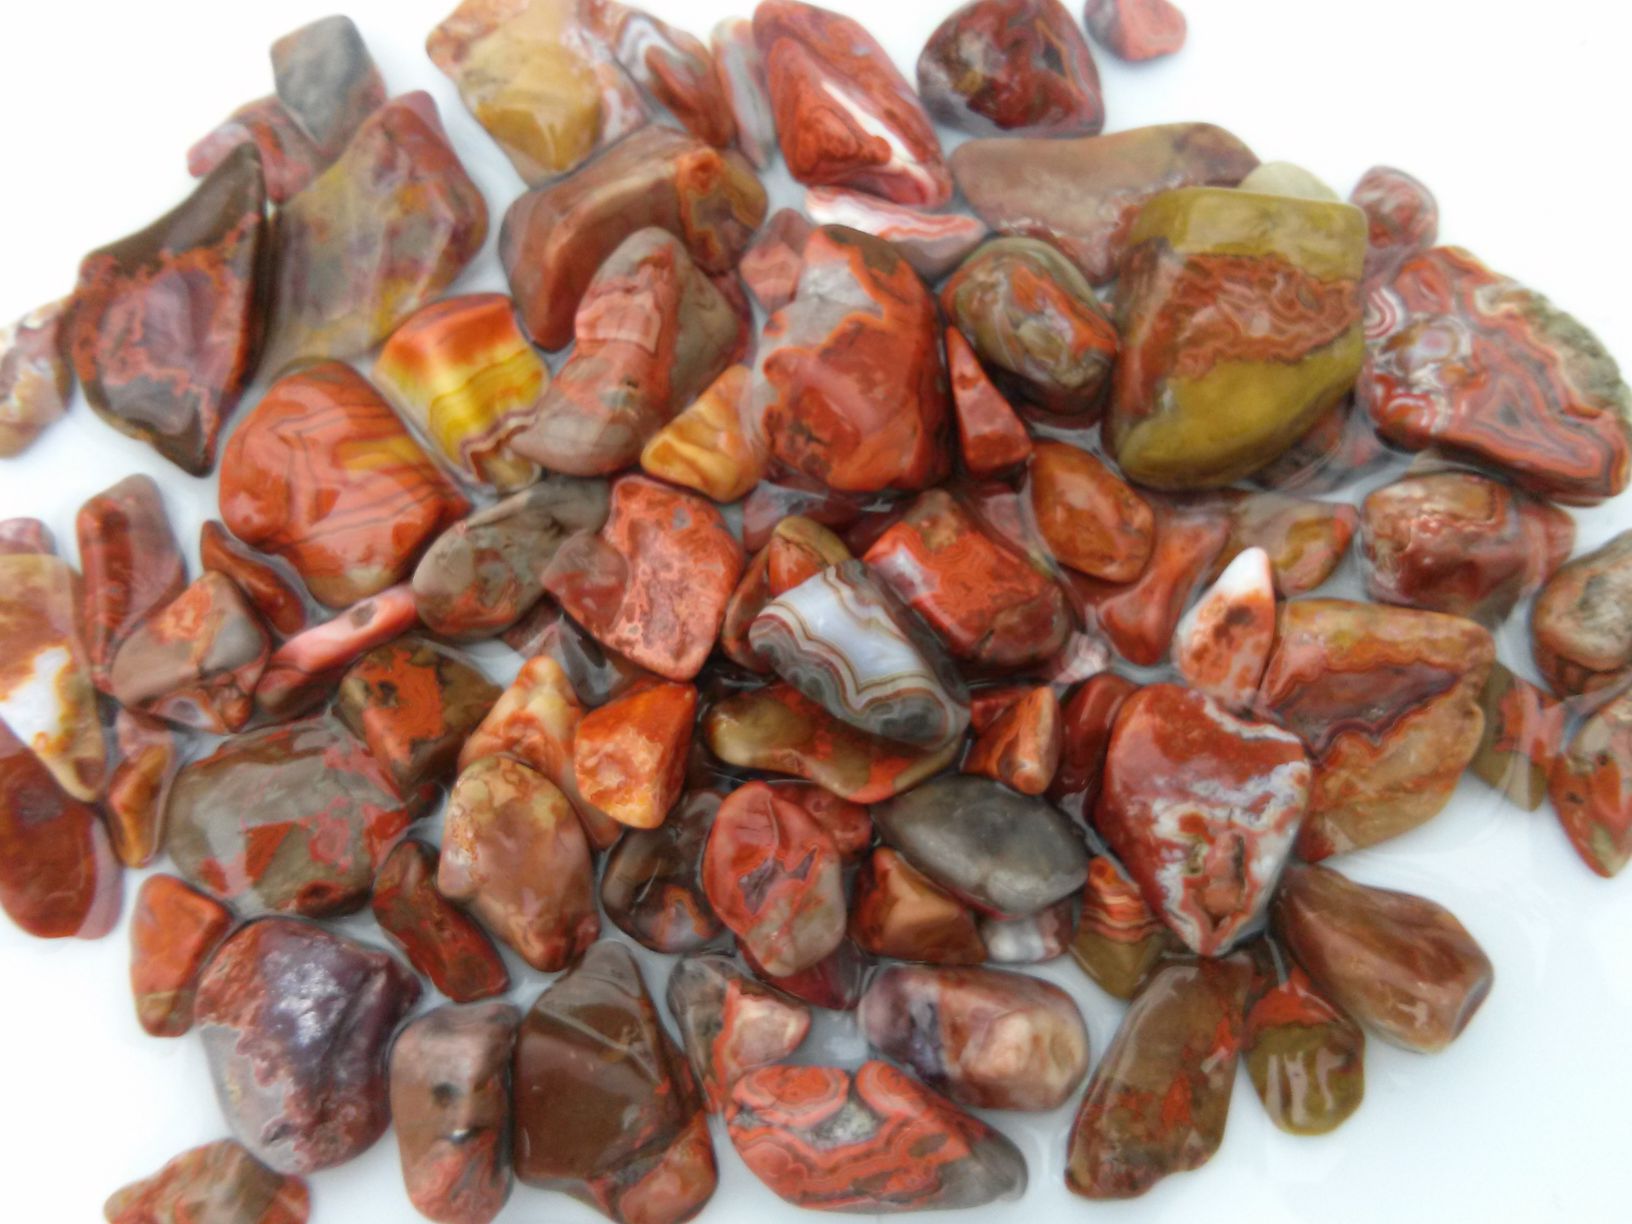
Want to see who has the ugliest slab? Here is my offering. I have named it "Uglisite". This stuff is hard. Quartz wont scratch it. Note how the image is reminiscent of toxic waste gently flowing into a slow moving stream. The greens have a decidedly mucus appearance and the random streaks of nasty brown material highlight the orange vugs of rust that are incoherently banded through the slab. Truly this is the ugliest slab I have cut. 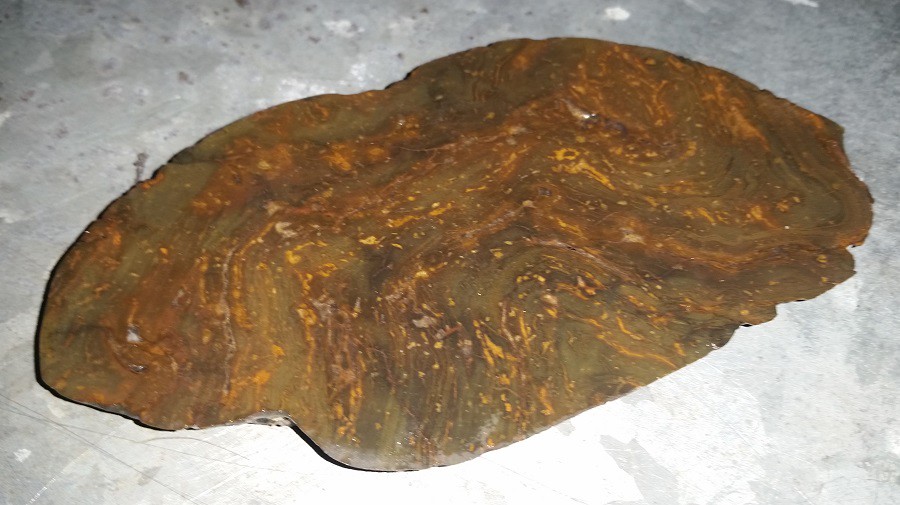 Uglisite Uglisite by Glen Ray, on Flickr |
|
Getta Grip
noticing nice landscape pebbles
Member since November 2016
Posts: 81
|
Post by Getta Grip on Mar 28, 2017 8:49:58 GMT -5
This does not appear to be working.
|
|
Getta Grip
noticing nice landscape pebbles
Member since November 2016
Posts: 81
|
Post by Getta Grip on Mar 27, 2017 17:56:26 GMT -5
Greetings Rockers!
I would like to find plans for a DIY starter tumbler. I would like to teach folks how to build and use a small starter tumbler.
I'm thinking that if I could find a source for inexpensive motors, and a good idea for inexpensive barrels, the rest is easy and cheap.
So what do you think? I'm looking for good ideas.
|
|
Getta Grip
noticing nice landscape pebbles
Member since November 2016
Posts: 81
|
Post by Getta Grip on Mar 26, 2017 8:53:30 GMT -5
|
|
Getta Grip
noticing nice landscape pebbles
Member since November 2016
Posts: 81
|
Post by Getta Grip on Mar 26, 2017 8:34:54 GMT -5
By the time you're done with that you might not want to get it dirty cutting rocks... Just sayin'.  LOL, I don't think there is too much chance of that. I'm learning how to use it now. I found out it cuts about 1 inch in six minutes. I also discovered it lifts about a gallon of oil out of the sump when it's running. I made a couple cuts that were a bit hot. I slabbed half of a 5-1/2" egg yesterday. I can't decide which to cut , some of the stones I have collected , a 10# rainbow obsidian or a 25# Brazilian agate. LOL, I don't think there is too much chance of that. I'm learning how to use it now. I found out it cuts about 1 inch in six minutes. I also discovered it lifts about a gallon of oil out of the sump when it's running. I made a couple cuts that were a bit hot. I slabbed half of a 5-1/2" egg yesterday. I can't decide which to cut , some of the stones I have collected , a 10# rainbow obsidian or a 25# Brazilian agate.
I know! I'LL CUT THEM ALL!!! 
While they are cutting I can start working on those cab machines I bought. I'll probably give you a call about that. I have a few questions about the wheels.
|
|
Getta Grip
noticing nice landscape pebbles
Member since November 2016
Posts: 81
|
Post by Getta Grip on Mar 25, 2017 10:22:01 GMT -5
64# 2.5 Oz.
58# 7 Oz.
Great idea! Thanks for the fun!
|
|
Getta Grip
noticing nice landscape pebbles
Member since November 2016
Posts: 81
|
Post by Getta Grip on Mar 25, 2017 9:07:47 GMT -5
Here's more pictures of my progress.
The angle iron for mounting the cover to the backplate.
 Angle iron for backplate by Glen Ray, on Flickr Angle iron for backplate by Glen Ray, on Flickr
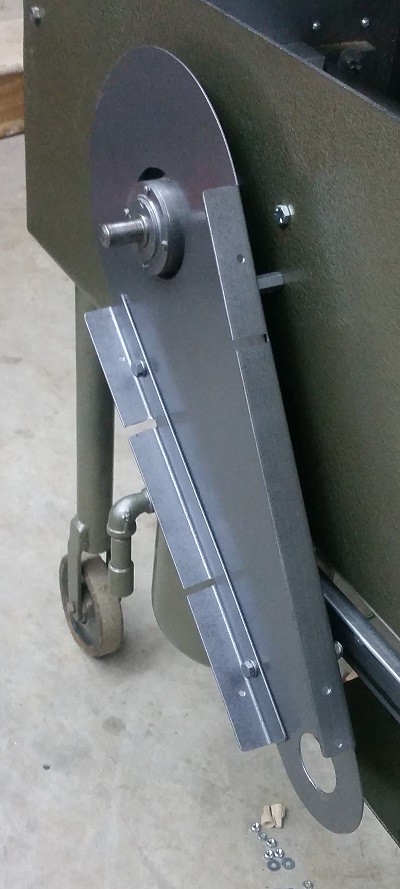
Here's the mounting couplings on the backplate. There are bolts going through the angle iron into the mounting couplings.
 mounting couplings on backplate by Glen Ray, on Flickr mounting couplings on backplate by Glen Ray, on Flickr
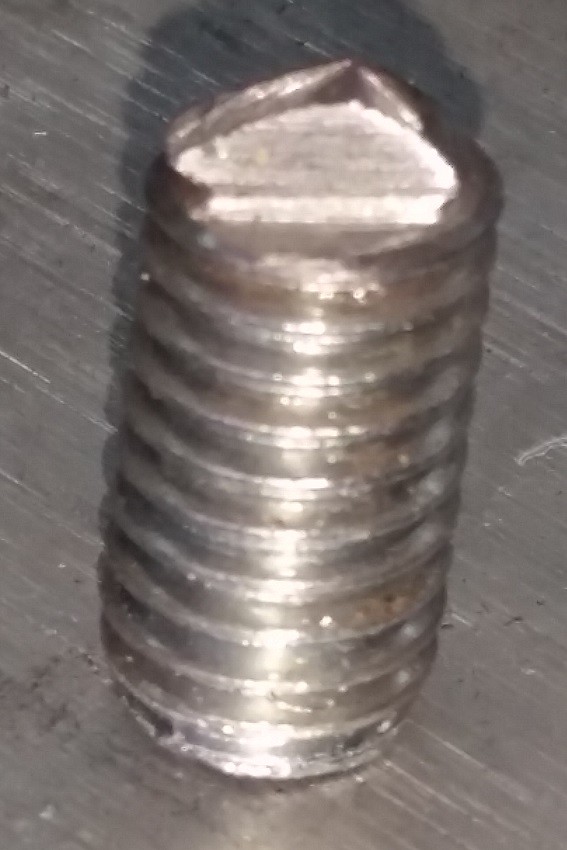
So, how do you transfer the location of the mounting couplings, onto the saw? You make transfer screws. You sharpen a piece of threaded rod ( with the point as centered as you can) and you cut a flat on each side of the point to facilitate installation and removal from the mounting couplings.
 Transfer screw by Glen Ray, on Flickr Transfer screw by Glen Ray, on Flickr
Here's the transfer screw installed in the mounting coupling.
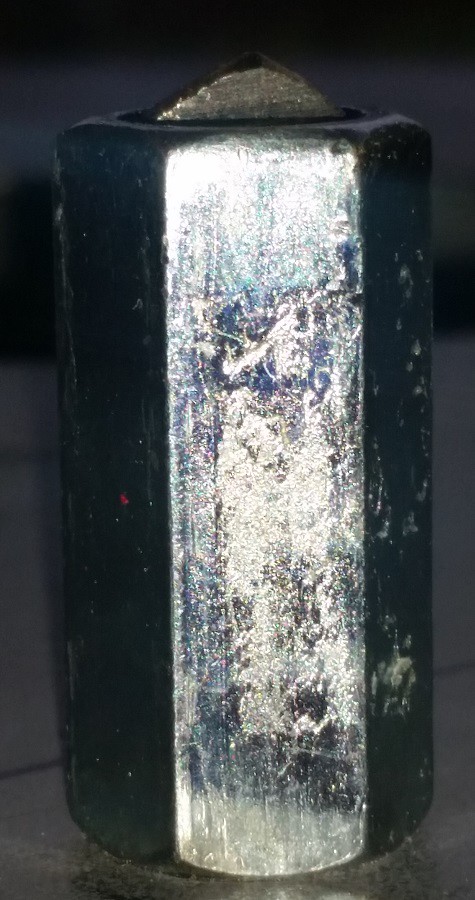 Transfer screw in mounting coupling by Glen Ray, on Flickr Transfer screw in mounting coupling by Glen Ray, on Flickr
I located the backplate on the saw (with transfer screws installed) and gently tapped each bolt that had a transfer screw against the saw. I used a small hammer for this.
Preparing to transfer screw locations by Glen Ray, on Flickr
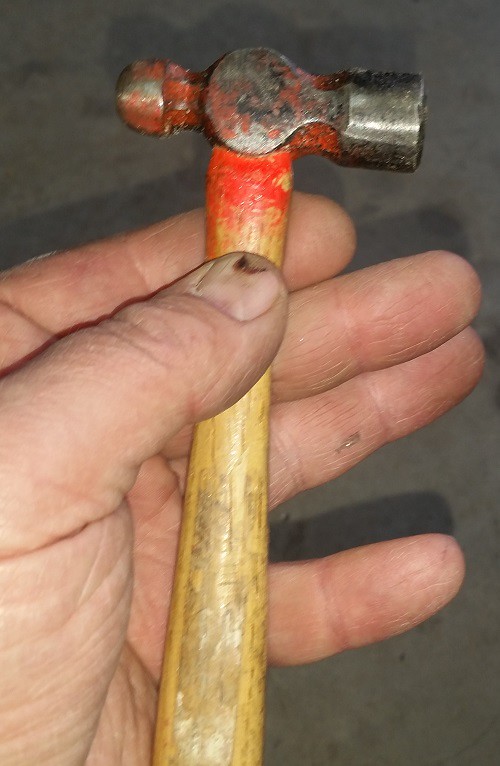 small hammer by Glen Ray, on Flickr small hammer by Glen Ray, on Flickr
The transfer screws make small marks where the bolt holes need to be.
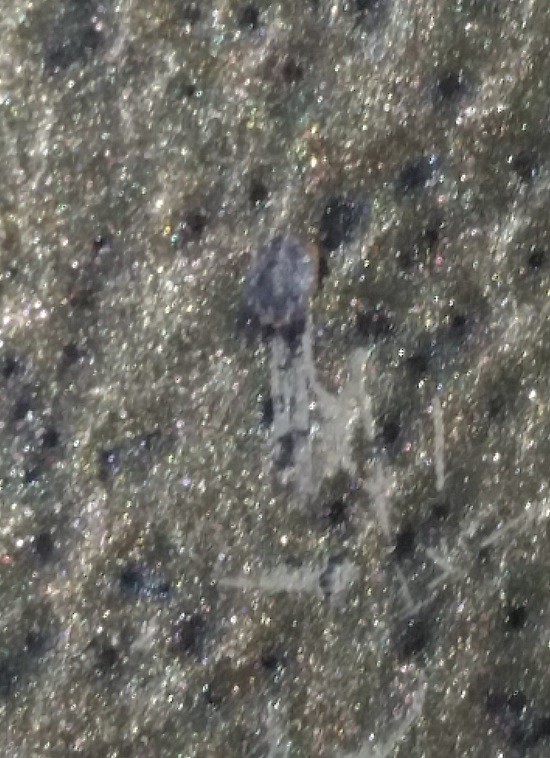 Transfer mark by Glen Ray, on Flickr Transfer mark by Glen Ray, on Flickr
I drilled the holes on the transfer marks
 Mounting holes by Glen Ray, on Flickr Mounting holes by Glen Ray, on Flickr
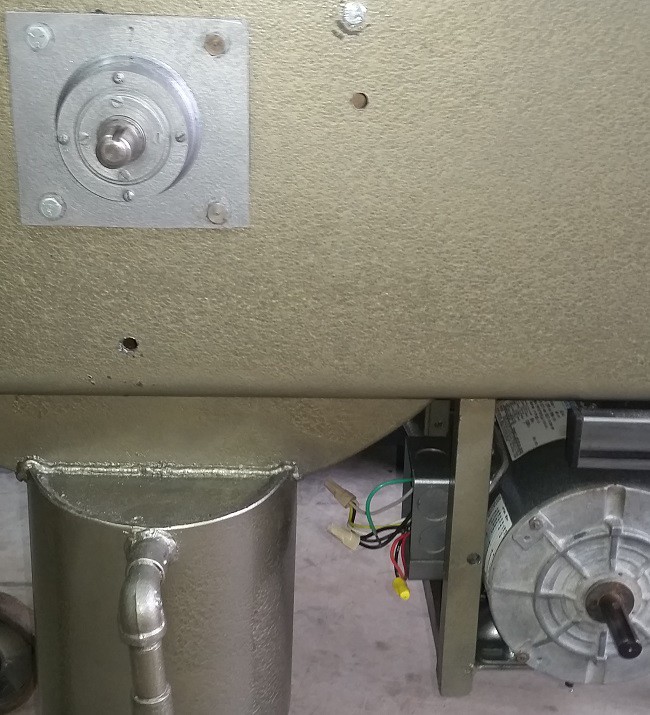
After drilling the holes I mounted the painted backplate.
 Backplate painted and mounted by Glen Ray, on Flickr Backplate painted and mounted by Glen Ray, on Flickr
Here's the finished installation.
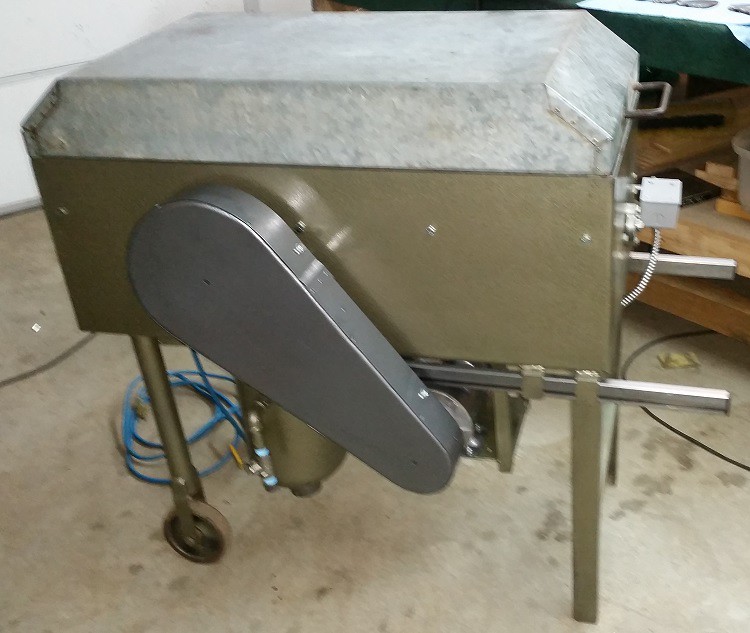 Finished drive side by Glen Ray, on Flickr Finished drive side by Glen Ray, on Flickr
|
|
Getta Grip
noticing nice landscape pebbles
Member since November 2016
Posts: 81
|
Post by Getta Grip on Mar 24, 2017 8:24:26 GMT -5
A lot prettier than last time I saw it in person. Yea, I'll hopefully get the belt guard done and mounted today. I'm going to start a new post on the saw after that.
I still have a few details to complete. I have to get the motor grounded, (I can't get to it with the motor where it is) and The pulley ratio was a bit slow so I ordered a new drive pulley and belt. They should be here today. I just received my oil yesterday. So with any luck, I'll get my first cut today.
That saw does look much better than when we dragged it out of the mud puddle. 
|
|
Getta Grip
noticing nice landscape pebbles
Member since November 2016
Posts: 81
|
Post by Getta Grip on Mar 24, 2017 8:14:57 GMT -5
Question from a sheet metal moron. When doing the hammering would you work the actual fold area or can you wail away on the easier to hit edge of the metal and work your way in? DirtCleaner I started by hitting the outside edge to get the metal moving the right way. By the time I was done I hammered all of it.
I think jakesrocks is right though. If I were to do it again I'd get a pneumatic hammer (like Harbor Freight Item# 69866 or #92037) It would have made the job much faster and easier.
Mar 23, 2017 7:36:31 GMT -7 jakesrocks said:
From an old retired sheet metal guy, That's one sweet looking belt guard. I've formed pieces over a wooden buck many times. It's much easier with a pneumatic hammer, but an old tinners hammer will do the trick.
|
|
Getta Grip
noticing nice landscape pebbles
Member since November 2016
Posts: 81
|
Post by Getta Grip on Mar 23, 2017 16:43:35 GMT -5
That's a really great setup! After reading this thread I'm pretty sure I'm going to have to repent. I'm sure the Bible says, "Thou shalt not covet thy neighbors saw or his rocks or any other thing that is part of thy neighbors rock hobby." Jasper 9:11
I'm in trouble with that one, I tell ya!
|
|
Getta Grip
noticing nice landscape pebbles
Member since November 2016
Posts: 81
|
Post by Getta Grip on Mar 22, 2017 14:31:19 GMT -5
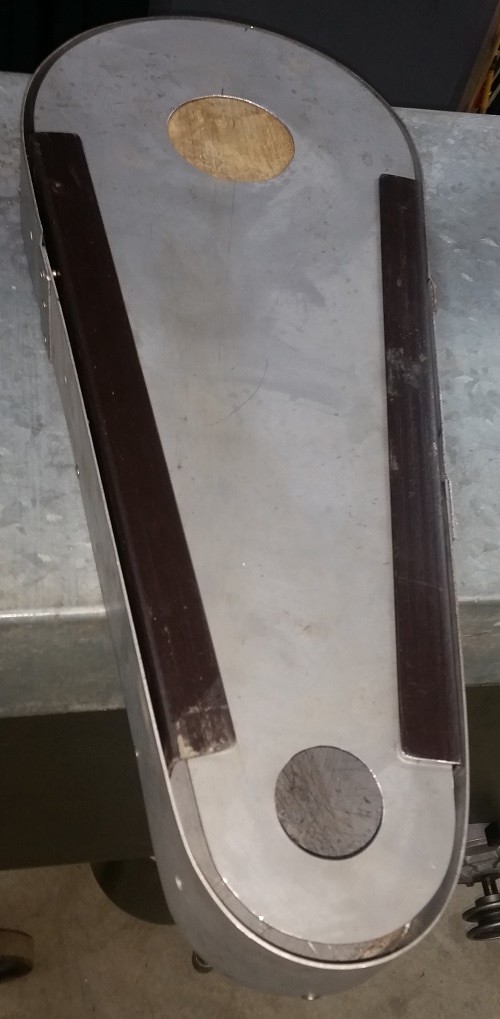
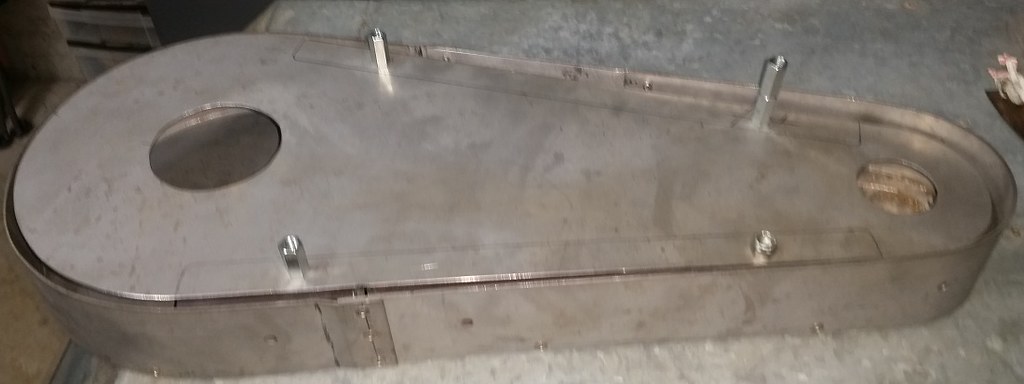
I have attached the sides to the cover. I used 15 (3/16 diameter x 1/4" long) Stainless Steel pop rivets. to complete it 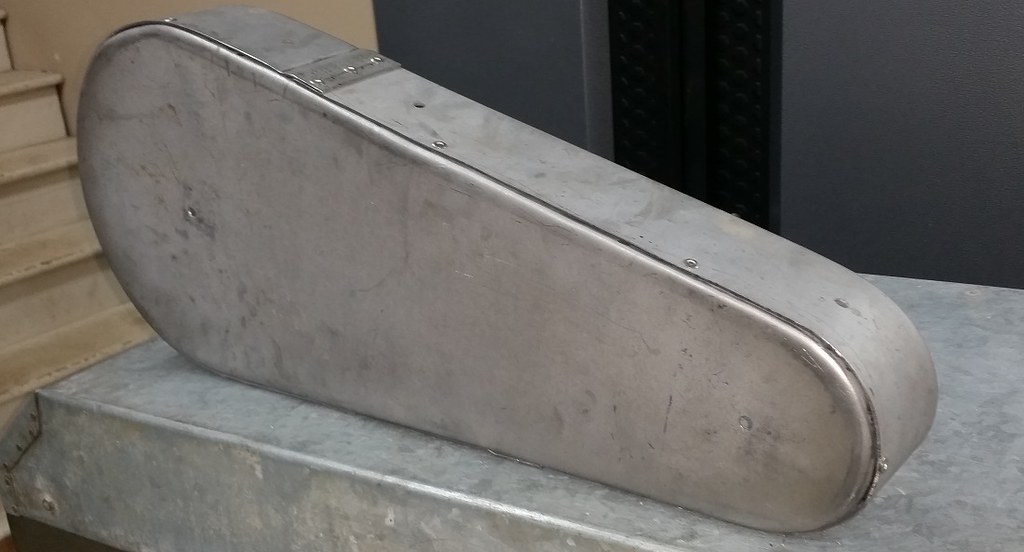 Cover Cover by Glen Ray, on Flickr Here's the cover setting on top of the saw 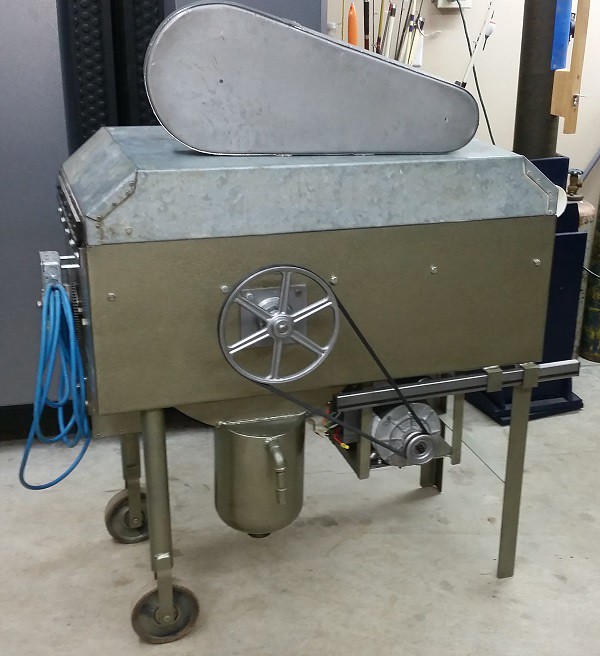 Saw and cover Saw and cover by Glen Ray, on Flickr Here's the cover setting on the pulleys. It is not mounted. It is just setting on the pulleys. 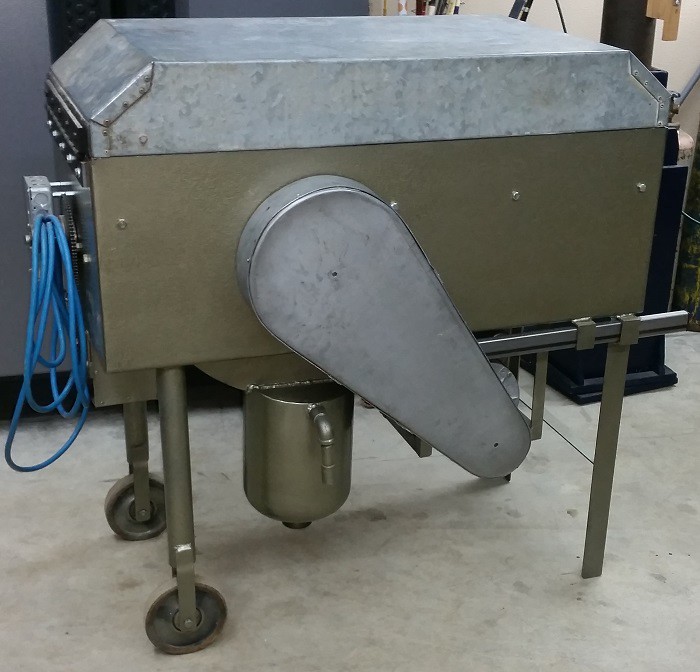 Cover setting on pulleys Cover setting on pulleys by Glen Ray, on Flickr Here's the layout for the backplate. I will be attaching angle iron (from an old bedframe) to the backplate. The cover will bolt to the angle iron.  Backplate layout Backplate layout by Glen Ray, on Flickr More to come as the project progresses. |
|


 LOL, I don't think there is too much chance of that. I'm learning how to use it now. I found out it cuts about 1 inch in six minutes. I also discovered it lifts about a gallon of oil out of the sump when it's running. I made a couple cuts that were a bit hot. I slabbed half of a 5-1/2" egg yesterday. I can't decide which to cut , some of the stones I have collected , a 10# rainbow obsidian or a 25# Brazilian agate.


