Copper Electro Etching Tutorial+ QD cuff bracelet tutorial
Oct 9, 2022 9:48:08 GMT -5
RWA3006, Rockoonz, and 14 more like this
Post by liveoak on Oct 9, 2022 9:48:08 GMT -5
Copper Electro Etching Tutorial + Quick & Dirty Cuff Bracelet Tutorial
Not sure how much interest there would be, but I was working on a bracelet and thought I'd document the process if anyone was.
Many people etch copper using Ferric Chloride, which I also did for many years.
But in recent years I've turned to Electricity & a salt water process.
Equipment Needed :
-DC Power Supply / Rectifier with clips for positive & negative
-Canning/Pickling Salt – mixed 3 1/3 cups of salt to 10 cups of water (to make a saturated solution)
-Copper or Stainless Steel Mesh – goes in the bottom of the plastic container and gets the copper wire attached to it. This will be attached to the negative side of the rectifier .
(I got mine from McMaster Carr)
-Copper wire (20 ga) - attached to copper mesh or Stainless Steel Mesh(above)
-Sterling Silver wire (20 ga) = This has to be attached to the piece you are etching AND to the positive side of the rectifier
-Plastic container
-Styrofoam
-Double sided tape
-Copper Sheet
Gauges I use : Bracelet- 16 ga, Pendants 20 ga, Earrings- 24 ga
Note- I have read of people using “battery wall warts” instead of the rectifier. I've never tried it so can not comment, other then to say, if you don't have a rectifier you might research that avenue.
Getting Started:
Image Quality
I’ve had the best results starting with a clear black & white line drawing.
There are some useful Dover Clip art books that come with a CD, in many genres. But of course nowadays there is an infinite source on the web.
Image onto Metal:
Basically in any etching you obviously have to get your image onto the metal.
I have used overhead projection film, and ironed designs onto clean metal.
I've also had pretty good luck with using a paper people use to make circuit boards for computers,
Note- if using printer ink /laminator the design must be done in reverse, as you will have to turn the design over to apply it to the metal. With the vinyl cutter- the design is right side up.
So, recently I've turned to a vinyl cutter, as it transfers pretty good detail & it holds up to the etching process pretty good.
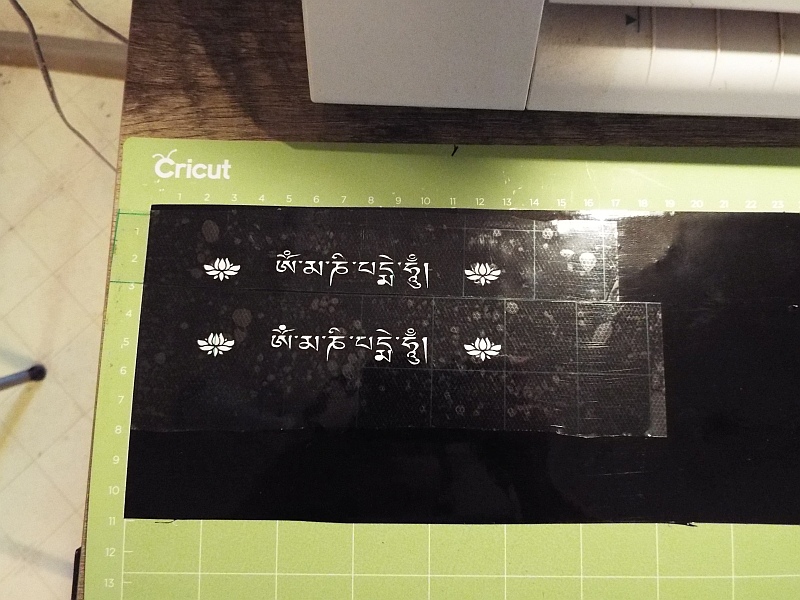
Prepping the metal :
First off the metal has to be squeaky clean, so that the water runs off the copper & doesn't pool.
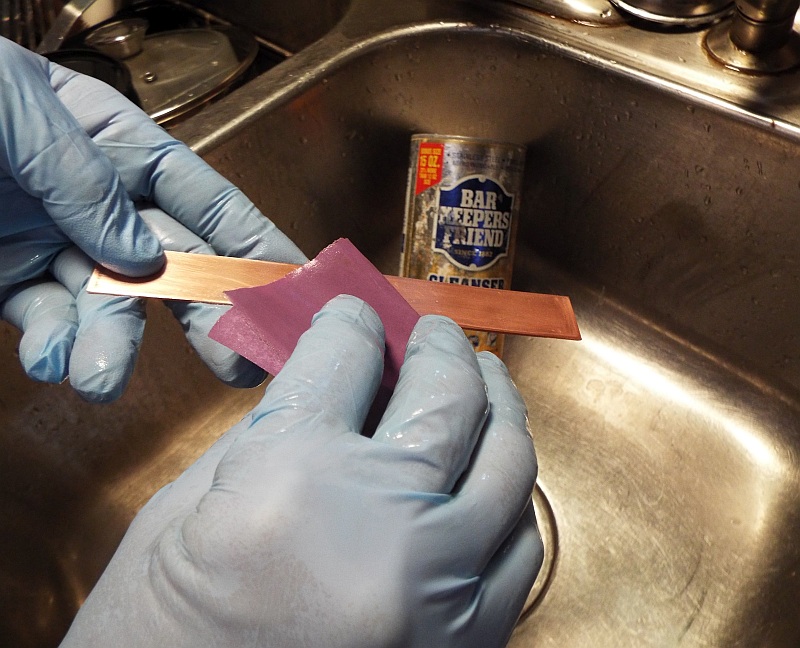
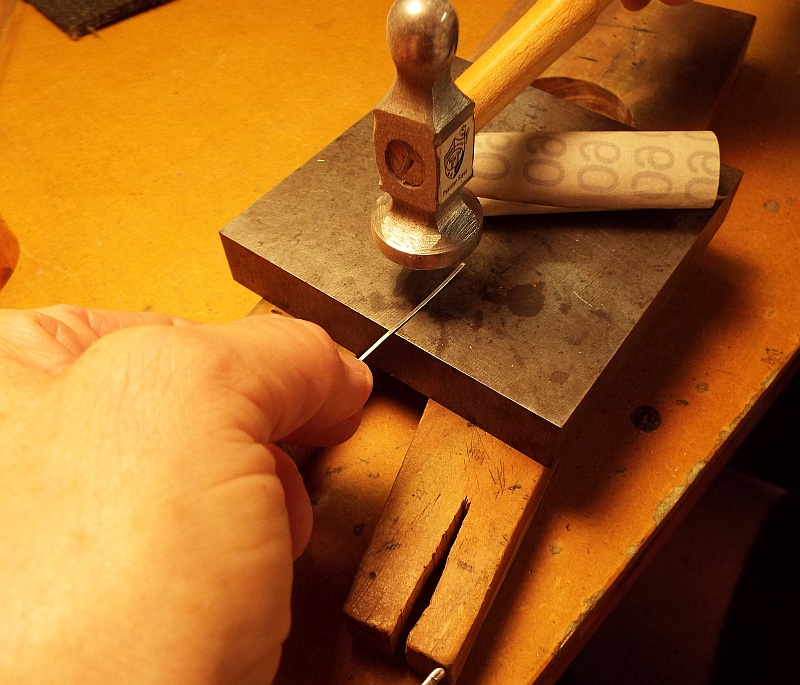
Next you need to attach the sterling silver wire to the back of the piece you're etching.
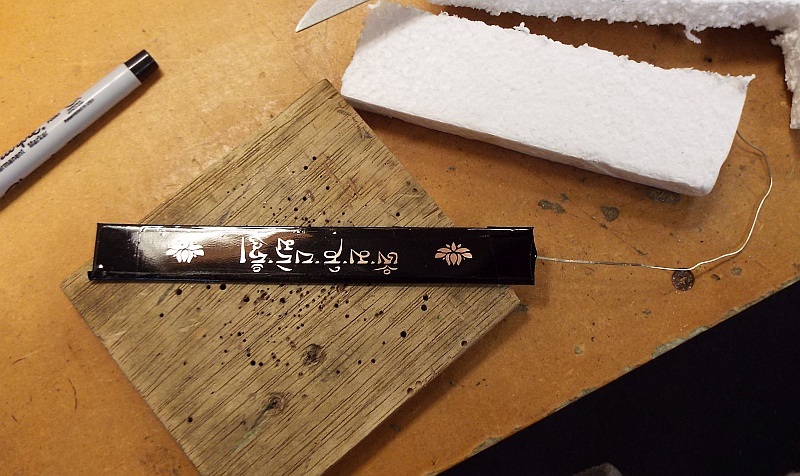
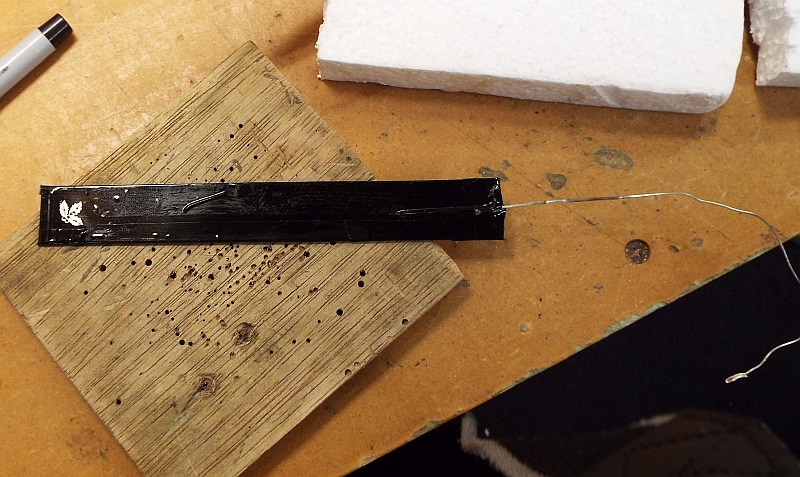
Alternatively: You could make your piece over sized & leave one end bare, with a hole drilled in it, and fasten your wire there, twisting it tightly, to make a good contact.
Obviously this bare section you’d plan to cut off, when finishing the piece.
Styrofoam float :
Next up is to cut a piece of scrap Styrofoam larger than the piece your etching .
This is used as a float to hold your piece upside down in the etching tank.
I attach my metal piece to the Styrofoam with a double sided tape.
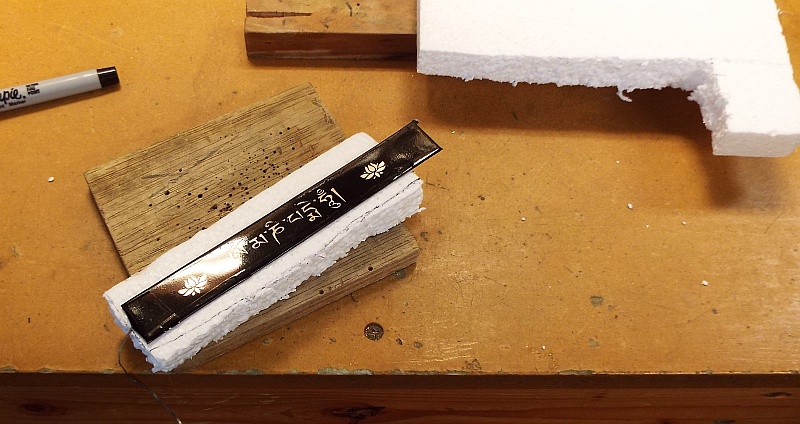
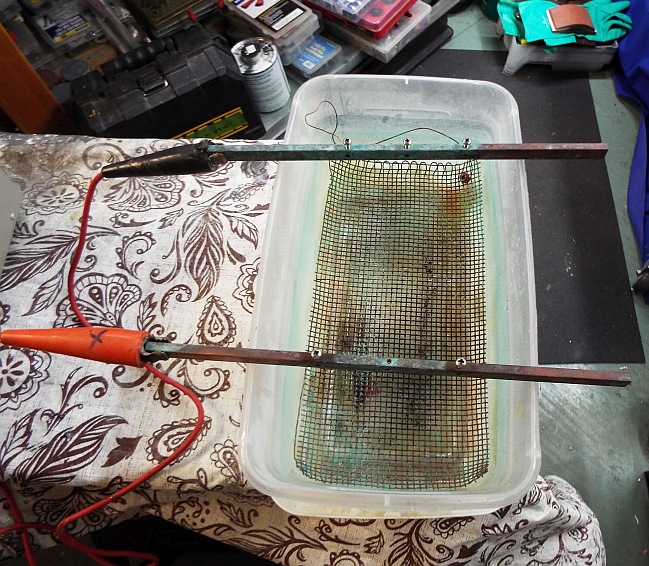
You need to connect the piece you are etching, with the stainless steel wire to the POSITIVE (cathode) side of the rectifier .
Note -I have 2 copper “bus” bars, that I attach mine to.
The “bus” bar makes suspending the “float” in the middle of the tank easier.
You then need to connect the copper or stainless steel mesh to the NEGATIVE (anode) side of the rectifier .
Then you turn on the unit, and adjust it to approx 2.5 volts for 20- 45 minutes depending on the depth and detail of the design.
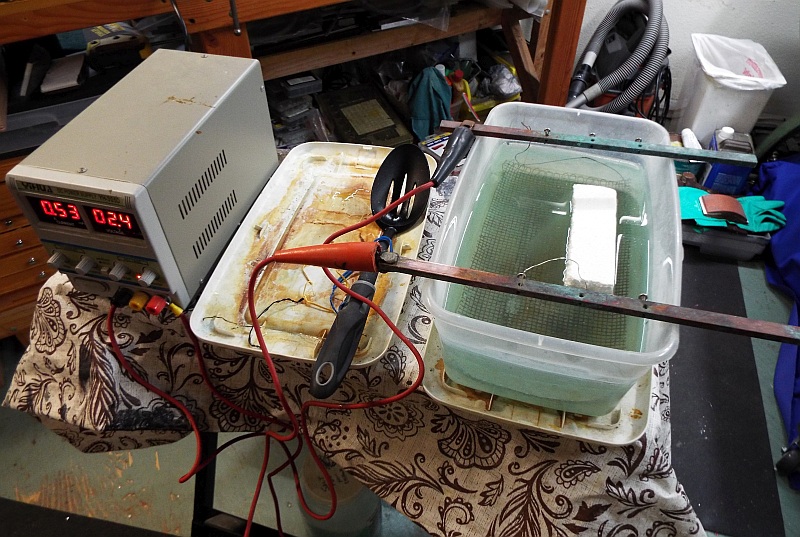
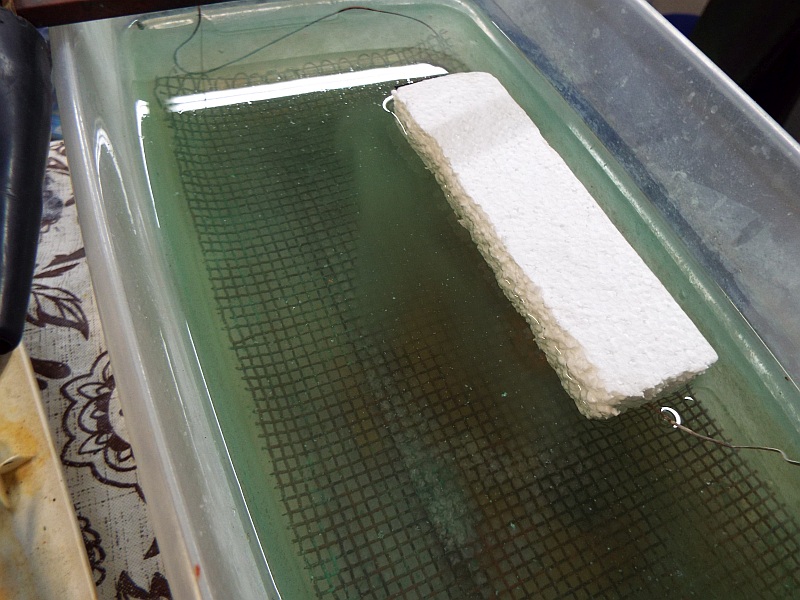
For this bracelet, I did it for 45 minutes, as it's a large design and I wanted it deep.
Also, since I was using the vinyl, I could leave it longer.
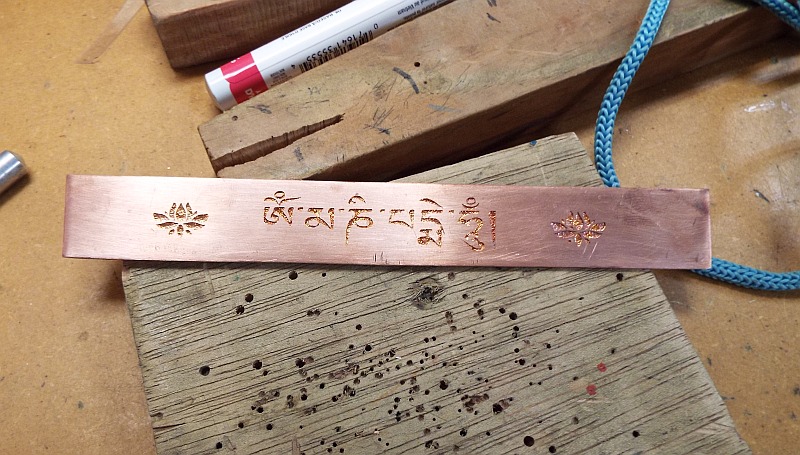
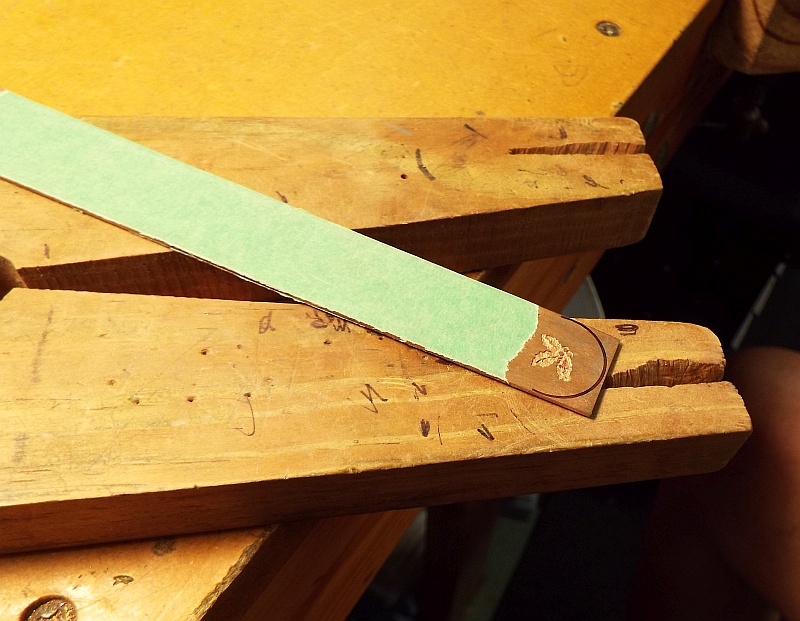
That's really all there is to it on the etching.
Finishing the bracelet:
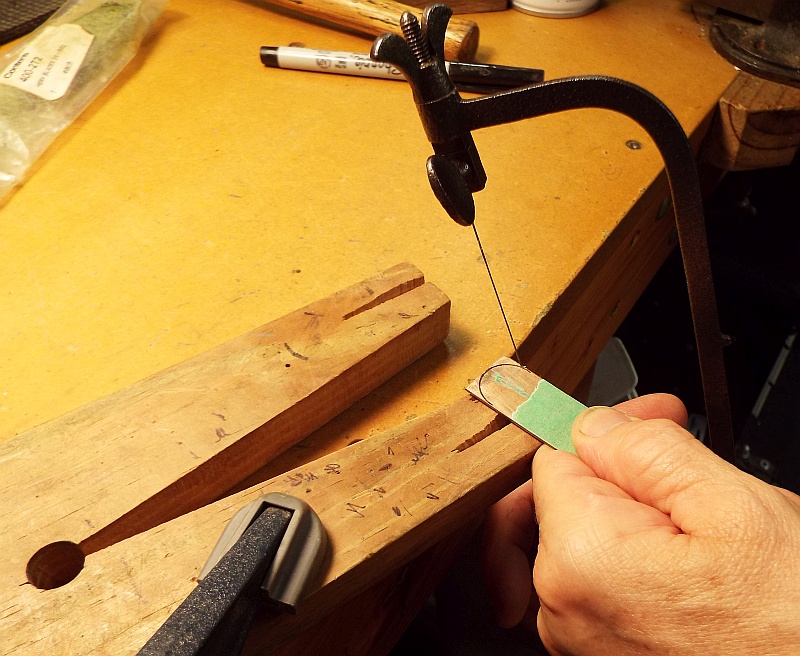
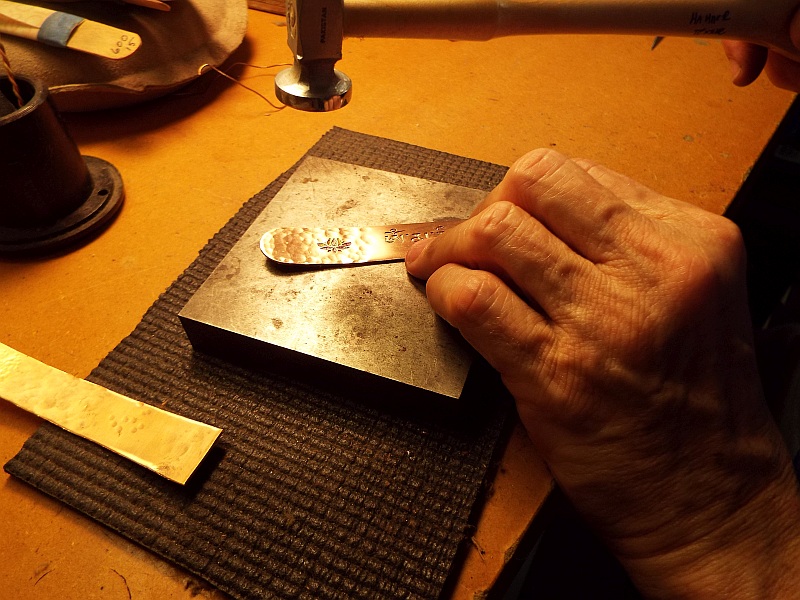
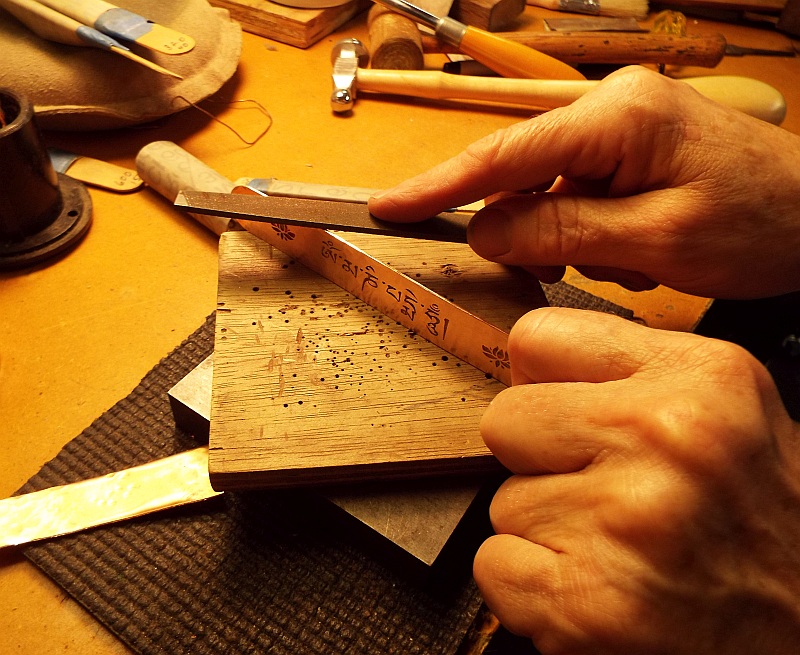
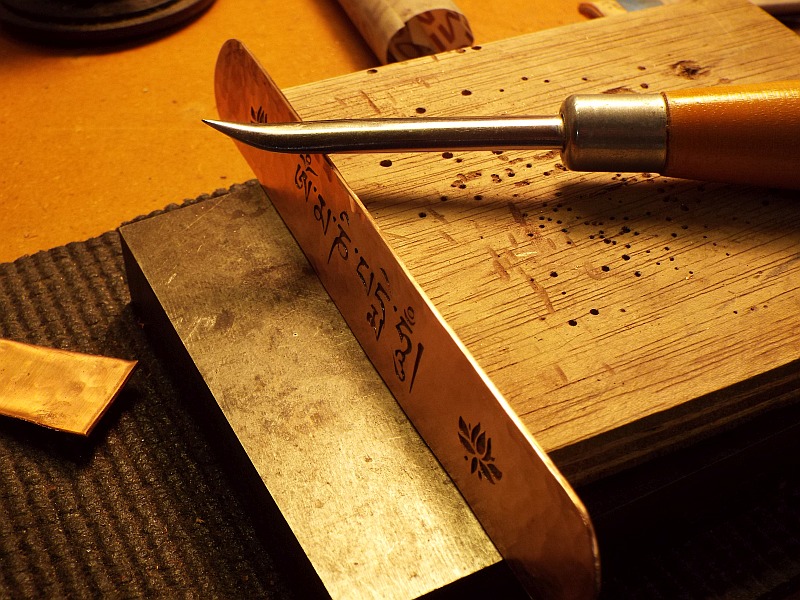
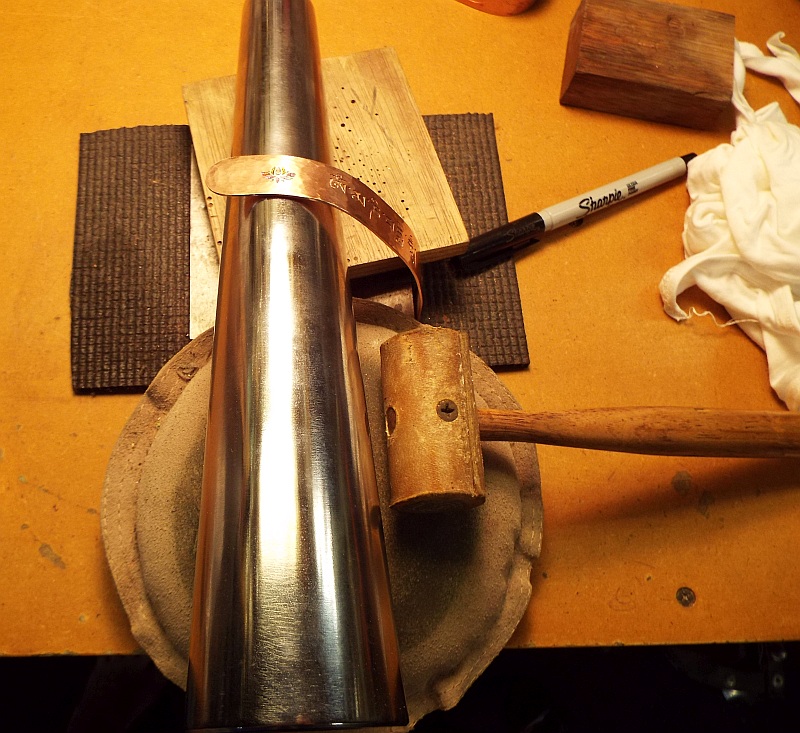
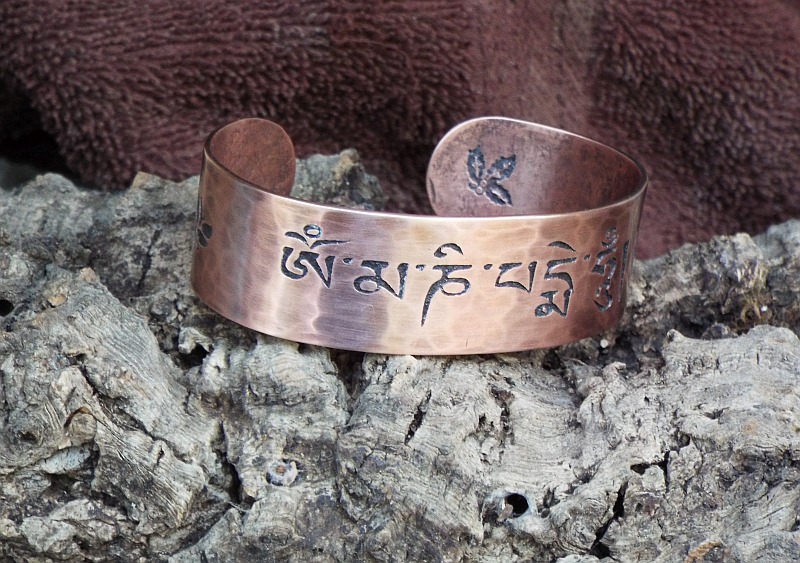
I then shaped it into the “cuff” on my bracelet mandrel (I've also heard of using a baseball bat).
You want to be sure to get the shape even, so go slow.
Liver of Sulfur & Renaissance Wax
I then followed up with a dunk in warm water / liver of sulfur mix to highlight the texture.
Lots of Possibilities :
Front of Earrings & back of pendant with a shooting star motif etched in, which I then painted with alcohol ink & sealed it with Sculpt Nouveau’s, Clear Guard .
Front of pendant & back of earrings engine turned for additional interest .
Hope this helps someone.
Any questions, feel free to ask,
Patty
Not sure how much interest there would be, but I was working on a bracelet and thought I'd document the process if anyone was.
Many people etch copper using Ferric Chloride, which I also did for many years.
But in recent years I've turned to Electricity & a salt water process.
Equipment Needed :
-DC Power Supply / Rectifier with clips for positive & negative
-Canning/Pickling Salt – mixed 3 1/3 cups of salt to 10 cups of water (to make a saturated solution)
-Copper or Stainless Steel Mesh – goes in the bottom of the plastic container and gets the copper wire attached to it. This will be attached to the negative side of the rectifier .
(I got mine from McMaster Carr)
-Copper wire (20 ga) - attached to copper mesh or Stainless Steel Mesh(above)
-Sterling Silver wire (20 ga) = This has to be attached to the piece you are etching AND to the positive side of the rectifier
-Plastic container
-Styrofoam
-Double sided tape
-Copper Sheet
Gauges I use : Bracelet- 16 ga, Pendants 20 ga, Earrings- 24 ga
Note- I have read of people using “battery wall warts” instead of the rectifier. I've never tried it so can not comment, other then to say, if you don't have a rectifier you might research that avenue.
Getting Started:
Image Quality
I’ve had the best results starting with a clear black & white line drawing.
There are some useful Dover Clip art books that come with a CD, in many genres. But of course nowadays there is an infinite source on the web.
Image onto Metal:
Basically in any etching you obviously have to get your image onto the metal.
I have used overhead projection film, and ironed designs onto clean metal.
I've also had pretty good luck with using a paper people use to make circuit boards for computers,
along with a laminator to put the image onto the clean metal.
The problem with these techniques is that it relies on using a very good quality name brand laser printer ink for your home printer,
and frankly I'm too cheap to buy the name brand ink.
Note- if using printer ink /laminator the design must be done in reverse, as you will have to turn the design over to apply it to the metal. With the vinyl cutter- the design is right side up.
So, recently I've turned to a vinyl cutter, as it transfers pretty good detail & it holds up to the etching process pretty good.

Prepping the metal :
First off the metal has to be squeaky clean, so that the water runs off the copper & doesn't pool.
I clean the metal under the running water & wear gloves, because the oil from your hands will contaminate the metal.
I use Bar Keepers Friend under running water & some wet/dry sandpaper.

Next you need to attach the sterling silver wire to the back of the piece you're etching.
It's important to get a good contact , so I first flatten the wire on my bench block with a hammer, then I sand the wire lightly,
so I've exposed fresh metal. I then tape the wire to the back of the piece to etch.
You'll need to bend the wire down - as when you put the piece in the etching tank , it will be upside down floating .

Now make sure you seal the back well with packing tape or extra vinyl. Also if you haven't coated all the edges with the tape/vinyl,
then use a large sharpie marker to coat the edges of the metal.
You have to be a little creative to seal the tape to the back with the wire coming off it. Just do the best you can.
Basically everything you don't want etched must be sealed / masked well.

In this specific design I tried something different, as the bracelet was for a women named “ Holly”,
so I personalized it, and did a 2 sided etch, putting a holly leaf that will be on the inside of the bracelet.

Alternatively: You could make your piece over sized & leave one end bare, with a hole drilled in it, and fasten your wire there, twisting it tightly, to make a good contact.
Obviously this bare section you’d plan to cut off, when finishing the piece.
Styrofoam float :
Next up is to cut a piece of scrap Styrofoam larger than the piece your etching .
This is used as a float to hold your piece upside down in the etching tank.
I attach my metal piece to the Styrofoam with a double sided tape.
I suppose you could use packing tape, as long as you didn't cover your design, and tape it around the float.

Etching:

You need to connect the piece you are etching, with the stainless steel wire to the POSITIVE (cathode) side of the rectifier .
Note -I have 2 copper “bus” bars, that I attach mine to.
The “bus” bar makes suspending the “float” in the middle of the tank easier.
I suppose you could theoretically just attach the wires coming out of the tank directly to the leads (clips) on the rectifier.
It just needs to be a good solid connection, and have the float somewhat centered in the electrolyte bath.
It's most important that the 2 poles don't contact each other, or the circuit will short & no etching will happen.
You then need to connect the copper or stainless steel mesh to the NEGATIVE (anode) side of the rectifier .
Then you turn on the unit, and adjust it to approx 2.5 volts for 20- 45 minutes depending on the depth and detail of the design.
It's interesting to watch, as since the metal is floating upside down, you can physically see the metal coming off into the salt water.
I usually check it at around 20 min & use my fingernail to see how deep the etch is.
If nothing happens, go back & check the connections. That's usually the problem.


For this bracelet, I did it for 45 minutes, as it's a large design and I wanted it deep.
Also, since I was using the vinyl, I could leave it longer.
Printer ink, or sharpie markers won't last as long & start wearing off, so you need to watch them more closely.
I’ve been known to touch up an ink drawing so I could etch it longer.
Since I did a 2 sided design, and electro etching works better in “line of sight”,
I had to take my bracelet out of the tank, and reverse what was sealed, and what face was pointing down.
I did the second side for 20 more minutes, since it had etched a little while facing up the first round.Once it's as deep as you like, you need to clean off the vinyl and tape, in the sink.


Note- The salt water in the tank can be stored & reused a couple of times.
However keep in mind that when it's time to dispose of it, the water becomes contaminated with copper, so is poisonous to plants (and humans).
So be aware when you dump it or bring it to a disposal center.
That's really all there is to it on the etching.
Finishing the bracelet:
I then finished my bracelet by first sawing the ends round, and then did a hammer texture on the copper, followed by filing and burnishing the edges.
Make sure there are no sharp edges left before continuing,


I then shaped it into the “cuff” on my bracelet mandrel (I've also heard of using a baseball bat).
You want to be sure to get the shape even, so go slow.
Note- if your mandrel is metal you need to use a soft (rawhide or plastic) hammer, otherwise you will stretch the metal of the bracelet too much with a steel hammer.

Liver of Sulfur & Renaissance Wax
I then followed up with a dunk in warm water / liver of sulfur mix to highlight the texture.
But to keep it from being too dark, you need to burnish it afterwards.
I usually start with an old blue kitchen scrubby, followed by 0000 steel wool.
Once the color is to your liking, I follow up with a coat or 2 of Renaissance wax. 
Lots of Possibilities :
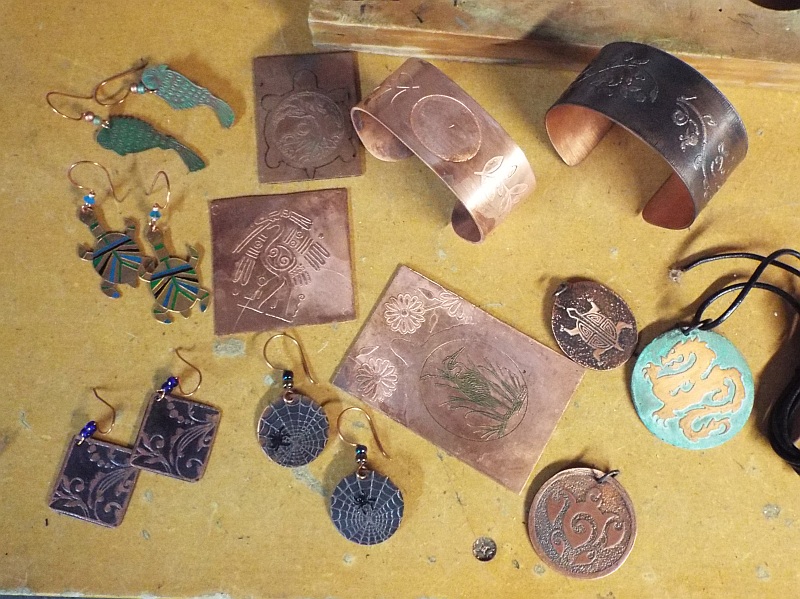
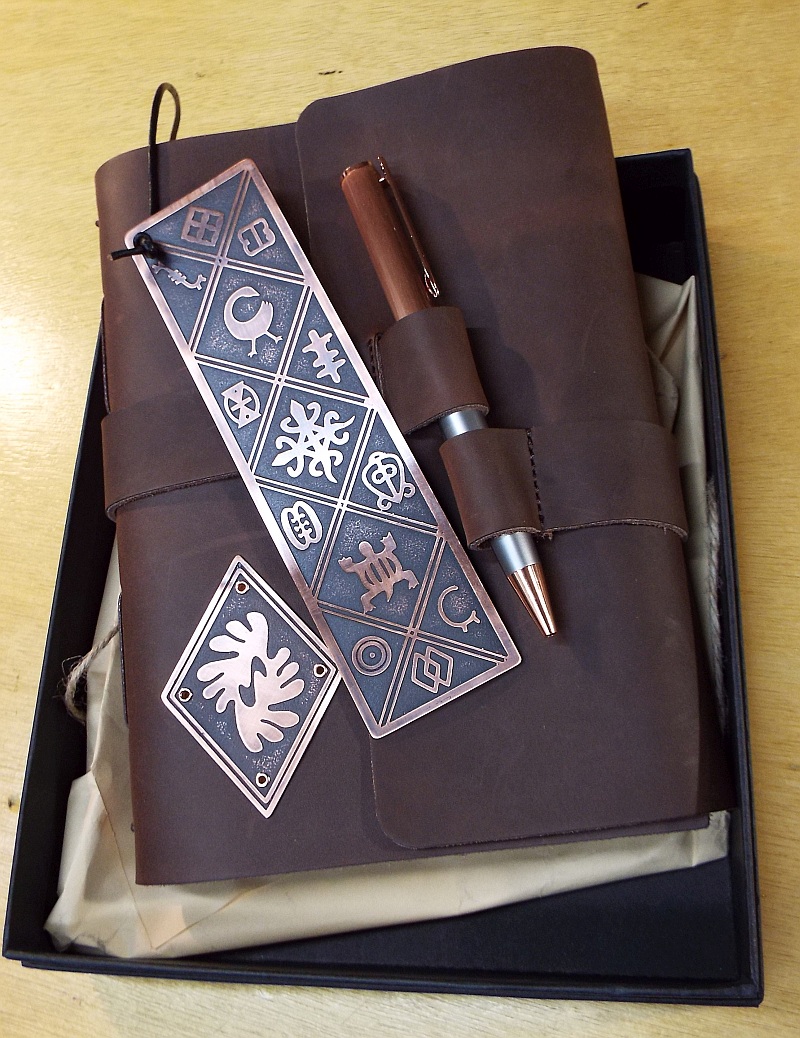
I've etched many things, from bracelets, earrings, and pendants, to bookmarks, machine badges and labels, etc.
I even recently did the cuff bracelet shown here, to now set a cabochon into it.
You're only limited by the size of the plastic tank you have & the amount of electricity you can feed it, and your imagination.

One last one-
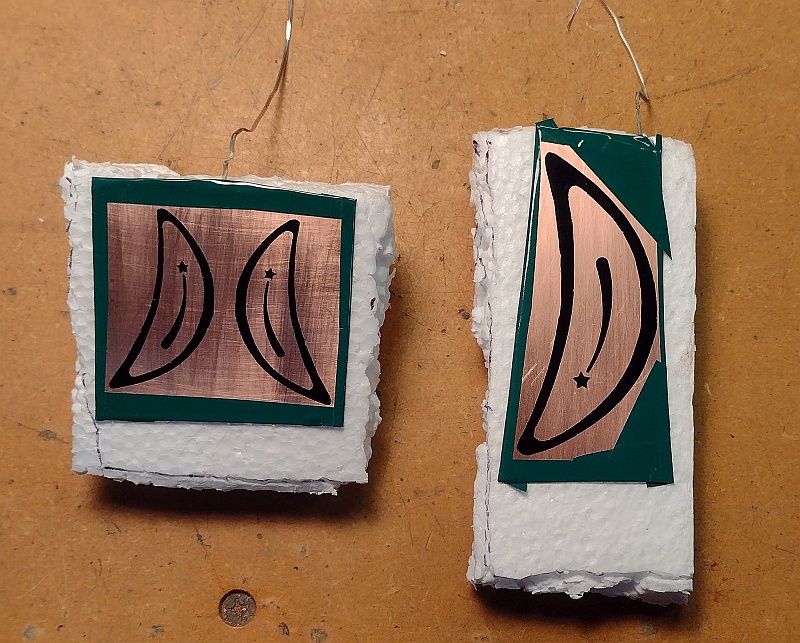
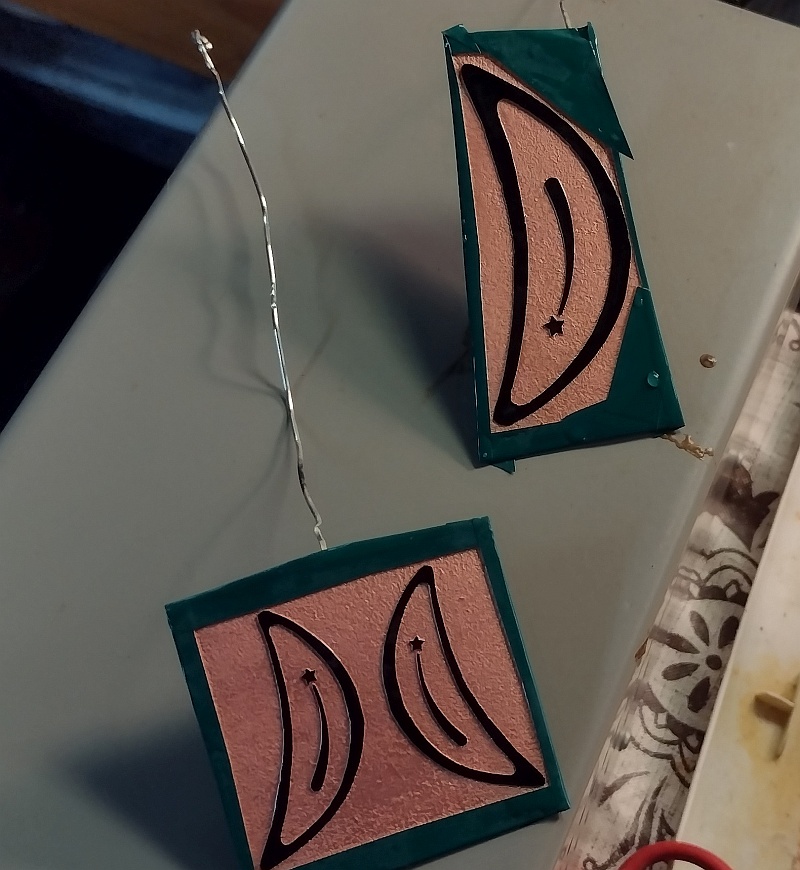
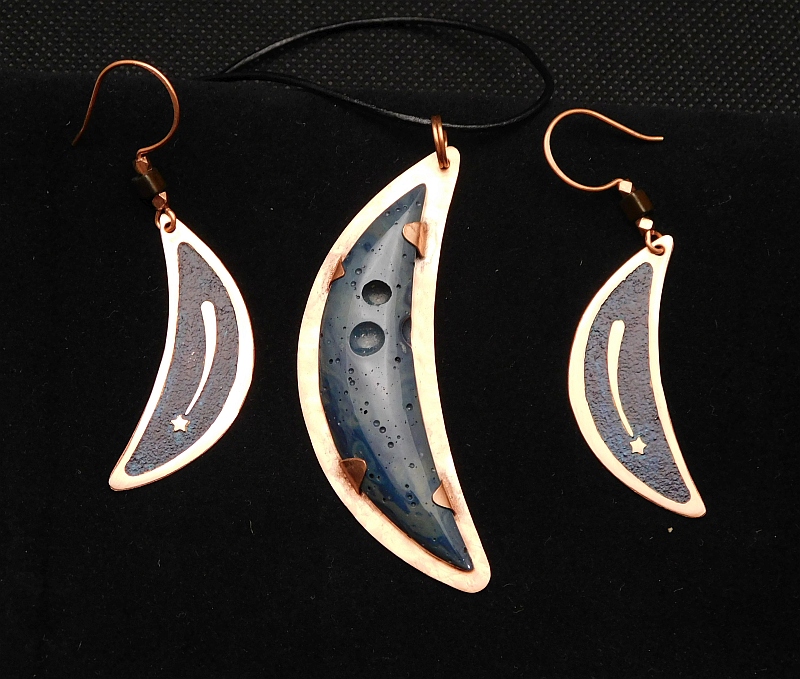
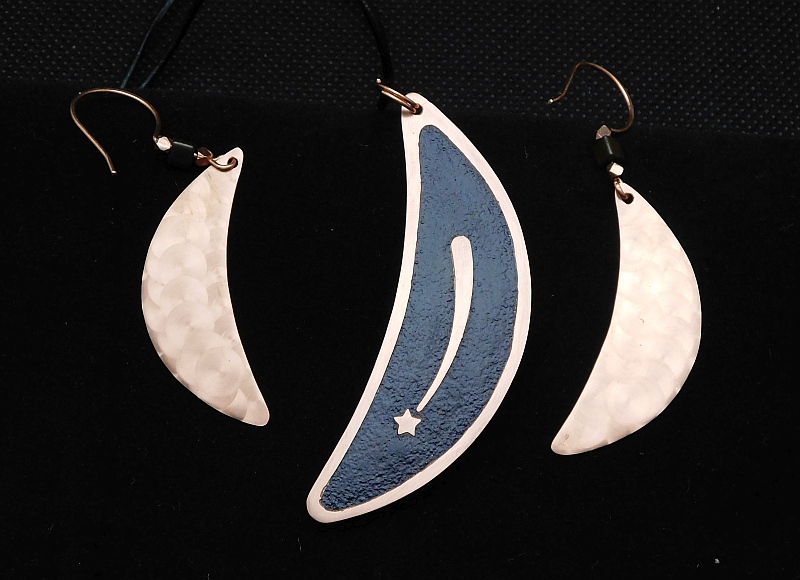
I wanted to show an etching that incorporated a stone, so I did an earrings & pendant set around my “Blue Moon” cabochon.
Masked, ready to etch :

A nice deep etch:

Front of Earrings & back of pendant with a shooting star motif etched in, which I then painted with alcohol ink & sealed it with Sculpt Nouveau’s, Clear Guard .
Front of pendant & back of earrings engine turned for additional interest .


Any questions, feel free to ask,
Patty


