quartzilla
Cave Dweller 
Member since April 2020
Posts: 1,215
|
Post by quartzilla on Feb 4, 2023 18:58:04 GMT -5
|
|
|
|
Post by parfive on Feb 4, 2023 19:46:10 GMT -5
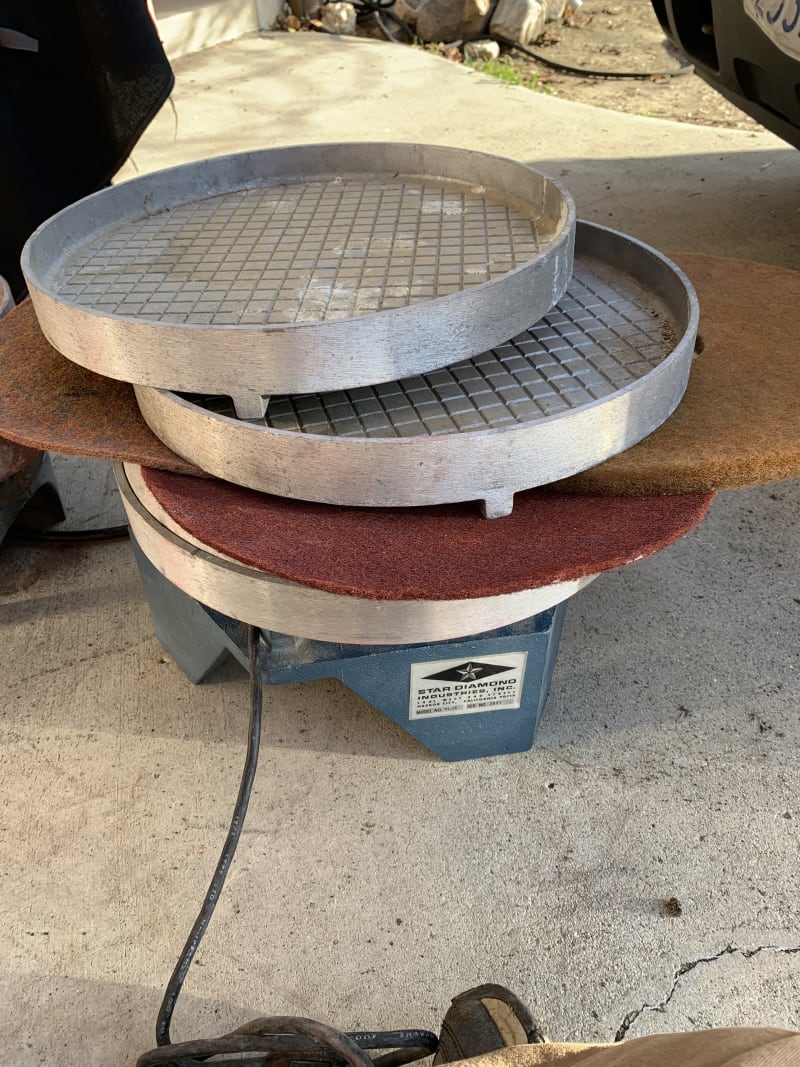
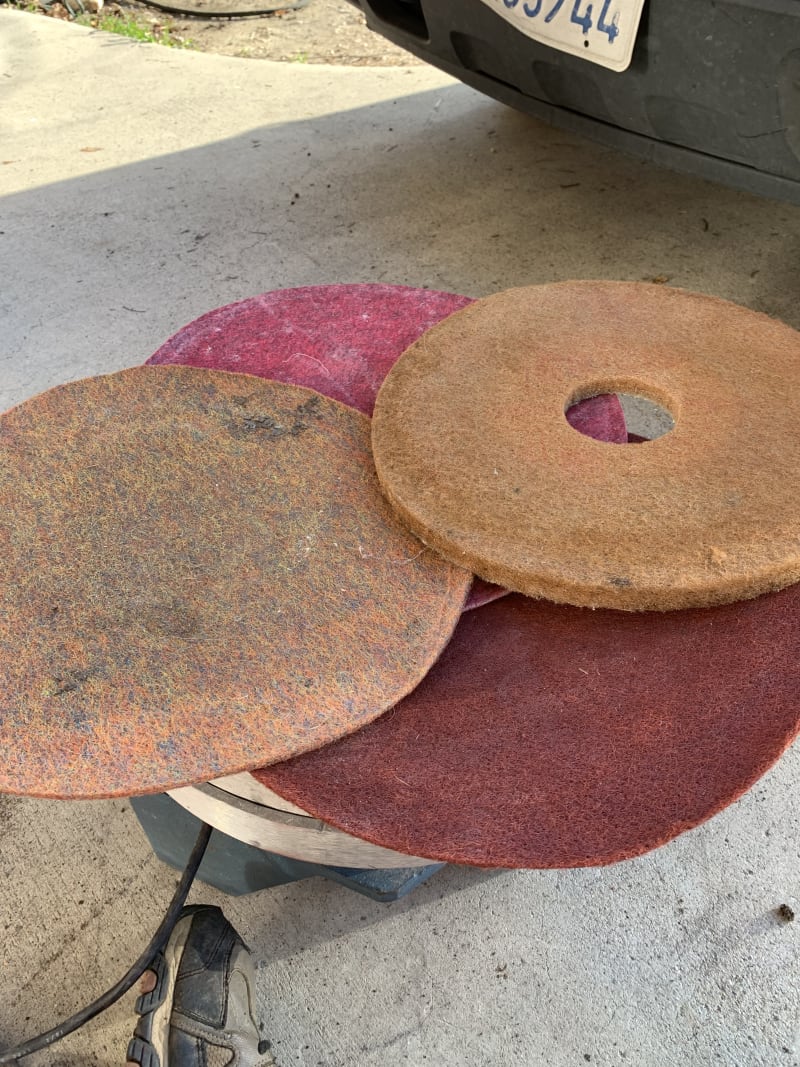
The one with the red pan is a dead ringer for my Covington.
I use a pad for the last step with AO polish.
|
|
quartzilla
Cave Dweller
Member since April 2020
Posts: 1,215
|
Post by quartzilla on Feb 4, 2023 23:35:01 GMT -5
So you run this thru stages just like tumbling making a slurry in the bottom of the waffle pan correct? That’s why there are more the one pan with them; the same as having a different barrel per grit stage just like tumbling correct? Is there a ratio of grit/water that is standard?
|
|
|
|
Post by Starguy on Feb 5, 2023 1:13:50 GMT -5
quartzillaNice find! Looking forward to see what you do with it.
|
|
|
|
Post by agatewhisperer on Feb 5, 2023 8:40:21 GMT -5
So you run this thru stages just like tumbling making a slurry in the bottom of the waffle pan correct? That’s why there are more the one pan with them; the same as having a different barrel per grit stage just like tumbling correct? Is there a ratio of grit/water that is standard? Yes exactly. I'm no expert with these but I've used a few tablespoons of grit and start it off by pouring a little water in (maybe a quarter or half cup?) And then adjusting with a spray bottle. I might be able to find the instructions that came with mine a little later. My main trouble has been getting the rocks weighted down if they aren't heavy enough by themselves. Would be interested to hear what people do for this but also needs to be easy to clean them between stages. |
|
|
|
Post by agatewhisperer on Feb 5, 2023 10:40:49 GMT -5
|
|
herb
spending too much on rocks

Member since November 2011
Posts: 444
|
Post by herb on Feb 5, 2023 11:47:31 GMT -5
So you run this thru stages just like tumbling making a slurry in the bottom of the waffle pan correct? That’s why there are more the one pan with them; the same as having a different barrel per grit stage just like tumbling correct? Is there a ratio of grit/water that is standard? Do all the pans have grooves in them? If the brand of lap came with a dedicated polishing pan, it usually doesnt have grooves. If they all have grooves, pick 1 to be the polishing pan and keep it and the pads away from the other pans and grit so they dont get contaminated. Keeping them in a plastic bag is good. Cant help you on how to remove the star diamond pan, but the one with the red pan looks like it has a bolt on the side. Looks like they are 15 inch pans? The general process I use is 4 spoonfuls of grit (I use a plastic picnic type spoon) and enough water so you just start seeing some ripples at the edge of the pan. Having a spray bottle to occasionally add a little more water is helpful. I do a 4 hour run at a time. At the end of a run, to see what to is are finished, you can take a pencil or an aluminium scribe and make a crosshatch pattern over the face of each rock and then run the vib for 2 of 3 more minutes then clean off the rocks. For cleaning, I have a 5 gallon bucket about 1/3 full of water. I take 1 thunderegg out at a time, swish it in the bucket of water to clean it up a bit, pat it dry with an old cloth and set it on a tray. If you used a pencil to mark the rock wiping the water off can also remove the pencil, so patting is best. After all the rocks are cleaned off, take out the pan and rest it on the side of the bucket. Take a scoop of water from the bucket, pour it in the pan, swish it about, and then dump it in the bucket. Check for any small rock chips that may be in the pan and repeat the rinse if needed. Now check the rocks. Any that clearly show the crosshatch pattern over part of the surface are not done. Sometimes you'll see the pattern very faintly still over the face of the rock. If it is all evenly as faint the rock is probably done. Once you get good at recognizing what the surface of the rock should look like for the grit you are using you can just took at the piece with a magnifying glass but the surface has to be dry. You can also use a metal ruler on edge to check for unevenness with a light behind. Any rock that isn't done does back for another 4 hour run. It is best to keep the pan full, rather than just having it mostly empty, so put new rocks in to replace any that finished. It usually takes 3 cycles at a grit to finish but sometimes more especially at the 1st stage. To keep track of how long a piece has been processing I put a small piece of duct tape on each piece and mark it with a dot of nail polish from old bottles that my girlfriend no longer wants. WARNING: using one of her new bottles can be very dangerous! That way I dont waste time checking for done rocks that have only gone 1 or 2 cycles. When you finish everything for a grit, wash everything off outside so you dont clog your pipes with grit. Wash the pan, the rubber bumper, the tray I set the in processrocks on, and the rocks. I use old toothbrushes to scrub the rocks. For the bucket, I let it sit for a day and the pour off most of the water and set the bucket somewhere out of the way to let it dry out before putting it in the trash because we have clayish soil here that doesnt drain all that well and I assume adding fine grit to it isn't going to help it any. When ready for polish, remove the grinding pan and clean up any grit dust that may be around the machine before putting in the polishing pan. The pad should fit tightly in the pan otherwise it can move on it's own and slow down the polishing action. I'd you are unsure how clean your polishing pad is giving it a thorough blasting with a hose can usually clean it up. On a new pad, start with about a spoonful of polish. After the pad has been charged with polish you only have to add a 1/4 spoonful or so after every 5th or so batch. I use white tin oxide with a dark gray pad. I can tell the pad is wet enough when it turns light almost white. You want the pad fairly moist. When it starts getting too dry you'll see the color turn closer to that of the dry pad. I find it takes 12 to 16 hours to get a mirror polish. I use the same duct tape and nail polish system when polishing. Stopping every 4 hours and checking any rocks that have been 3 or more dots indicating they've been going 12 or more hours. When you are all done polishing set the pan and pad in a dust free area maybe with a plastic bag lightly laying over it until they dry completely and then put them back in their sealed bag for storage. Sorry for being so long winded! |
|
|
|
Post by agatewhisperer on Feb 5, 2023 12:44:32 GMT -5
herb do you add weight to any of your lighter rocks or slabs?
|
|
herb
spending too much on rocks
Member since November 2011
Posts: 444
|
Post by herb on Feb 5, 2023 13:05:26 GMT -5
herb do you add weight to any of your lighter rocks or slabs? I haven't until now. I have some 3 by 4 inch pieces of granite counter top scraps. I used exterior wood glue to attach a granite piece to a slab. I've been waiting for the glue to cure. Will try grinding it in the next day or 2. I also have some small agate nodule halves. They are about 1 by 1.5 inches in size. I can grind them by themselves, but they take forever! Normally I dont worry about it and use them as "filler" when grinding other larger thundereggs since they dont take up much space. This time, I laid them out in 2 groups of 3, put a dab of epoxy on the top of them and then set a granite scrap on top of them. Unfortunately for both groups of 3, one of the nodules detached after a couple hours of grinding. The epoxy I used was kind of old, so I dont know if that is the problem or if I just didnt use enough. Will try again with some new epoxy. |
|
quartzilla
Cave Dweller
Member since April 2020
Posts: 1,215
|
Post by quartzilla on Feb 6, 2023 7:44:53 GMT -5
Thanks agatewhisperer and herb. This is an enormous help. Herb the very detailed instructions must have taken you a while, I really appreciate your time and experience. |
|
|
|
Post by agatewhisperer on Feb 6, 2023 8:42:18 GMT -5
Any thoughts on weighing down smaller halves of a round rock? herb I like your countertop idea for slabs and may need to try that out. Could even leave it over hand a little so the slabs don't chip each other. Any thoughts on weighing down half of a round rock that isn't very heavy on its own? Maybe like half of a thunderegg or something. Sorry I'm hijacking your thread 😉 I'd like to use my flat lap more than I currently do but need some better techniques. |
|
|
|
Post by hummingbirdstones on Feb 6, 2023 10:17:05 GMT -5
|
|
herb
spending too much on rocks
Member since November 2011
Posts: 444
|
Post by herb on Feb 7, 2023 11:08:01 GMT -5
Any thoughts on weighing down smaller halves of a round rock? herb I like your countertop idea for slabs and may need to try that out. Could even leave it over hand a little so the slabs don't chip each other. Any thoughts on weighing down half of a round rock that isn't very heavy on its own? Maybe like half of a thunderegg or something. Sorry I'm hijacking your thread 😉 I'd like to use my flat lap more than I currently do but need some better techniques. I realized that having the countertop piece be a little bigger than the slab would be a great way to protect the slab about a half hour after I glued a piece to my 1st slab! The granite overhangs 2 of the sides so the slab get some protection. I just finished running my 1st slab with the granite weight glued to it thru the 1st stage of grinding. I am happy to report that the exterior wood glue held up! Will see how it fairs thru the later stages. I also started he rough grind on 3 small agate nodules that I also glued to granite. One thing I discovered is that the agate nodules raise the granite up high enough so that the granite now bumps into the sides of the aluminum pan making a constant ting, ting, ting noise! I have some Epdm rubber scraps from replacing my pond liner that I think I will cut some strips out and glue to the sides of the granite. One piece banging around is loud enough, cant imagine what a whole pan of them would sound like! For weighing down small half rocks like thundereggs you just need to find something heavy to glue on top. Some people mention lead weights, but an assortment of rocks would work too. Search a nearby lake or river to find some smoothed rocks or cut some up if you have a saw. For really small pieces attaching 2 or 3 to a rock would work, for not so small peices, they can be done individually. For gluing, I think I'm going to try wood glue or caulk instead of the epoxy I used on my 1st test nodules just because it is easier than mixing epoxy and then later dissolving it when done |
|