|
|
Post by DirtCleaner on Sept 13, 2013 21:21:45 GMT -5
I am not at home now but have a few more pics. This must be the hole you referred to. Thanks jakesrocks!  And a pic of the watering system which I still need to make a supply for:  |
|
|
|
Post by Rockoonz on Sept 15, 2013 18:24:27 GMT -5
Wow, the old FranTom and Highland park units from that era are so similar. Heres the HP I rebuilt a while back. I added the center wheel in the main section, it originally had 2. 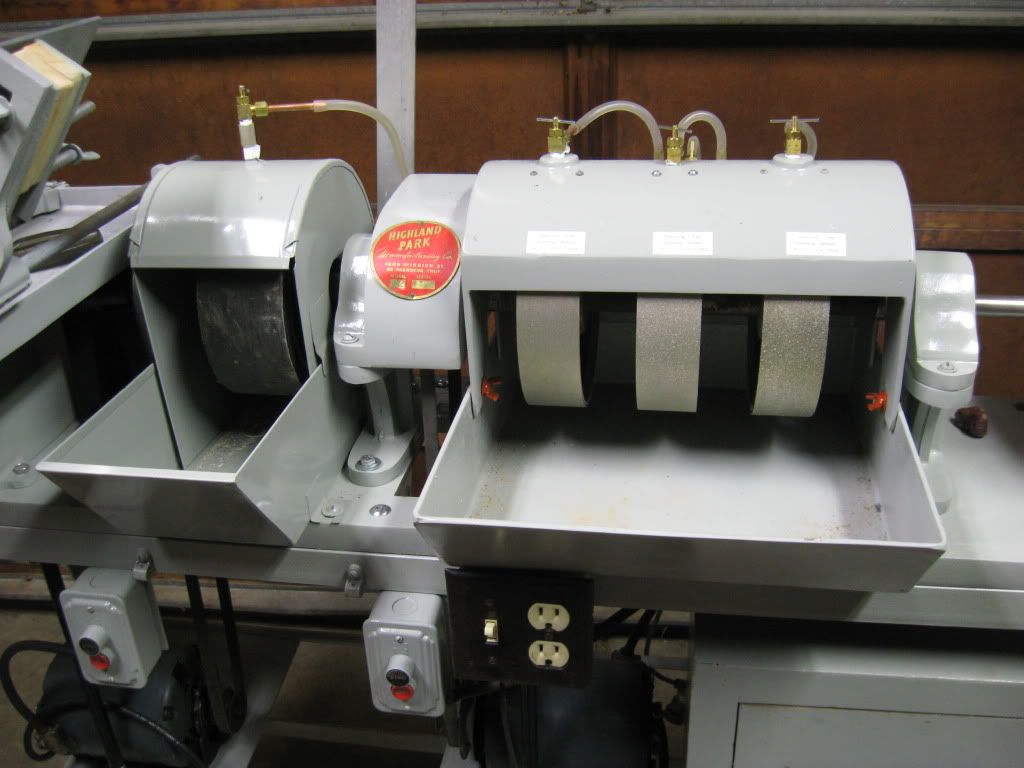 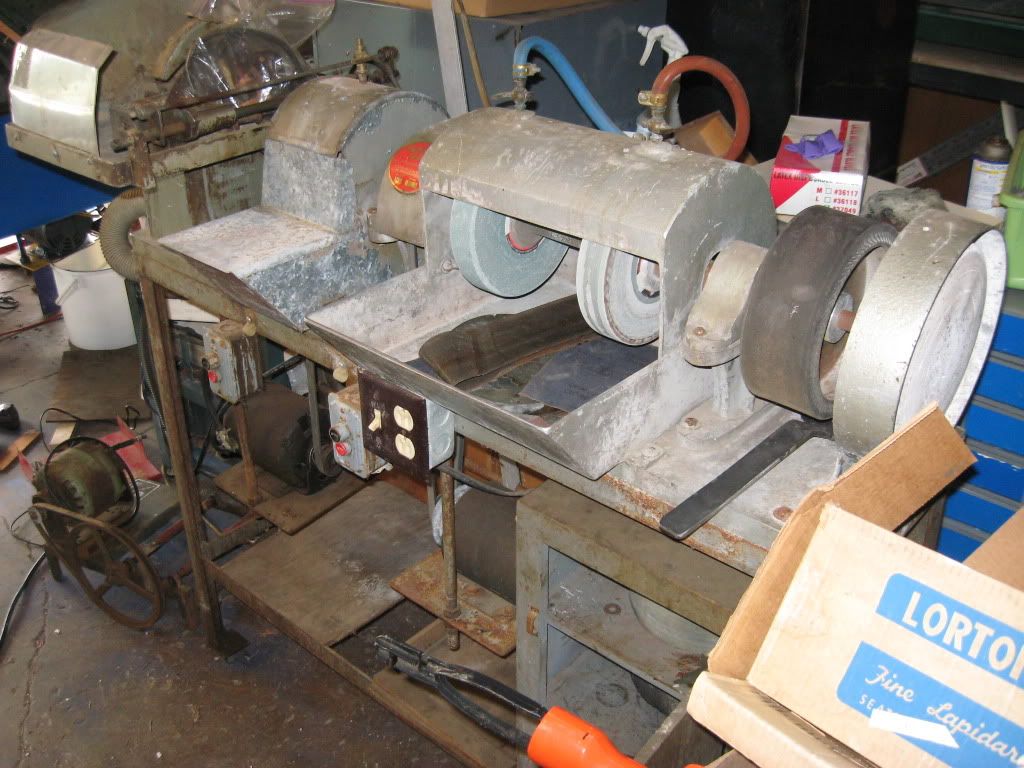 Lee |
|
|
|
Post by DirtCleaner on Sept 16, 2013 13:06:29 GMT -5
Nice work rockoonz.
|
|
juzwuz
has rocks in the head

Member since April 2010
Posts: 526
|
Post by juzwuz on Sept 16, 2013 13:52:26 GMT -5
It's cool that people are working on old FranTom grinders. I'm going to get mine off the shelf again and work on some sphere preforms and learning how to cab.
|
|
Coxxxy
off to a rocking start

Member since October 2018
Posts: 19
|
Post by Coxxxy on Dec 4, 2018 0:35:32 GMT -5
The chamois under the hood: 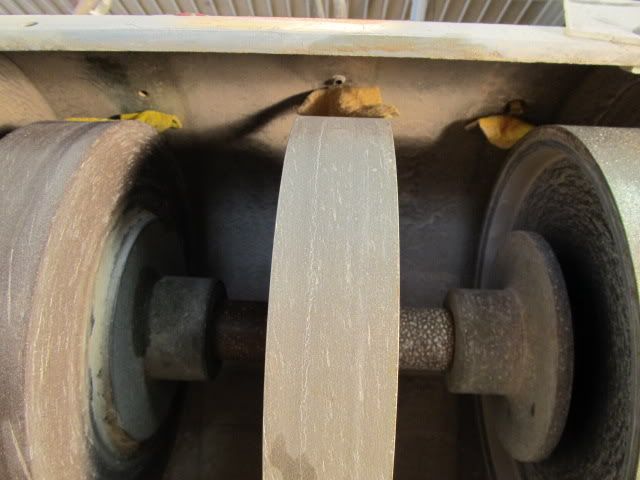 Sue Any clues on how to mount something like this under there? Just thread into the valves??? Im at a loss and need some splash guards and mist reducers big time. Thanks guys/gals. |
|
|
|
Post by Peruano on Dec 4, 2018 6:50:59 GMT -5
Coxxxy, I think you are asking how to attach something to diffuse the water. First off if you have too much water it will tend to throw it on the operator, floor, etc/ and make a mess. If you can feel a mist in front of the wheel and you are not always leaving a trail of rock dust on the wheel, you have enough water (and probably don't need more). I personally don't like things rubbing on the wheels other than rocks so I glue (E6000 or rubber cement) a piece of carpet or almost anything else on the lower lip of the hood to deflect water down onto the work instead of my work apron. It need not touch the wheel to do the job and by not touching its not holding grit or particles that might damage the work. If you have room between the top of the hood and the wheel you can take a drip irrigation "T", add a couple of slits in the cross tubes, and jam it in the water exit. This will tend to spread the water over a wider area of the wheel. I've even been known to create a little ridge of rubber cement where water tended to concentrate and drip off the hood. The ridge deflected the water toward the edge of the stone instead of all of it hitting the center. If I've missed your question completely, I apologize. Try us until we get it right.
|
|
Coxxxy
off to a rocking start
Member since October 2018
Posts: 19
|
Post by Coxxxy on Dec 4, 2018 9:03:35 GMT -5
Coxxxy, I think you are asking how to attach something to diffuse the water. First off if you have too much water it will tend to throw it on the operator, floor, etc/ and make a mess. If you can feel a mist in front of the wheel and you are not always leaving a trail of rock dust on the wheel, you have enough water (and probably don't need more). I personally don't like things rubbing on the wheels other than rocks so I glue (E6000 or rubber cement) a piece of carpet or almost anything else on the lower lip of the hood to deflect water down onto the work instead of my work apron. It need not touch the wheel to do the job and by not touching its not holding grit or particles that might damage the work. If you have room between the top of the hood and the wheel you can take a drip irrigation "T", add a couple of slits in the cross tubes, and jam it in the water exit. This will tend to spread the water over a wider area of the wheel. I've even been known to create a little ridge of rubber cement where water tended to concentrate and drip off the hood. The ridge deflected the water toward the edge of the stone instead of all of it hitting the center. If I've missed your question completely, I apologize. Try us until we get it right. No, thank you, all your suggestions help alot. I just got the grinder going and have been soaked after every session. Ive got to get the shields and water dialed in, and as its my first grinder im on the learning curve lol. Im Googling pictures but theres not alot of visual aids in restoring the old shields and accesories to the original. Getting there though. Thank you again. |
|
|
|
Post by Bluesky78987 on Dec 4, 2018 10:45:04 GMT -5
Coxxxy, take a look at Tommy's thread about building his own cabbing machine. He built hoods out of plastic water jugs, look to have been pretty easy and effective. Also, rock shows are good sources of pieces like that. I also appreciate you asking the question because I need water spreaders on my new unit too - thanks Peruano Tom for the idea about the drip irrigation T - gonna try that.
|
|
lv
off to a rocking start
Member since April 2019
Posts: 3
|
Post by lv on Apr 30, 2019 5:04:36 GMT -5
I can't get the old SC grinding wheels off mine. It has the 10" saw on the left and the polishing disc on the left.
I got the nut and flange and blade off and got out the set screw out of the flange on the other side of the blade but it will not come off the shaft.
I got the polishing disc off the other end but cannot move the bearing assemblies on either end.
Got the large nut loose on the right side next to the wheel collars but the collars will not move either.
Took out all the allen head screws I could see.
Are some of these threaded on or do I just need to free these things with some muscle, a rubber mallet and some pipe wrenches ?
Thanks, LV
|
|
|
|
Post by captbob on Apr 30, 2019 9:44:53 GMT -5
Hey LV, have you tried to lube the shaft? Try using something like PB Blaster or another penetrating oil.
Maybe stand the unit on end so you can spray the shaft around the wheel and the oil can soak down under the wheel. May take a day or two of spraying and letting the oil do it's thing, but might be worth a try before resorting to brute force.
Can you post a picture of what you are working on?
Welcome to the forum!
|
|
|
|
Post by Peruano on Apr 30, 2019 13:09:49 GMT -5
I'd probably try to take off the right bearing, not the saw end but whatever seems most accessible. A bit of steel wool polishing really helps along with the penetrating fluid to lubricate it. If you really need a bearing puller, borrow one with a long reach from your local auto parts store or take the shaft to a bearing shop and let them press the old bearings off to get to the wheels.
|
|
lv
off to a rocking start
Member since April 2019
Posts: 3
|
Post by lv on Apr 30, 2019 16:46:48 GMT -5
Great suggestions, I have a gallon of blaster but have not tried a puller or shop yet. Last resort. As long as the stuff is not threaded on, I will just soak it more. Time will tell. Someone was talking about using pipe wrenches and such, but I did not want to resort to that yet. Just making sure I was not going to damage anything trying to slide everything off when it is actually threaded on ! Weather is better here today, so back to soakin' wit Blaster, I guess !  Thanks for the good advice, LV |
|
AzRockGeek
has rocks in the head
Member since September 2016
Posts: 635
|
Post by AzRockGeek on Apr 30, 2019 17:42:25 GMT -5
I had the same problem a few years back, evenly heat the flange with a propane torch, it will loosen up in a minute or so.
|
|
lv
off to a rocking start
Member since April 2019
Posts: 3
|
Post by lv on May 17, 2019 17:44:30 GMT -5
Finally got everything off the shaft! WEW !!!
The puller did part of the job, however, I did have to resort to Vice grips, Pipe wrenches, a rubber mallet and a hack saw.
The puller got the flange off the saw side and the 4 bolt bearing assemblies on both sides.
The pipe wrenches, vice grips and rubber mallet got the first flange and wheel off the right side.
The next flange on the other side of the wheel would not budge and so I had to hack saw it off.
(The torch was a good idea but would not help. Too much corrosion.)
After that all the rest came loose with the help of the pipe wrenches, vice grips and rubber mallet. AMEN !!!
Got everything wire brushed and cleaned up and ready to fit the wheels and H2O drip system for them.
The shaft took some damage from the sawing but not much.
Thanks for all the helpful advise.
You guys are GREAT !!!
|
|
ghopper02
off to a rocking start
Member since December 2019
Posts: 1
|
Post by ghopper02 on Dec 5, 2019 23:03:52 GMT -5
I've gotten an old FranTom saw/grinder working, but I would like to convert the split drum on the right side to an Expando wheel.
Does anyone have experience converting the threaded shaft to one that you can mount an Expando drum on?
Thank you,
Doug
|
|
|
|
Post by RocksInNJ on Dec 6, 2019 1:19:37 GMT -5
Why do most photobucket pics show up blurred with their logo over the pic for me. That’s always drove me nuts.
|
|
|
|
Post by hummingbirdstones on Dec 6, 2019 8:42:28 GMT -5
Why do most photobucket pics show up blurred with their logo over the pic for me. That’s always drove me nuts. Because when PB went to a paid hosting format, they held everyone's photos hostage unless they paid up. |
|
|
|
Post by RocksInNJ on Dec 6, 2019 9:32:43 GMT -5
Why do most photobucket pics show up blurred with their logo over the pic for me. That’s always drove me nuts. Because when PB went to a paid hosting format, they held everyone's photos hostage unless they paid up. Ah ok. Thanks so much. That’s always driven me nuts. So the above pics are blurry for everyone then. I always thought something was wrong on my end. |
|