|
|
Post by connrock on Mar 9, 2013 9:52:58 GMT -5
Hi Adrian,,,
Plenty of pop corn this time Adrian!
The water main/sewer connections are called a "Saddle" connection over here cuz it looks like a saddle that goes on a horse!
The modern ways of plumbing today are almost like cheating from the old ways! LOL I worked on many broken water mains and and got pretty wet.The hole would almost fill with water as we tried to keep the pumps running! LOL
It's amazing that they can put all that dirt back into the tunnel!A LOT of hard work too!
I have to ask,,,,was the loft roof height made to fit the water heater or the water heater bought to fit the loft roof height?
Gotta go a buy more pop corn for next week! LOL
Thanks sooooooo much for the up-date and photos Adrian!
Good luck this coming week,,,,,her we had over 1 foot of snow come down on us yesterday!
connrock
|
|
adrian65
Cave Dweller  Arch to golden memories and to great friends.
Member since February 2007
Posts: 10,790
|
Post by adrian65 on Mar 9, 2013 23:45:07 GMT -5
Thank you, Joanne. You're so right  ...I have to ask,,,,was the loft roof height made to fit the water heater or the water heater bought to fit the loft roof height? Tom, we designed the roof with a slope to allow the use of the ceramic shingle to cover it. When ceramic shingle is set, the slope of the shingle itself is lower than the slope of the roof. You can see this in the 2nd to last picture in page #13 of this thread. So, there's a minimum slope of 15...20 degrees which most of the shingle producers reccomend to ensure a good water flow. We designed the roof with a slope just a bit above this limit - 24 degrees. This way that central area of the loft resulted high enough to be easily visited, even if a tall/medium tall person can stand up straight only in the very neighbourhood of the bird feeder. The idea of placing the buffer in the loft came only after this. Otherwise the buffer would had been placed in the basement, but I thought it wood be good to keep the basement cool and the buffer+pipes would had been heated it too much. The length of the pipes between the buffer and the bathrooms would had been longer from the basement than from the loft. Not to mention the pipes between the buffer and the solar panels, which are much shorter now. Where it is now, it is very close to the bathrooms so the length of the pipes will be some 6 m. I don't think this short length would need a recirculation pipe, don't you? There won't be more than a few secconds till the hot water would come to the bathroom. Adrian |
|
|
|
Post by connrock on Mar 10, 2013 8:57:45 GMT -5
Hi Adrian, That was good thinking making the slope of the roof 24 degrees to make the loft higher! I see no reason to have a circulating line on the hot water if it will only travel 6 meters. The last house I piped was for my son Tom.It was about 10(?) years ago.His home is quite large,has a full basement and 2 floors of living space with 4 full bathrooms and a 1/2 bathroom in the basement. The hot water source is in the basement and about 40 meters from the last plumbing fixture,,,which is a sink in the master bedroom bathroom on the 2nd floor. I ran a circulating line of 1/2" copper tubing from the hot water source in the basement up to that last sink so the hot water could circulate and be instant when the faucet was used. I installed a small electric circulating pump in a "bypass" line but the hot water tanks.The reason for the bypass was so that we could see if the hot water would "circulate" with a "gravity" flow,,,,,hot water would rise and cooler water would "sink",,,return back to the hot water tanks without using the circulator. If this did not work we could open the bypass and use the circulator. We found that even in winter it takes only (about) 10-15 seconds to get hot water at that sink without using the circulator! I just looked at all the new photos you posted again and realized that the reason you can dig under a road is because of the type of dirt you have there. In the area of the USA where I live this would be impossible with all the rocks we have here. About 2 years ago I wanted to "re-grade" some of my property to change the "slope" of part of it.Mostly I dug with a shovel and used a steel rake and then planted new grass there. This is the pile of rocks I removed from that small area in my back yard and these rocks are VERY small compared to most of the rocks found here,,,,,,  NO tunnels dug here! LOL connrock |
|
adrian65
Cave Dweller  Arch to golden memories and to great friends.
Member since February 2007
Posts: 10,790
|
Post by adrian65 on Mar 10, 2013 15:05:48 GMT -5
Too bad those rocks aren't a bit more interesting... like agates, jaspers, etc.
|
|
|
|
Post by connrock on Mar 11, 2013 8:26:32 GMT -5
Adrian,,,VERY fer rocks found here for lapidary!Mostly poor grade quartz.Some VERY small agates are found and some small jasper but they are too small and rare to use in lapidary.
connrock
|
|
Deleted
Deleted Member
Member since January 1970
Posts: 0
|
Post by Deleted on Mar 13, 2013 0:32:49 GMT -5
Very cool thread Adrian, building your own castle must be a great feeling. Looking forward to seeing the completed project!
|
|
adrian65
Cave Dweller  Arch to golden memories and to great friends.
Member since February 2007
Posts: 10,790
|
Post by adrian65 on Mar 16, 2013 13:14:52 GMT -5
What a hoot, Tony Nephrite, to "see" you again! Glad to see your comment. Heree is the update of this week. The cement rendering works continued inside... 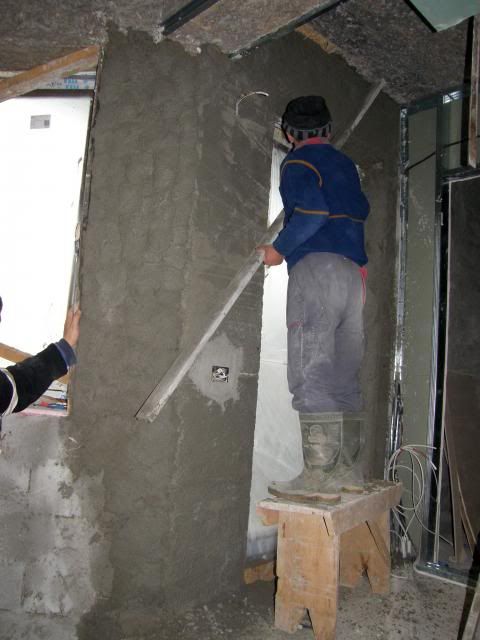 ...and outside - on the base of the fence: 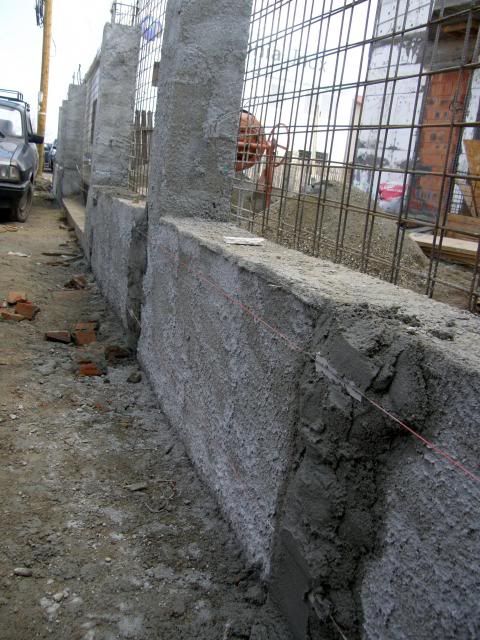 They also started the floor leveling. It's a process very similar to the cement rendering, only it's on horizontal surface and the layer is thicker (3 inches):  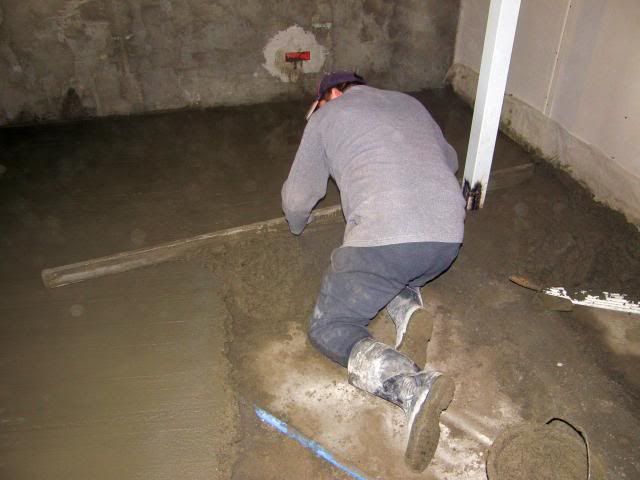 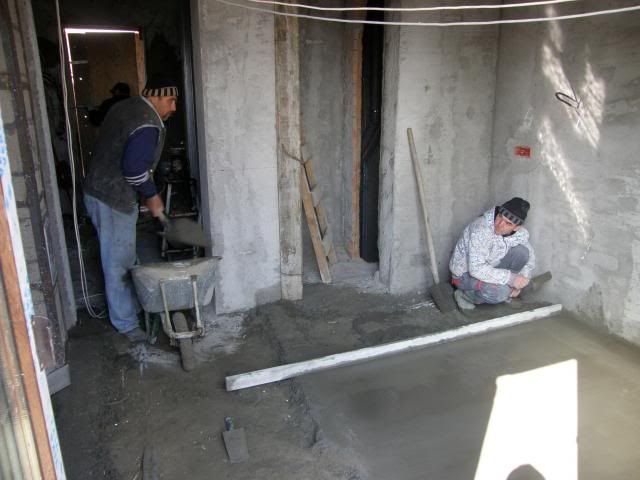 The outer front stair is now completed, here's the last step poured; now only the flower box in the right side of the stair has to be poured:  Now let me give you a lead to the basement. Easy on the steep stair... 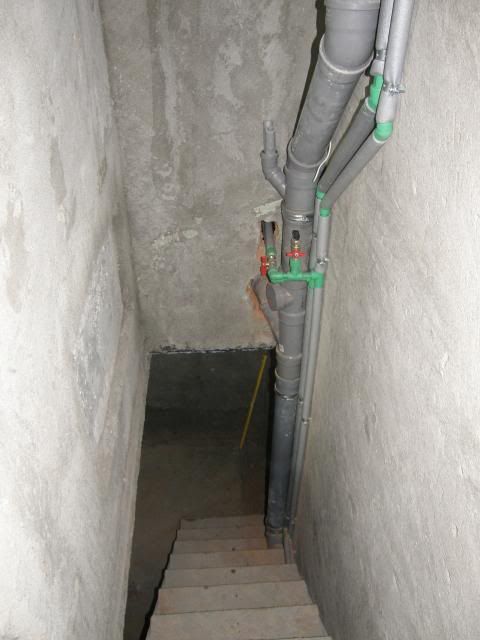 Here we are. You can see the plumbing works: 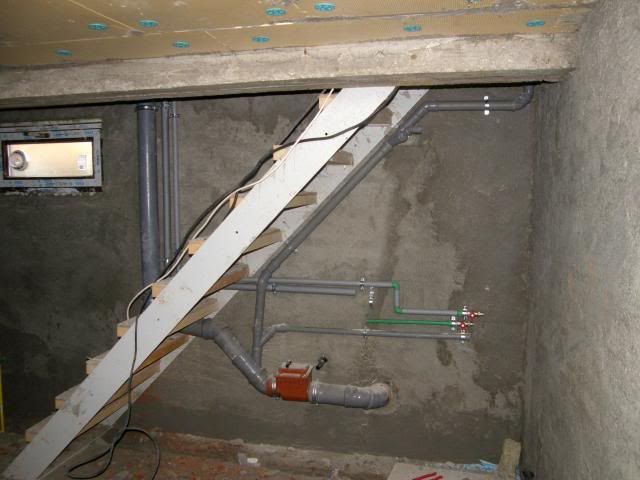  Here is the sink for the basement. I hope it will wash many beautiful rocks  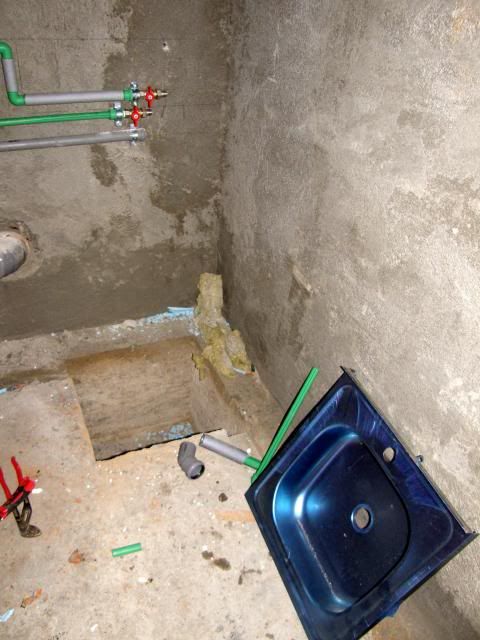 We bought some more of the tiles forthe bathrooms: Ioana's choice for her bathroom: 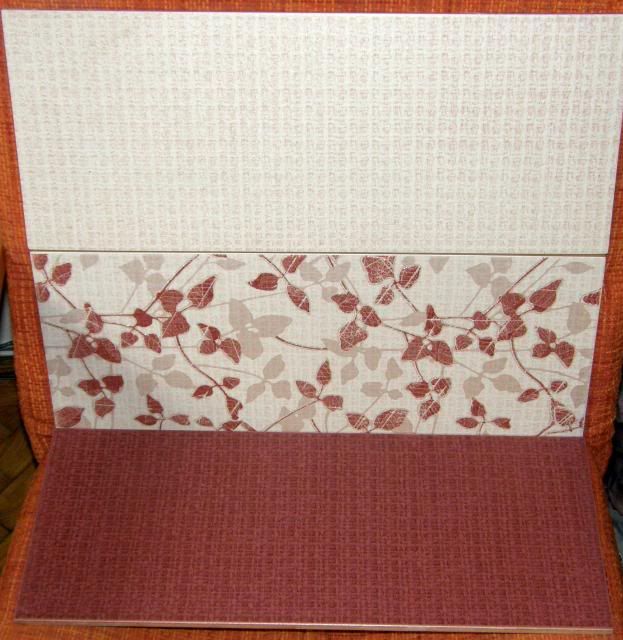 Our choice for the other bathroom:  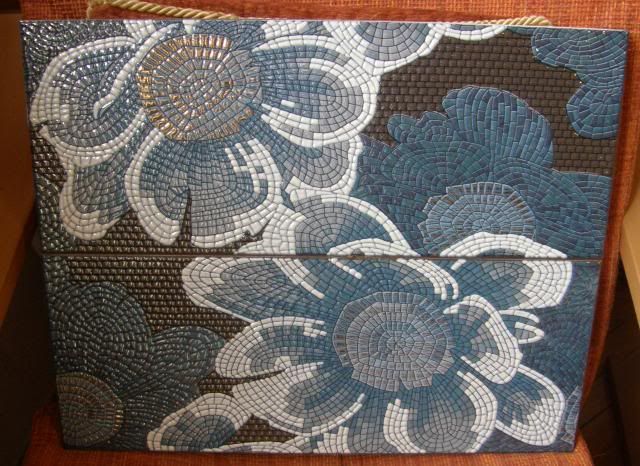 Next week, the floor leveling will continue, together with the plumbing works. Thank you for looking, Adrian |
|
adrian65
Cave Dweller  Arch to golden memories and to great friends.
Member since February 2007
Posts: 10,790
|
Post by adrian65 on Mar 22, 2013 15:21:04 GMT -5
So? whatcha think? Like the tiles?
What about the plumbing works, Tom, do they look like yours?
|
|
|
|
Post by sheltie on Mar 22, 2013 15:29:14 GMT -5
Tile choices are great. As far as plumbing is concerned, as long as mine work that's all I care about!  |
|
|
|
Post by helens on Mar 22, 2013 16:25:55 GMT -5
I need to get my husband to look at your pix too... it's truly fascinating to see how homes are built in other countries compared to the US!!
That tunnel for connecting the plumbing... omg... I have never seen or heard of that here. When they do pipe connections, I'm 100% certain they dig the whole ground up to lay the pipe, just so someone doesn't do a tunnel like that and have it collapse on them. Wow... you have some BRAVE (and crazy) plumbers there:)!!
Other thing is the bricks you use, and stucco right on top of it from what I see of the outer walls... here in the US, for block/brick construction, they lay the block, then put in 2x4 wood 'frames' on the inside, so they can lay insulation in between the walls, to help with soundproofing, and also to have a place to install wiring and plumbing unseen behind the walls. I see you use drywall for inner wall partitions, but did not see it for outside walls. I'm seeing that you mortar your wires directly into the walls!
Also, the blocks!!! They are FULL of cells!!! Here, concrete blocks have 2 cells... so there's room to put rebar from the foundation, then fill the cells with concrete. Block walls here are generally tied together with rebar in addition to mortar, so taking down a wall is much harder to do, from the steel reinforcement.
Also, the way you stucco directly on the outside blocks... usually when stucco is used, they put up black paper (not sure why), then like a chicken wire on the block to hold the stucco in place ... I'm seeing direct application of stucco on the red brick/block. Your blocks must stick better than ours.
Fascinating pix series!! So interesting to see how things are built differently in different places. Thanks:)!!
|
|
adrian65
Cave Dweller  Arch to golden memories and to great friends.
Member since February 2007
Posts: 10,790
|
Post by adrian65 on Mar 23, 2013 13:24:58 GMT -5
Thank you Sheltie and Helen. Helen, the bricks (blocks) do not have re-bars running through their hollows because there is a lot of reinforcement in the concrete structure of the house. We also use reinforced masonry as you describe it, but generally for houses built enirely of bricks (no concrete columns). I like the way you stucco on chicken wire, sounds more sturdy. Anyway, even without wires, the stucco remains stuck to the walls for long time if well prepared. Now, here is the progress during this week. The flower box next to the outer front stair: 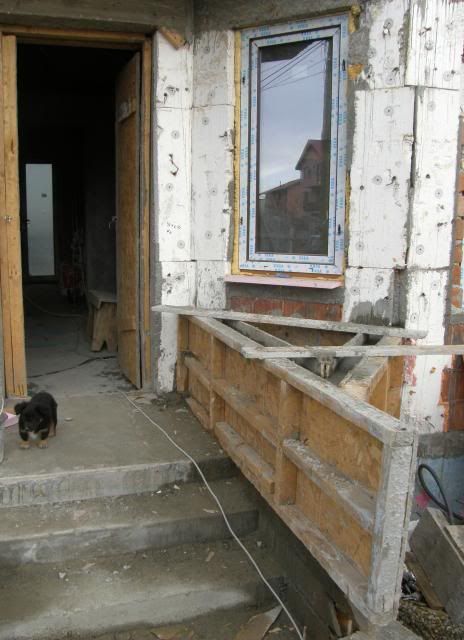 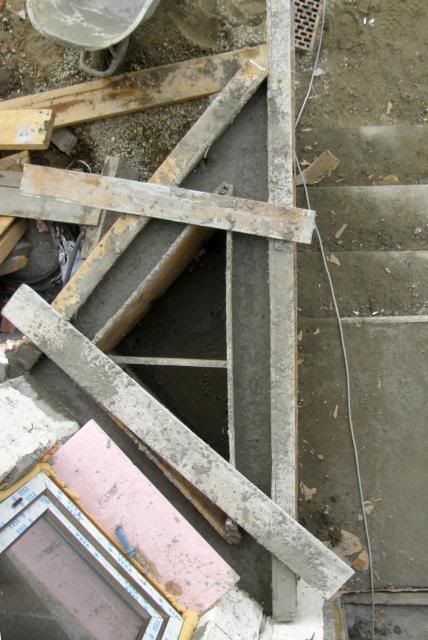 The plumbing works in the bathrooms: 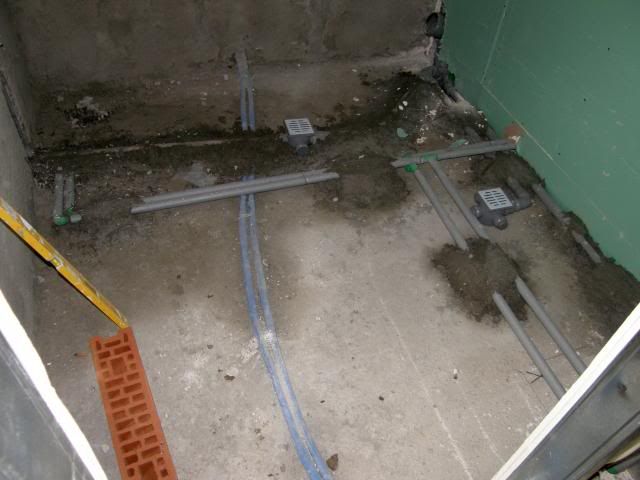 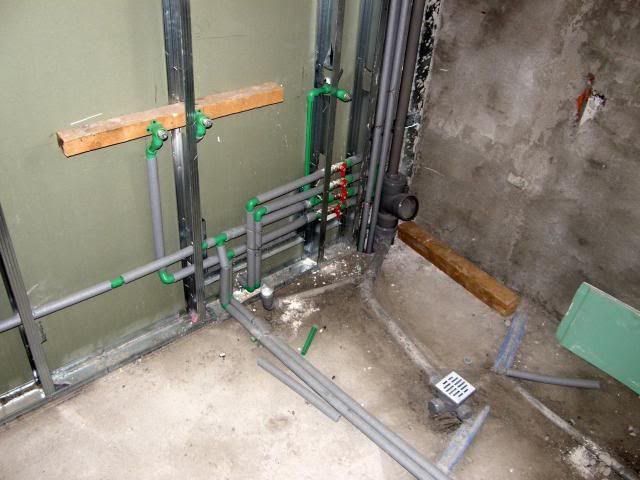 They also started to build the frame and to mount the drywall plates on the ceilings: 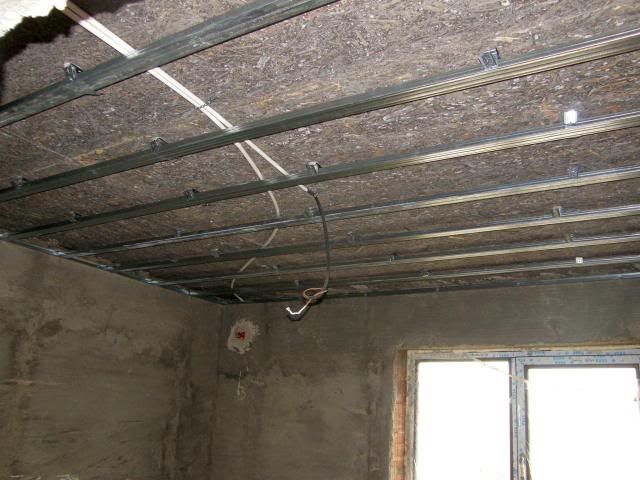 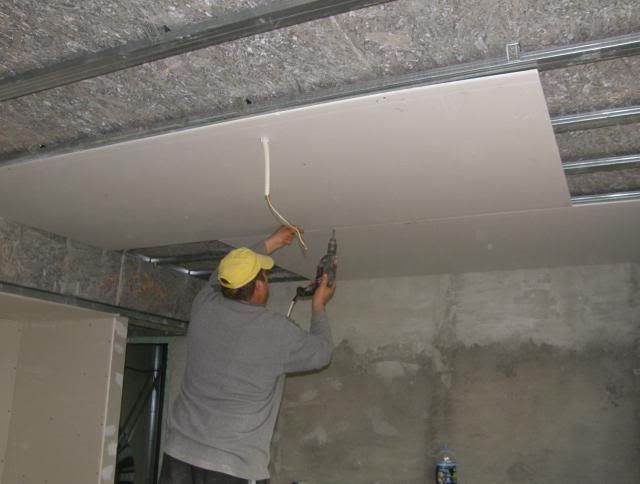 Here you can also see the mask of the chimney (the pink drywall): 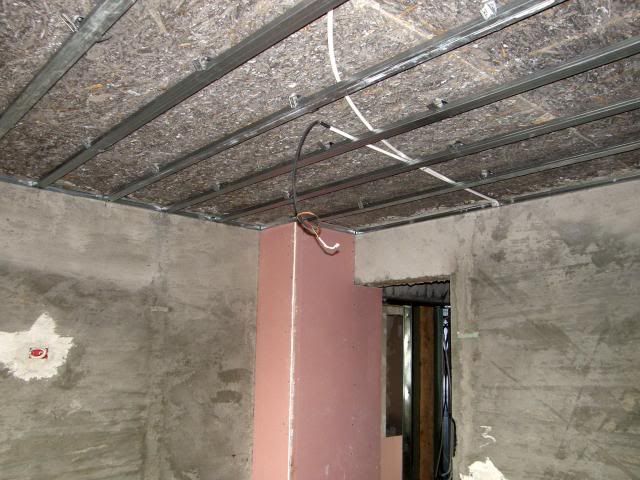 A lot of floor leveling has been made. In fact, the only areas not yet covered are the two bathrooms shown a bit above. Here is the living room with all the floor leveling complete. You can also see there is no more provisory stair to the upper floor. The metallic steps are there, instead, waiting to be set to form the stair. This is to be made next week. 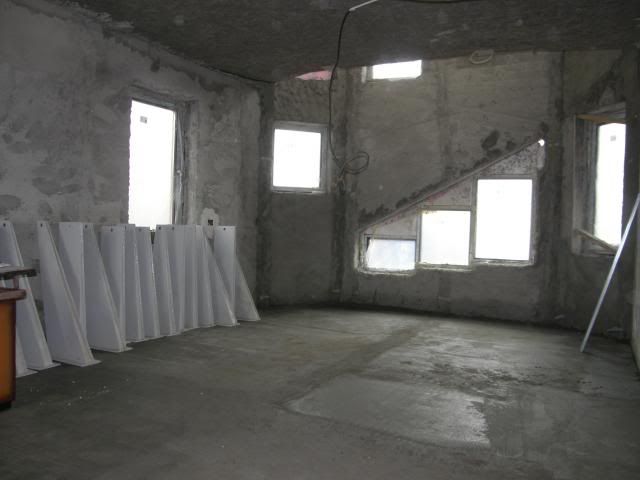 Thanks for looking, thank you also for comments. Adrian |
|
snuffy
Cave Dweller 
Member since May 2009
Posts: 4,319
|
Post by snuffy on Mar 23, 2013 14:58:21 GMT -5
Ah,stucco,fond memories! We use a metal lath on all outside walls.We have in the past stuccoed older brick homes,and nailed the lath over the brick,it covered the cracks that occurred in the brick joints over the years,and put in control joints to prevent further cracking. Inside walls,we do similar to yours,if its mixed right and done right,its tough stuff.Mostly the inside work was patching and replacing old walls.Costs too much to do the insides here! Have really enjoyed watching the progress.
snuffy
|
|
|
|
Post by MrP on Mar 23, 2013 15:55:49 GMT -5
Adrian
At first I thought you were building the house to last generations. Guess I was wrong, it is to last FOREVER. I am really enjoying watching this build...............MrP
|
|
|
|
Post by helens on Mar 23, 2013 22:18:47 GMT -5
Ahhh... I just thought of the purpose of the black felt paper over the block outer walls... moisture barrier. I think it's the same stuff as you put on the roof before applying shingles or roofing... to protect against humidity seeping through the porous blocks. Then, the chicken wire is stapled on and stucco'd. I'm realizing that maybe it's done that way in Florida because of our sometimes 100% humidity in the summer. It protects against mold and dry rot seeping in via walls. We also lay thick plastic protective coatings under the rebar when the foundations are poured for the same reason, to be a moisture barrier against humidity or radon gas coming up from the ground. In less humid parts of the world, it's probably less/un necessary.
That's good construction practice.... but today, to cut corners, some builders use fiberboard for walls, with the black felt and chicken wire and stucco on top, particularly on 2nd story and up. Your poured in place, rebar enforced columns on the corners are great:).
Do you pour your concrete directly on the pipes on the ground, or lay wood on top to conceal them? I think your architecture is interesting too:).
|
|
adrian65
Cave Dweller  Arch to golden memories and to great friends.
Member since February 2007
Posts: 10,790
|
Post by adrian65 on Mar 24, 2013 0:24:37 GMT -5
Thank you Snuffy and Mr P.
Helen, I didn't get your question in the last phrase, the one related to concrete pouring. In the meantime I figured out, Karen helped me in this, asking the same thing. So, the "concrete" - which in fact is a mortar - is poured directly on the pipes (heating pipes, electric wires pipes) which are now sunk in this leveling layer. No joints along the sunk parts of the pipes, to avoid leaks.
Thank you for the architecture thing. We designed the house as you see and found an architect to agree to keep 99 per cent of our design in the official project. When I was asking him if he'd agree not to change much of it, he said: "in fact, it would be hard to change anything, the house is well thought". A great complement for our work, coming from an architect.
Adrian
|
|
|
|
Post by helens on Mar 24, 2013 2:54:58 GMT -5
Very neat:). What material is the piping? It looks like flexible PVC, but our PVC here is white. The green joints are odd too, are those PVC as well?
Also, the way you are building the house, is that the way most homes are built today in Europe, or is that a more modern way of building? You designed it yourself! That's wonderful, and the best way to get exactly what you want:)!
|
|
|
|
Post by connrock on Mar 24, 2013 7:34:11 GMT -5
Hi Adrian,
I've been away for a week watching my g'son and his college team play baseball in the South!
A LOT of work has been done and even more concrete and mortar!
The plumbing looks much different then what is normally done here!Are the copper joints soldered or are mechanical (flare/compression) joints used,,,,or,,,are the water pipes made of plastic?
Ioana's choice of tiles is beautiful,,,especially the blue tiles,,,,blue is my wife's favorite!
Thanks again for taking the time to let us see the progress on your new home!
connrock
|
|
adrian65
Cave Dweller  Arch to golden memories and to great friends.
Member since February 2007
Posts: 10,790
|
Post by adrian65 on Mar 24, 2013 12:33:02 GMT -5
Helen, the way our house is built is the way most of the houses are built here (in Romania and, as well as I know, in most areas of Europe, with local variations of course).
The water pipes (both hot and cold) are made of PPR (a sort of plastic). The joints are done with a heating machine which heats the pipes and joints. Both the pipes and the joints are green; what is grey is the thermal insulation. If you google "ppr pipes" you'll figure out better.
All the heating pipes are copper and the joints are soldered.
Adrian
|
|
DBARRD
off to a rocking start

Member since September 2012
Posts: 10
|
Post by DBARRD on Mar 24, 2013 14:49:06 GMT -5
Thanks for the reply Adrian
I have seen foundations go as deep as twelve feet here ,i think it was because the owners wanted a high ceiling and the use of steel beams to eliminate telepost and make rooms more open
Ha Ha but it also depends where the house is been built
David
|
|
adrian65
Cave Dweller  Arch to golden memories and to great friends.
Member since February 2007
Posts: 10,790
|
Post by adrian65 on Mar 29, 2013 23:08:55 GMT -5
Thank you, friends! Here is the update for this week. The drywall works to the ceilings have continued; now all the first floor ceilings and three quarters of the ground floor ceilings are covered with drywall. The most important step forward this week was the mounting of the main stair and the loft ladder. Firstly, the main stair. We firstly marked the points for drilling: 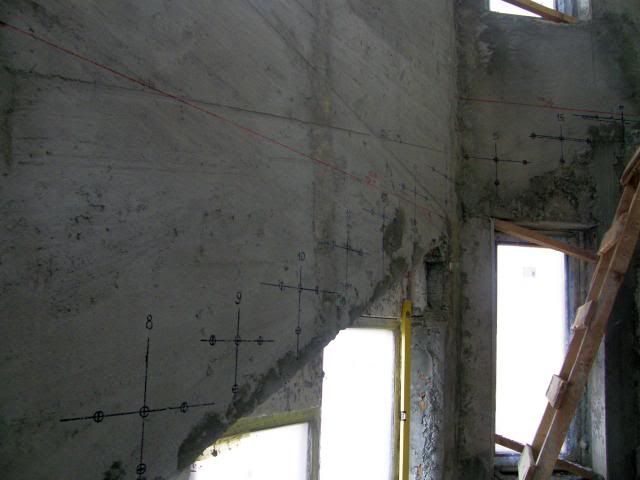 Then, drilled the holes in concrete: 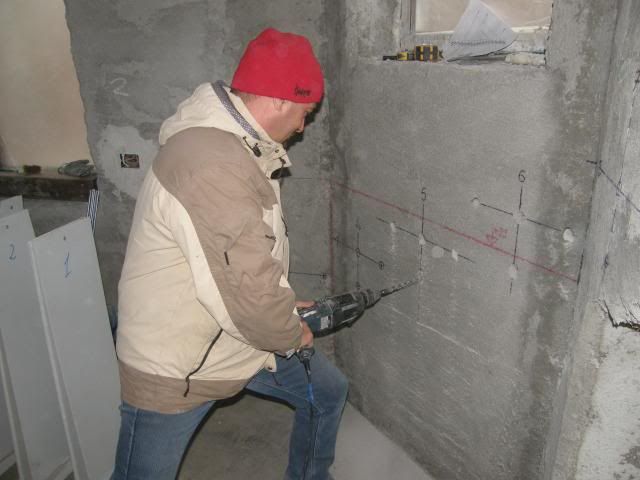 After this, we filled the holes with Sika bi-component mortar and inserted the threaded rods inside: 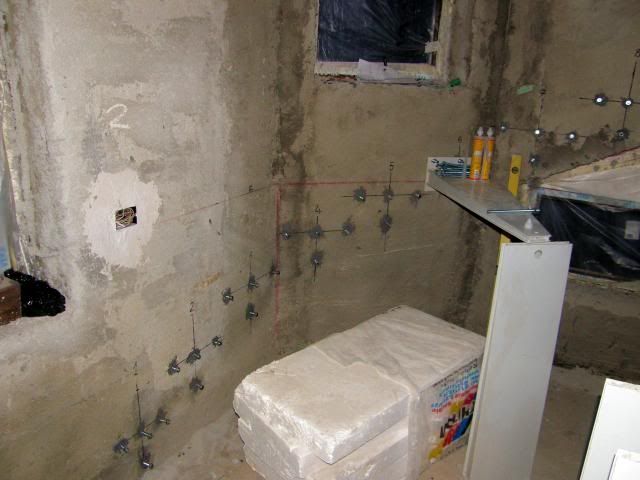 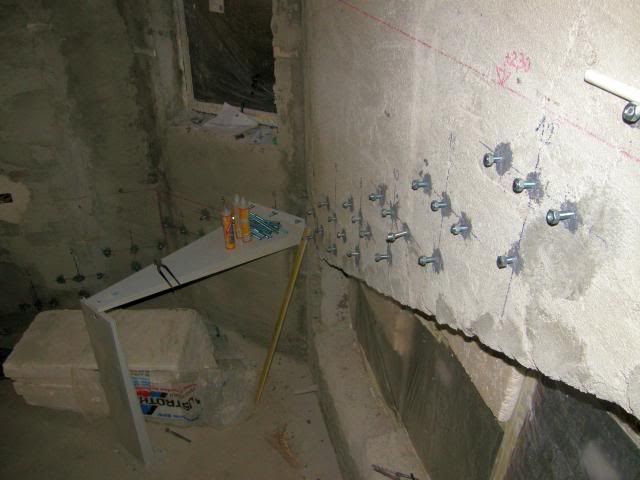 The mortar cured pretty fast and the next day we could mount the metalic stairs: 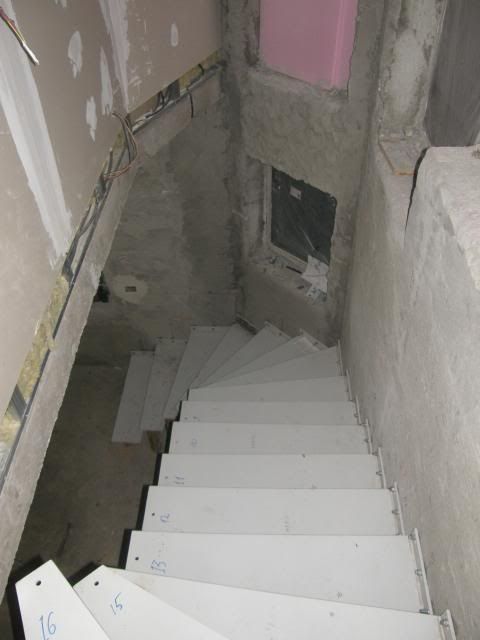 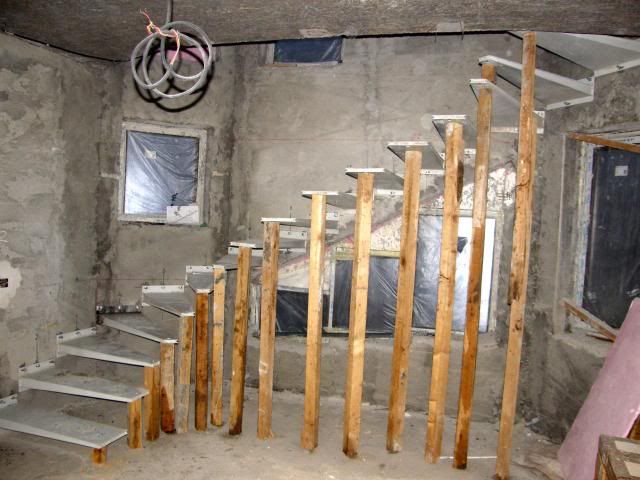 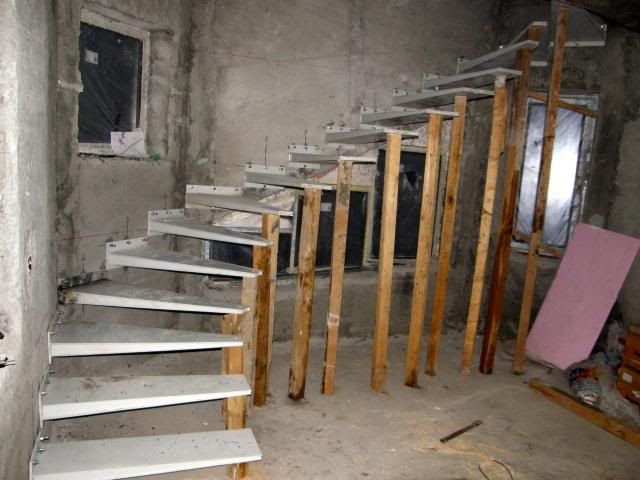 Notice the wooden columns underneath each step. These are provisory bearings, until we will finish the rods which will hold the ends of the steps. We already started to link those rods to the steps, here are some cell phone pics: 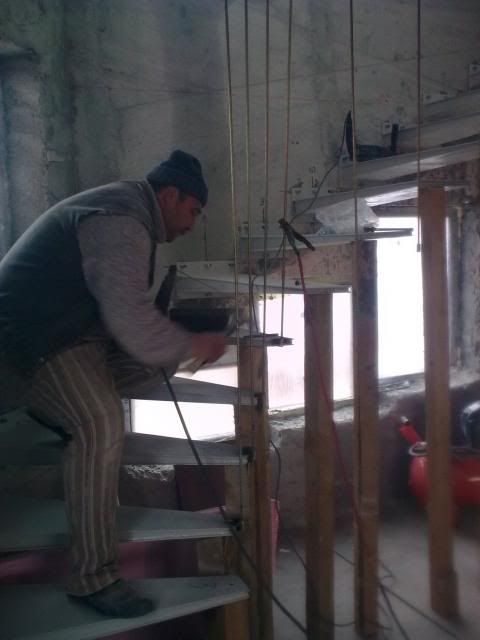  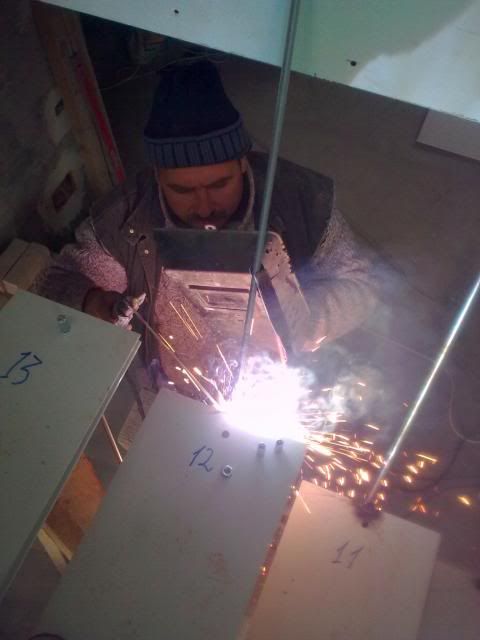 The crew also installed the ladder to the loft in the designated hollow: 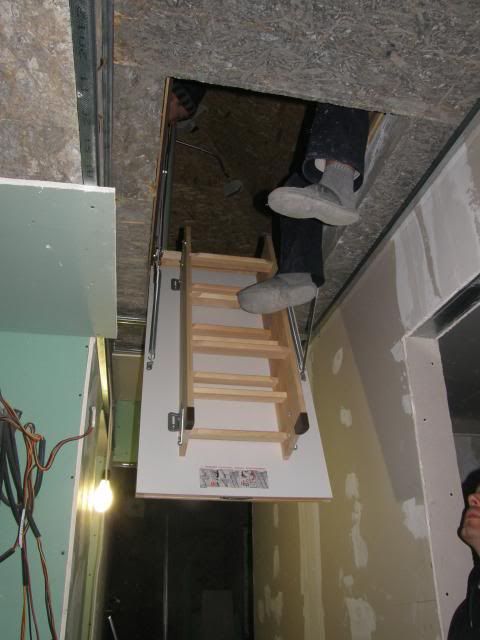 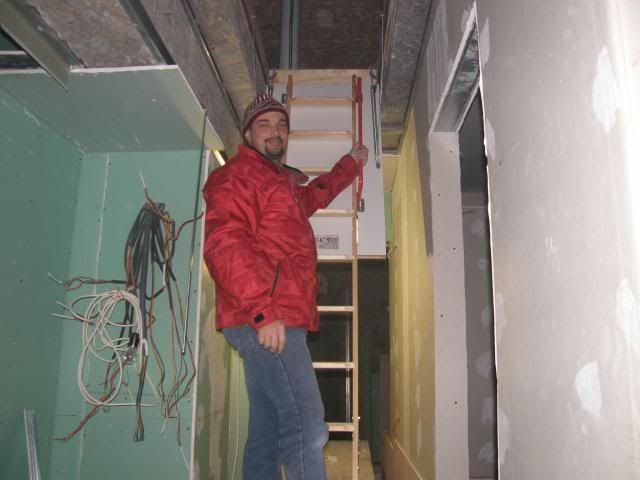 The snow we had this past week kept us inside but, as you could see, there were a lot of things to do inside the house. Next week, the works to the stair will continue, together with some more works - maybe on the outside. Thank you for looking, Adrian |
|