bandmenter
off to a rocking start

Member since September 2019
Posts: 12
|
Post by bandmenter on Sept 23, 2019 17:22:08 GMT -5
|
|
bandmenter
off to a rocking start
Member since September 2019
Posts: 12
|
Post by bandmenter on Sept 23, 2019 17:28:20 GMT -5
It would appear I posted the same pick twice, must have been worth a second look. Bill  |
|
|
|
Post by Peruano on Sept 24, 2019 8:49:15 GMT -5
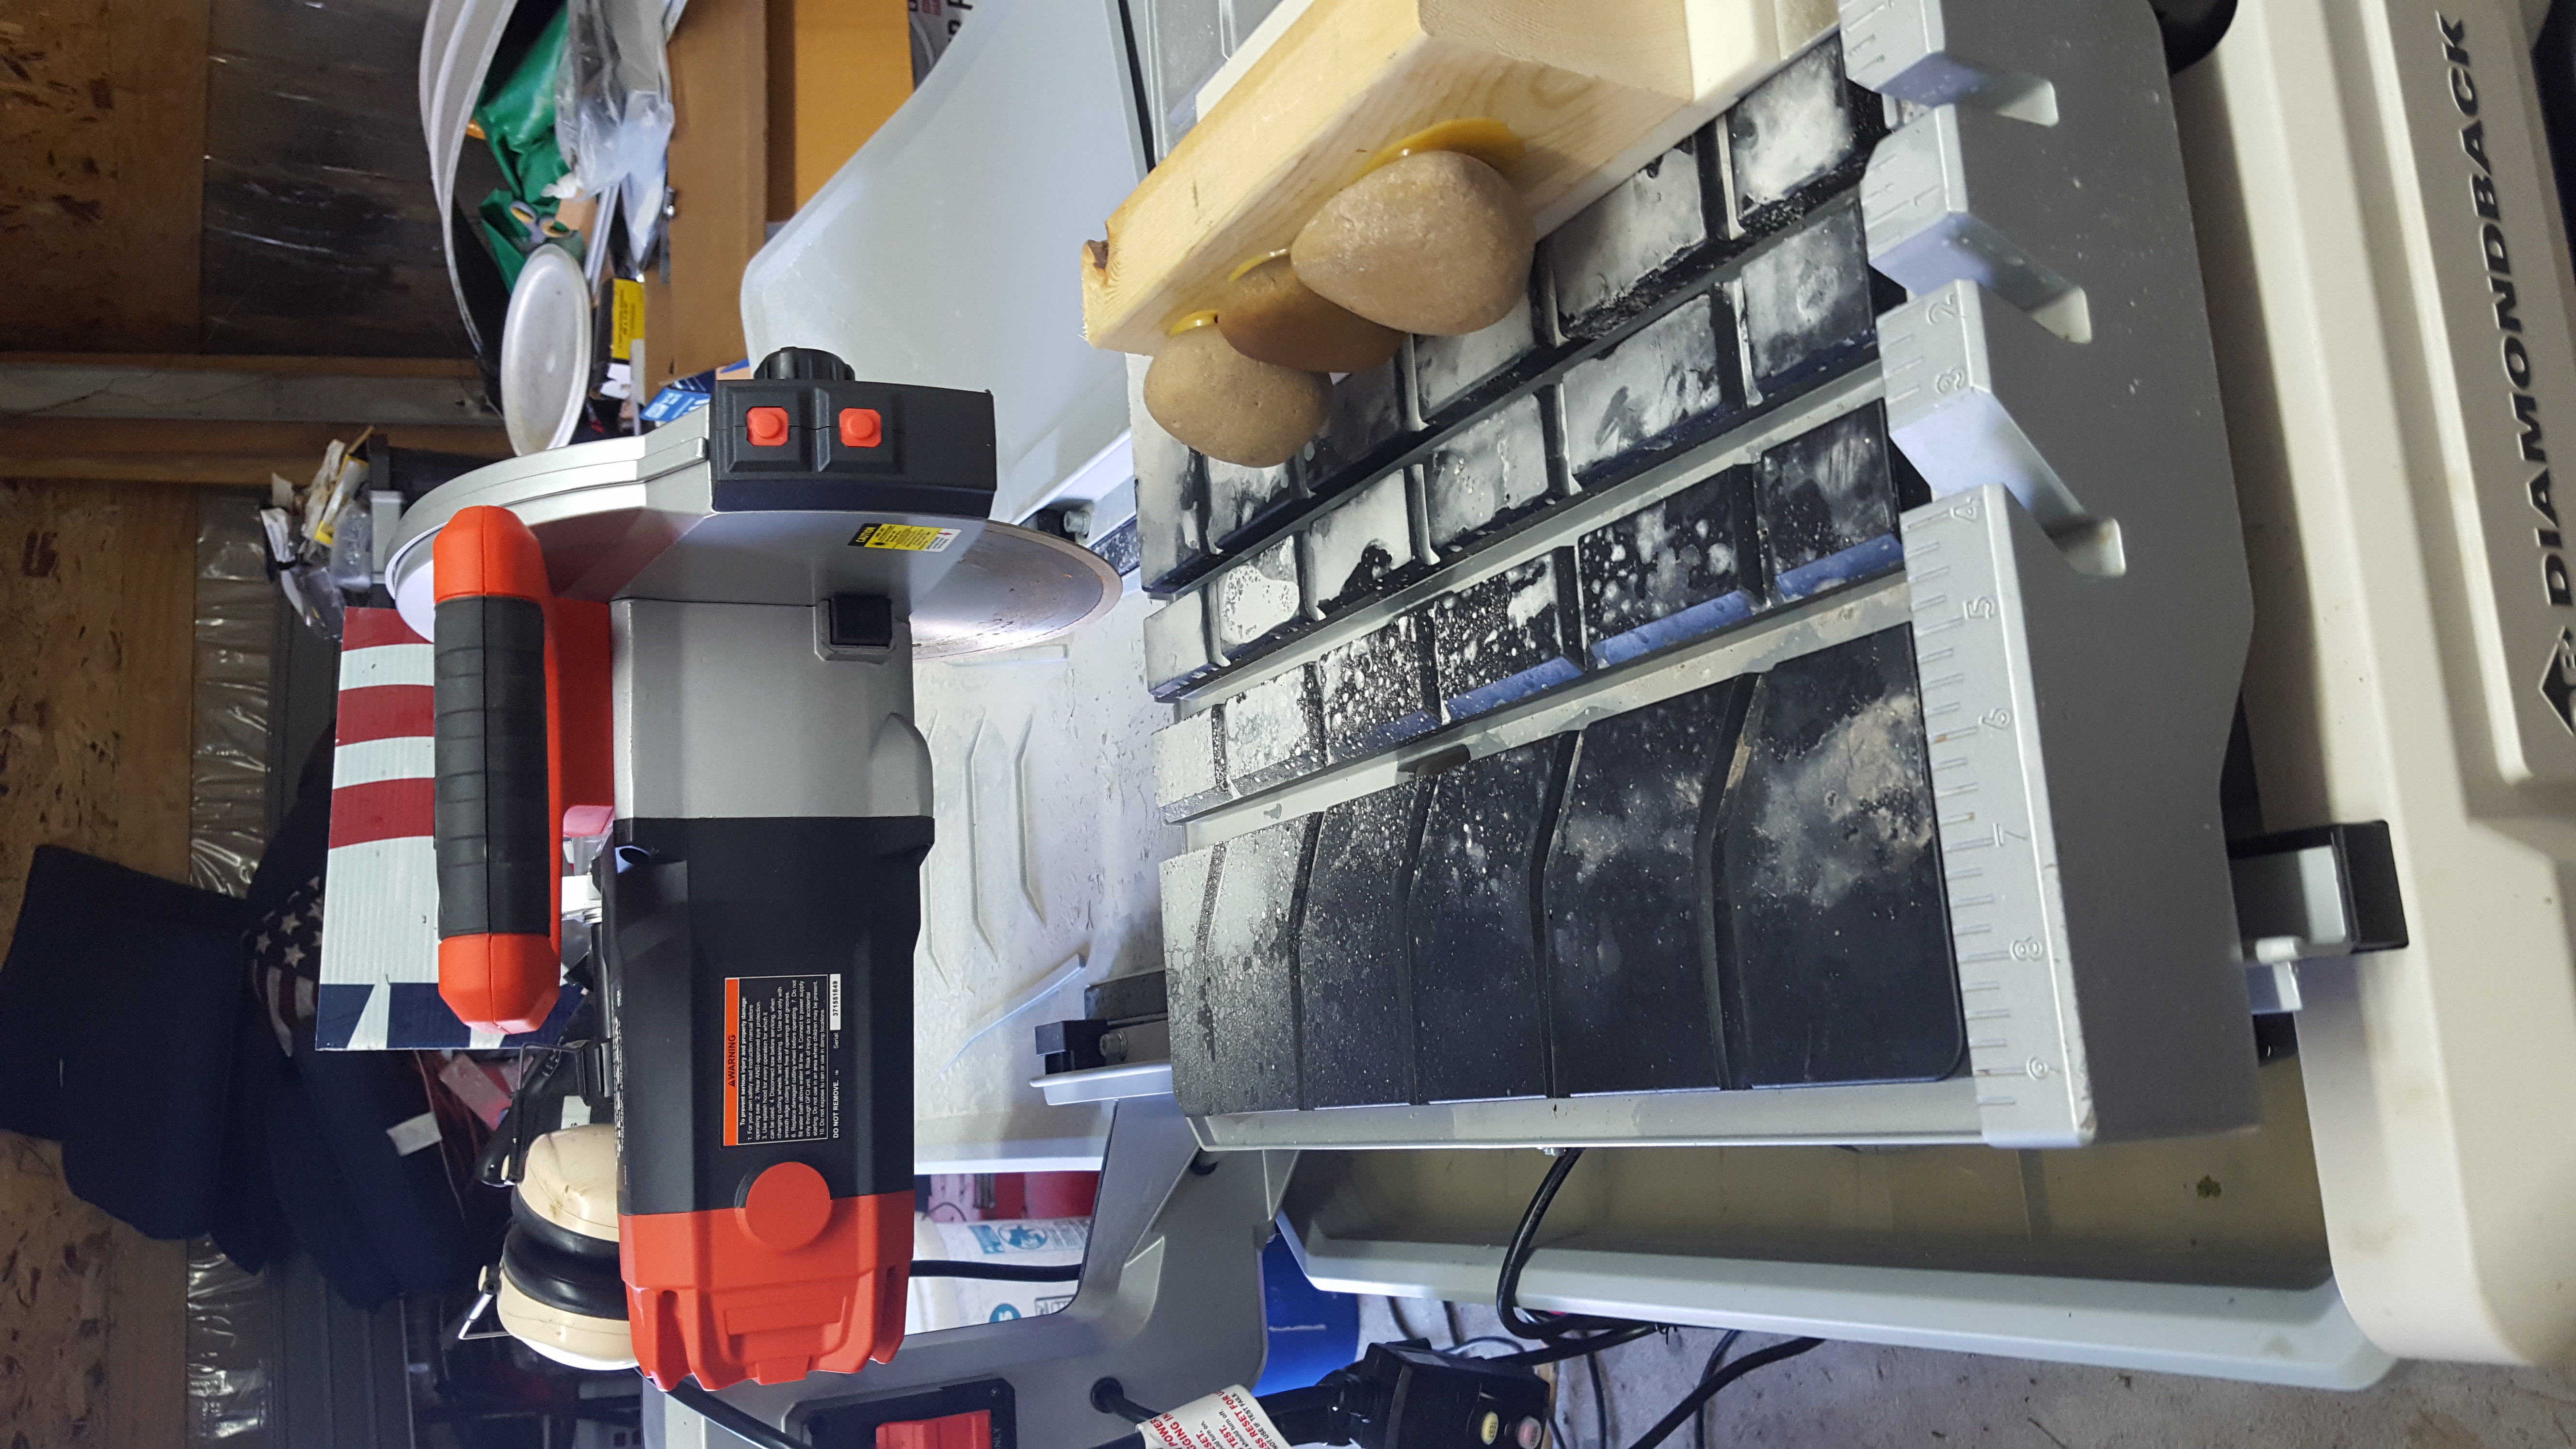
That's great. I traditionally glue to the end of the 2x2 or 2x3 or 2x4. The end is rougher and has more grabbing power. Plus a longer stub is easier for me to clamp in the vice on my saw. You don't have a vice but it would be fairly easy to rig one with carpenters clamps or  ? My only other comment would be having multiple rocks on the same glue=-up could cause extra work because the first slice position might vary between rocks. You almost have to cut each on the same trajectory. Be sure and let the stones/glue cure for at least a 24 hour period and protect them from freezing temps (freezing makes it easier for them to pop loose). Removal of wood glue mounted specimens can be done with a long soak in water, but if you sawed the wood very close to the stone the water penetrates evenly and faster so an hour or at most an overnight soak is enough. Good thinking there. Slab on. |
|
|
|
Post by manofglass on Sept 24, 2019 16:10:06 GMT -5
I just stick the 2by4 in the vice
|
|
bandmenter
off to a rocking start
Member since September 2019
Posts: 12
|
Post by bandmenter on Sept 27, 2019 0:59:08 GMT -5
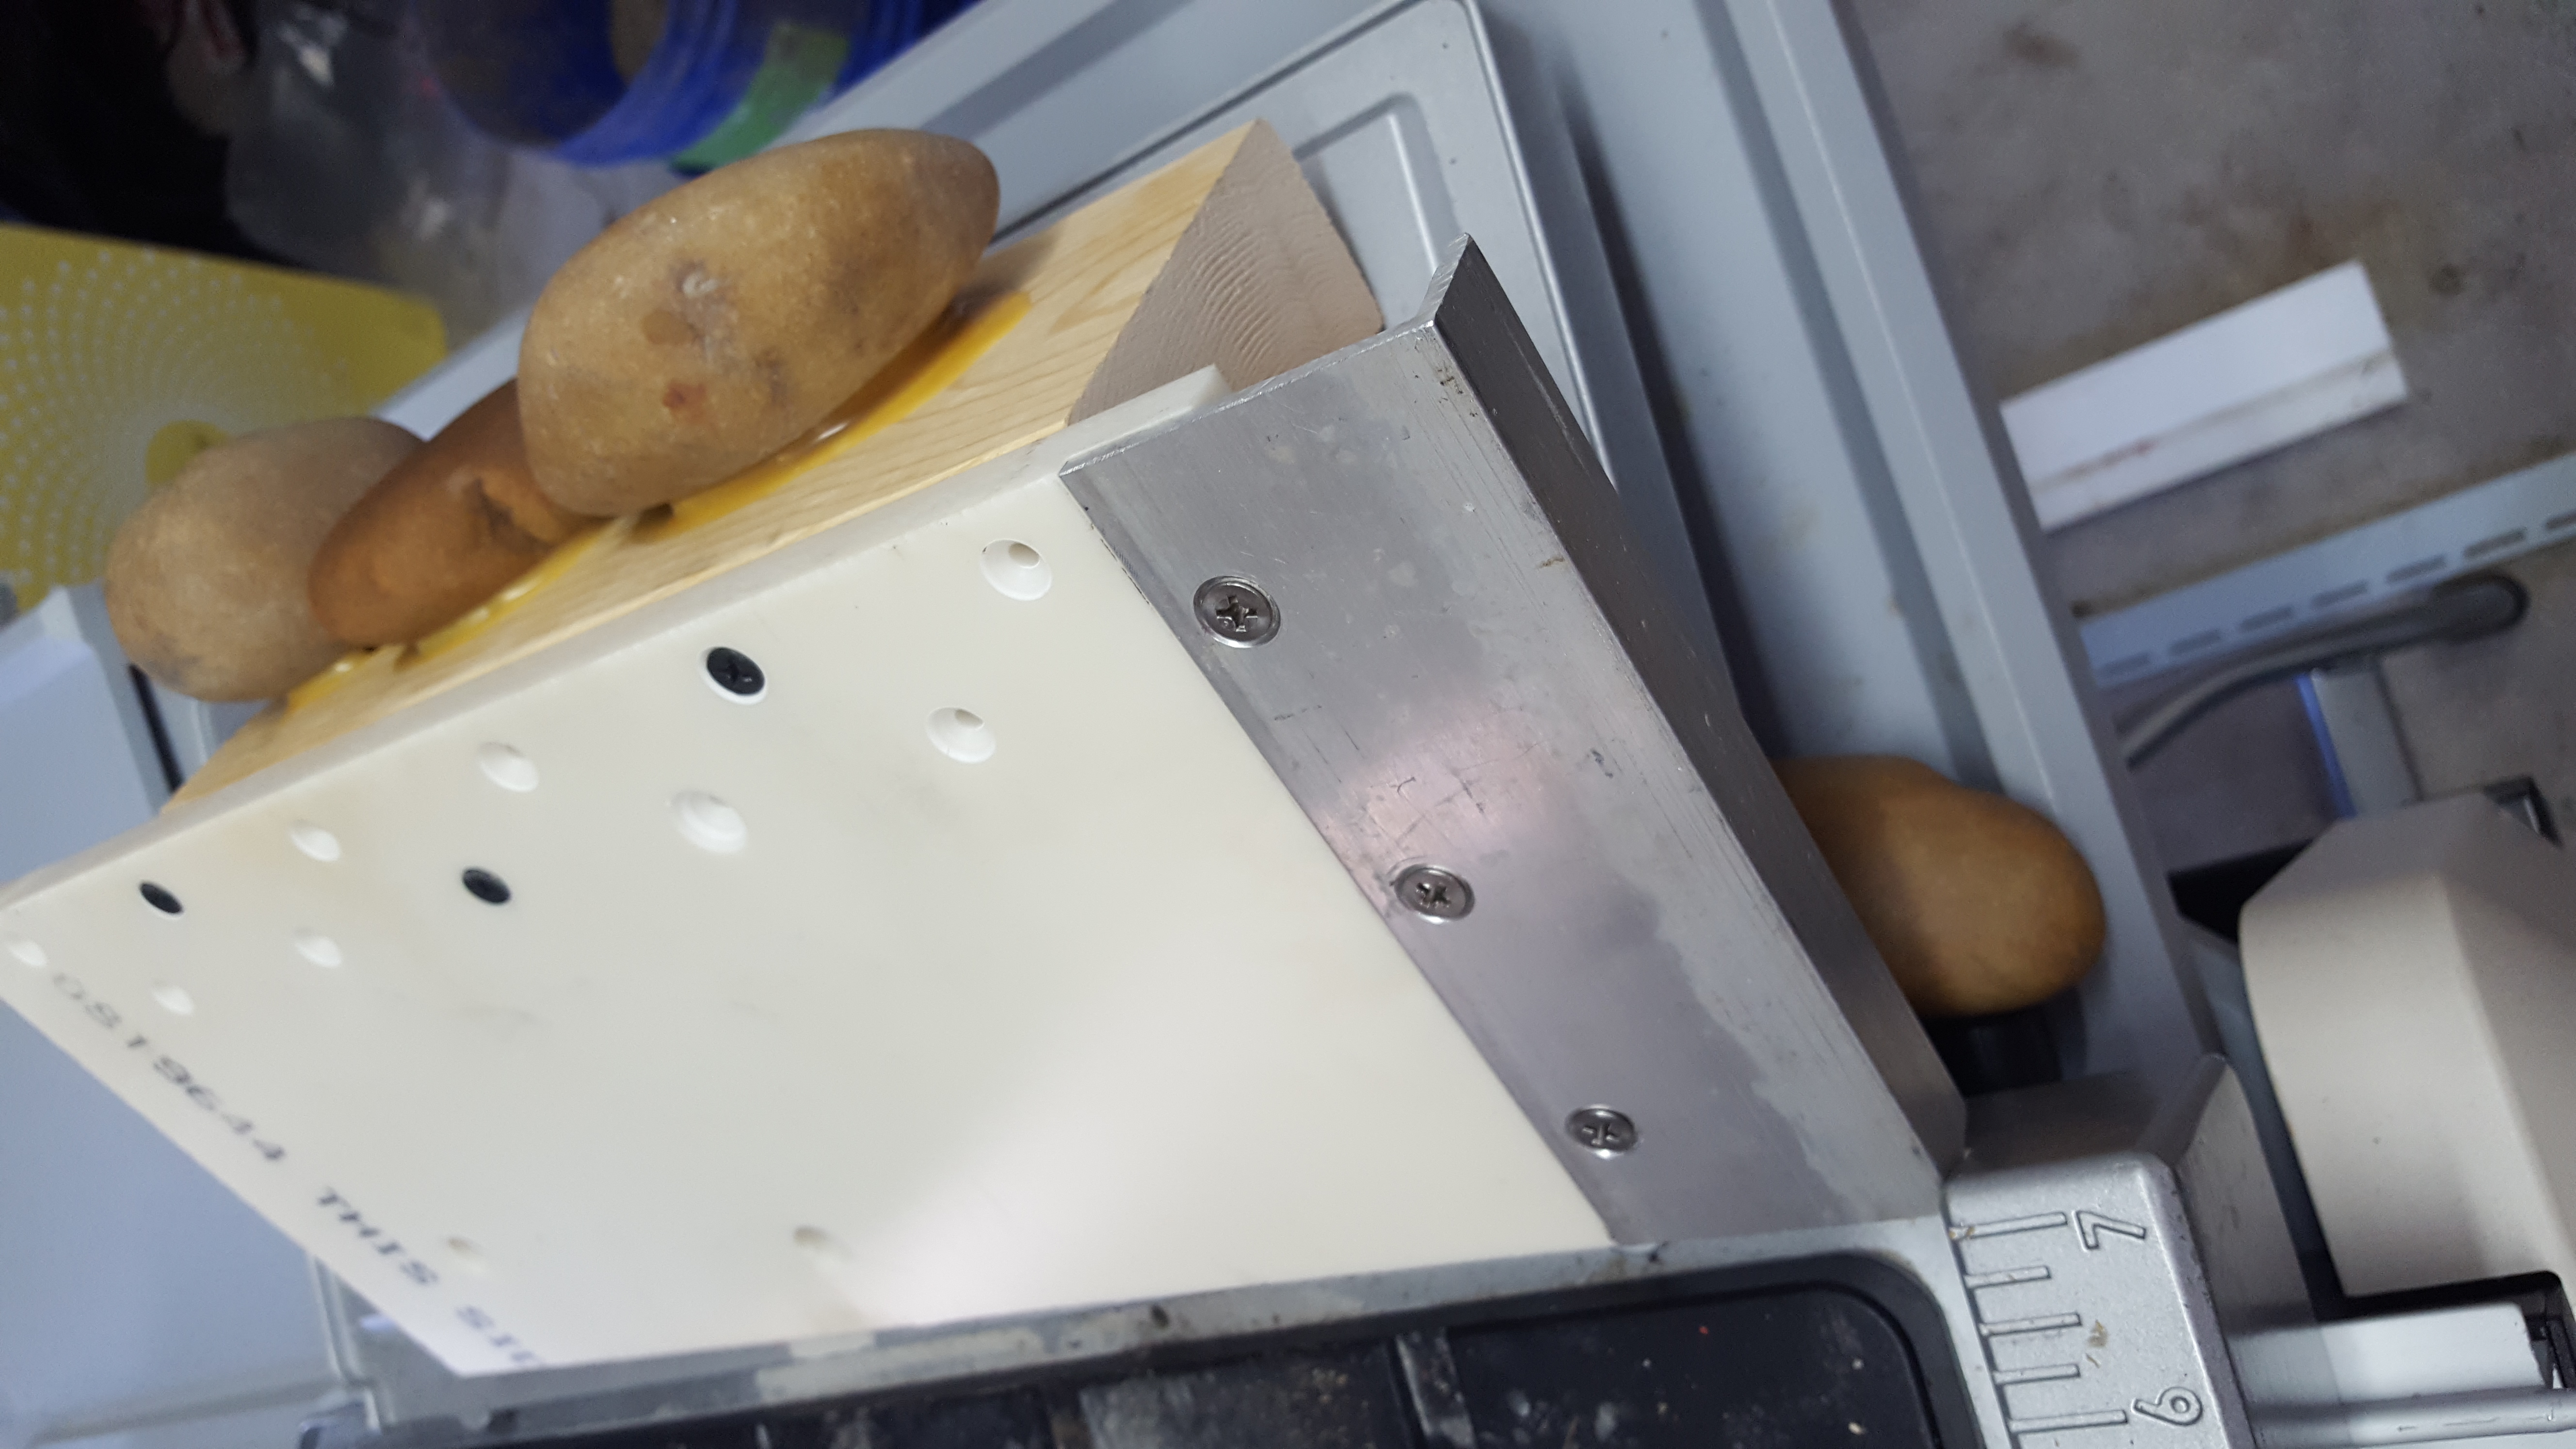
Was messaging a new friend, Manofglass, here on RTH, he said that I should add more pictures of my build for those who might be interested. I mentioned in another post that I like using Corian counter top material to make fixtures. It is a very rigid material, it cuts easy on the table saw, it is machinable and is more times than not, free. So that is what chose to use as my base material. the first thing to do is square it up as it was a sink cut out. 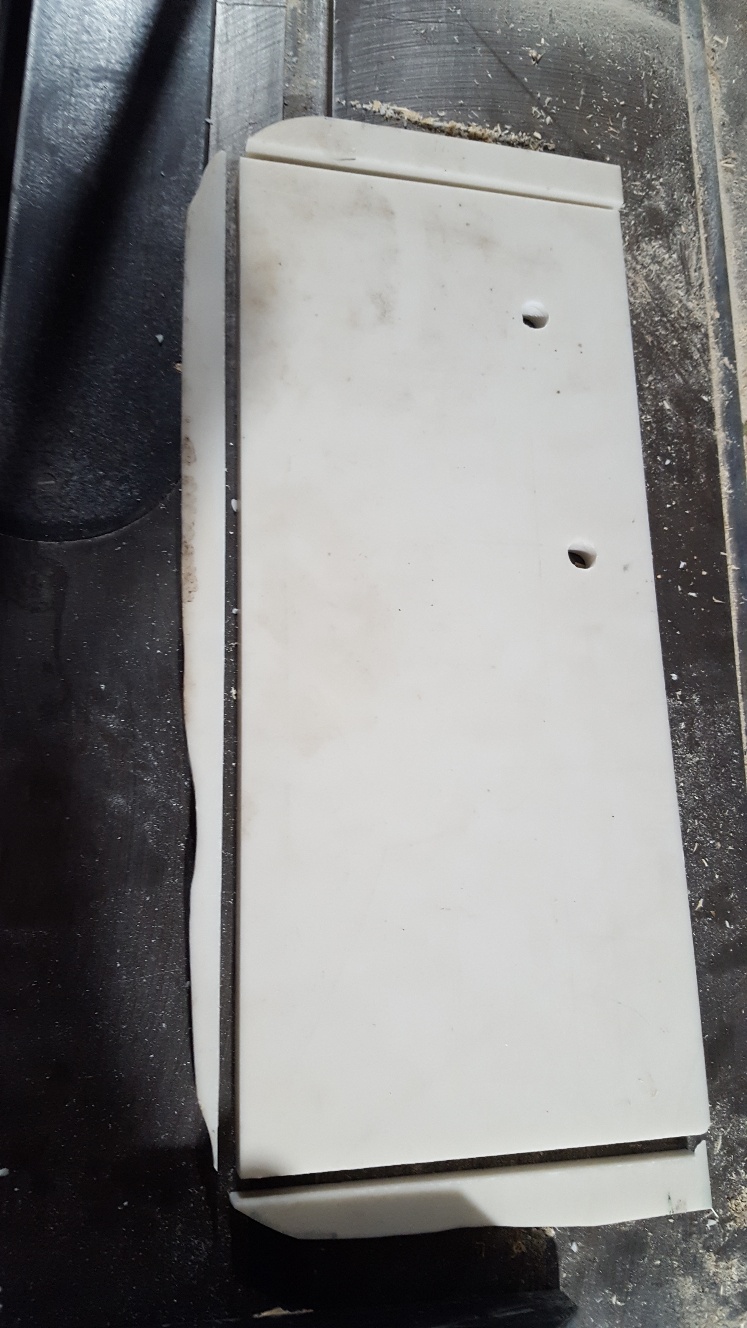 Then I cut a piece of aluminum angle to give me an uneven leg for clamping to the saw bed. I often will cut it on the table saw as well. 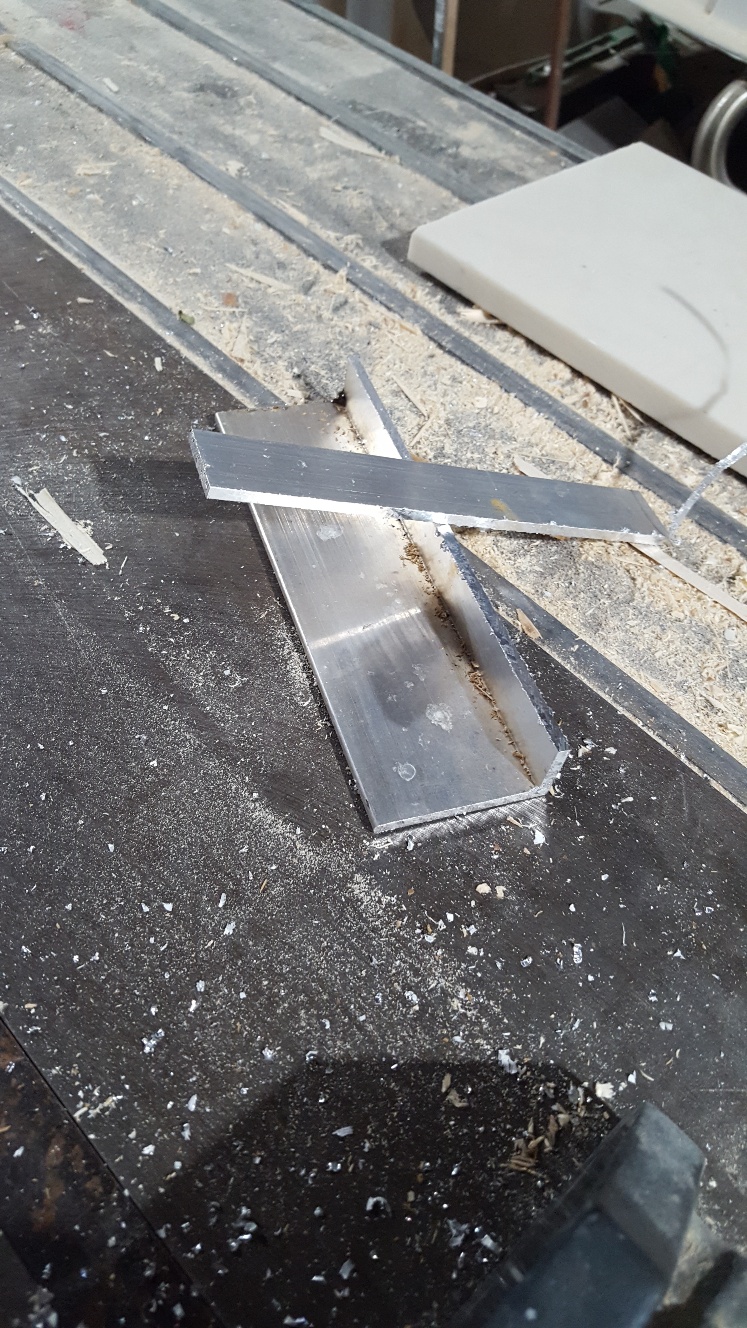 I then cut a rabbit joint in the base material to allow the aluminum to be recessed on the piece, i cut it 3/4 by 1/8 inch deep. Laying out the hole pattern, I use Gorilla tape to hold the alignment. I drilled through both pieces of material for tapping the Corian material to 10-32 countersunk screws. Yes, this means that I also countersunk the aluminum.    I then laid out the hole pattern to along the edge to attach the 2x4 to the jig.  The jig attach's to the saw table using a c-clamp. The edge of the aluminum acts as a guide to shifting over the material for the next cut. 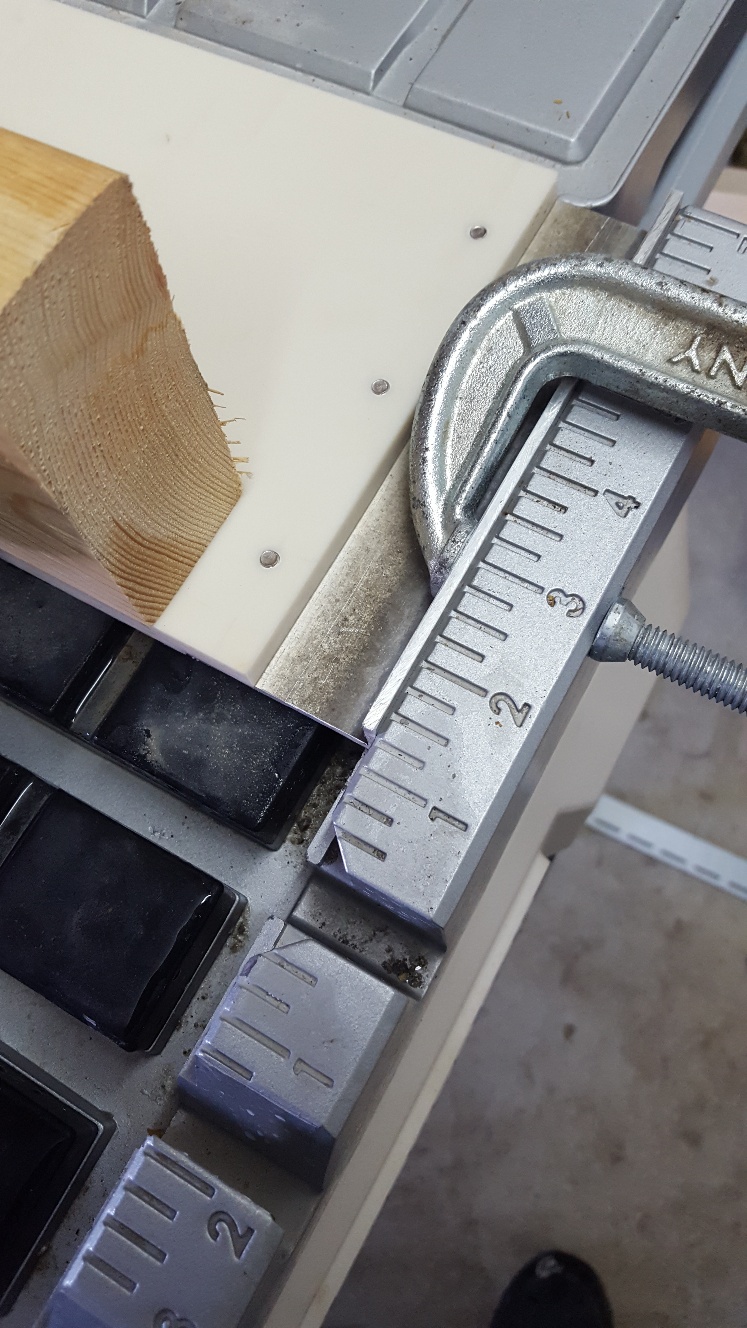 As many of you know, none of this can happen without proper supervision.  Hope this inspires others to try different things to accomplish excellent results. Bill |
|
Fossilman
Cave Dweller 
Member since January 2009
Posts: 20,681 
|
Post by Fossilman on Sept 27, 2019 9:09:07 GMT -5
I use the 2x4 method also, but with only one rock per board.... 99% of the time, the glue holds, but have had a few that drop off the board as the blade puts pressure on the rock as it starts cutting, dropping the rock off the board..
|
|
|
|
Post by HankRocks on Sept 27, 2019 9:40:40 GMT -5
Been using the 2X4 method for smaller rocks on the 10inch, no failures yet after maybe 300 or 400 cuts. I glue to the cut end as I think it grips better and I let the glue dry for over a week. Just started using a 4X4 method on the rocks for the 24 inch saw. It's a lot easier than trying to clamp half of a rounded Brazilian nodule. First cut went well 6 slices off of one piece. Gluing two more to try.
My plan for the larger Brazilian nodules, I will cut them in half on my 20 inch using a custom built geode holder and then if they are hollow I may polish and sell as is. If they are solid I will glue and then take slices off at least one half.
I just need more dang hours in the day to get all of these projects done!!! Didn't realize that when one retires the days get shorter!!
|
|


 ? My only other comment would be having multiple rocks on the same glue=-up could cause extra work because the first slice position might vary between rocks. You almost have to cut each on the same trajectory. Be sure and let the stones/glue cure for at least a 24 hour period and protect them from freezing temps (freezing makes it easier for them to pop loose). Removal of wood glue mounted specimens can be done with a long soak in water, but if you sawed the wood very close to the stone the water penetrates evenly and faster so an hour or at most an overnight soak is enough. Good thinking there. Slab on.


