adrian65
Cave Dweller  Arch to golden memories and to great friends.
Member since February 2007
Posts: 10,790
|
Post by adrian65 on Oct 21, 2010 12:59:22 GMT -5
Hi, everyone! Firstly, a brief story of how I decided to make this cane. A while ago, my mom told me she'd like a fancy cane, with metal handle. I found a web-site which had very pretty models at fair prices, but when I tried to order on-line it appeared that they don't ship to Europe because of the high cost. Funny that they had a shipment computer which gave the shipping price (some $50). I also e-mailed them, asking if they could send me at least the metallic handle such as I would add the stick, but they told me no, we don't do that. Oh well, too bad that their customer service doesn't raise to the quality of their products. I kept searching and found a local web-site with lots of models, but the prices were totally crazy: some 500 Euros for a cane!!! Well, in these conditions, I asked mom if she wants the handle to be made of silver or if it could be made of stainless steel. She told me stainless steel would be OK, and that was the start of this project. I "extracted" the shape from a stainless steel "cube", as you see below: 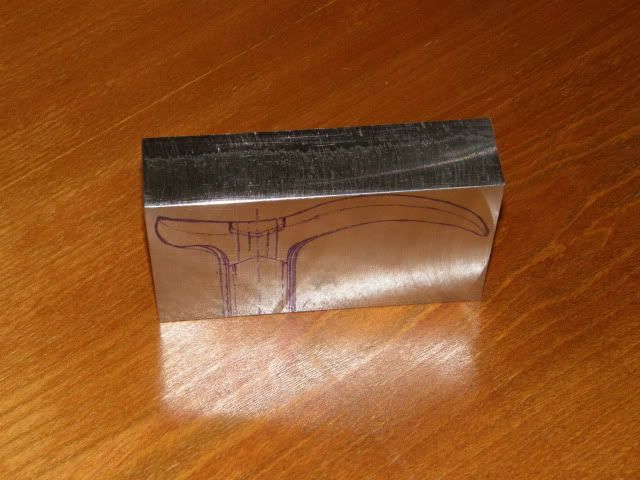 Then I changed my mind about the design and drew some other shape. The hole you see will host the stick at the lower end and a cab at the upper end. 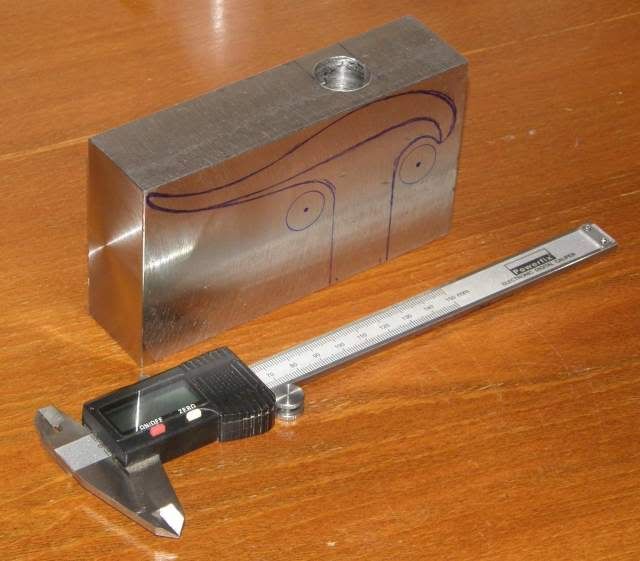 As you see, there were lots'n' lots of holes to drill: 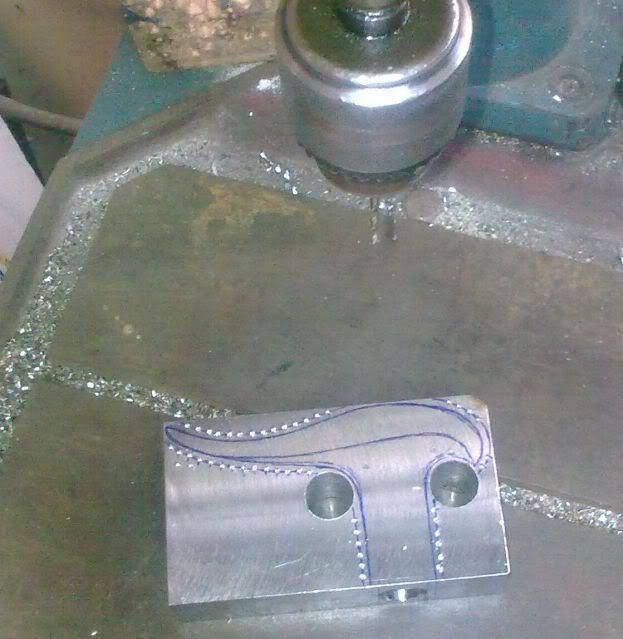 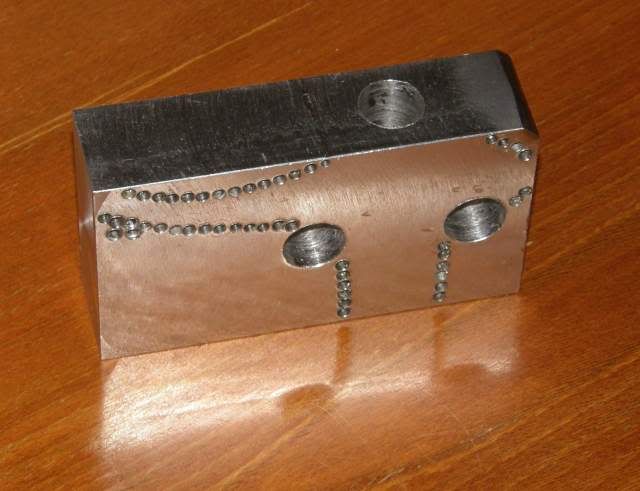 Then I started to grind the shape: 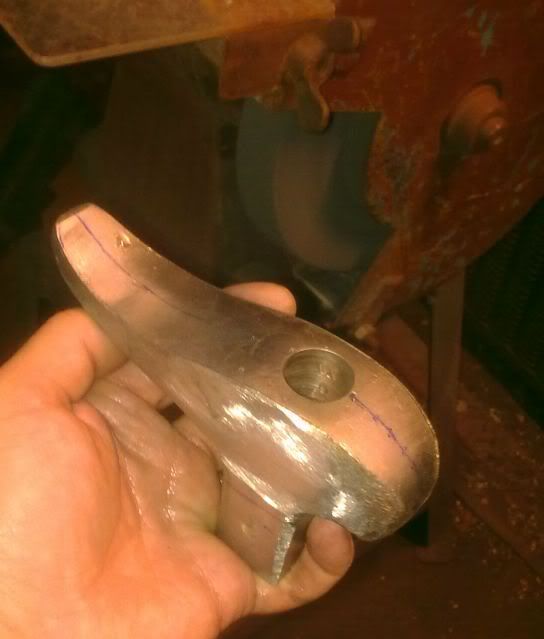 And to smooth it: 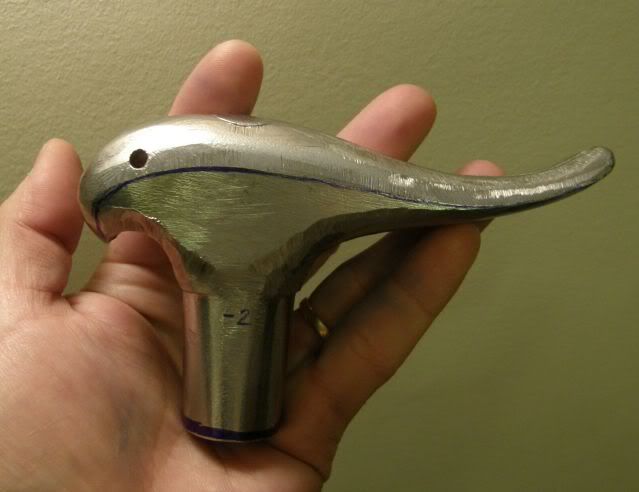 The small hole in the left will be filled with a brass rod (sort of metal intarsia) to add to the fish (maybe dolphin) shape of the handle. I think it's quite appropriate, my mom being a Pisces. Notice I put a plug in the upper hole, I think this way it will follow better the curved shape and won't undercut near the edges: 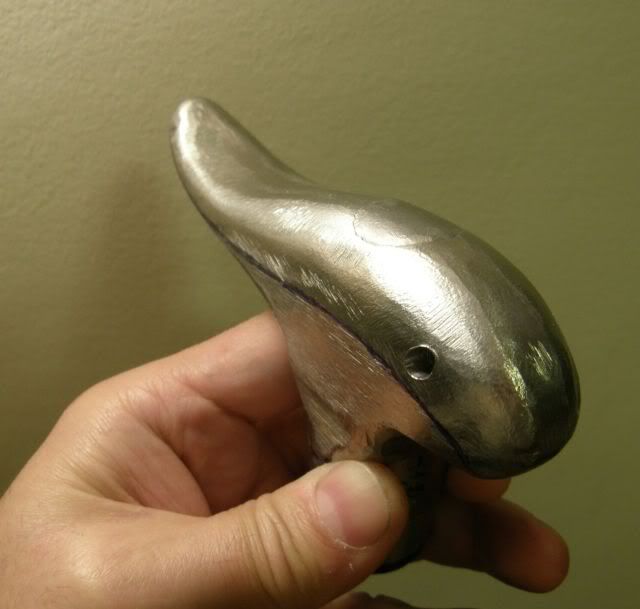 That would be all for now, I will post further progresses. Thank you for looking, Adrian |
|
|
|
Post by moondragon on Oct 21, 2010 13:10:07 GMT -5
There is no end to your talent:) You constantly amaze and delight me with your wonderful skills.
I cant wait to see the finished cane. I am sure you got more surprises up your sleeve:)
If you need a certain kind of stones or stones to finish it off, let me know I will send them to you.
|
|
|
|
Post by johnjsgems on Oct 21, 2010 17:50:09 GMT -5
You are a true artist.
|
|
|
|
Post by Toad on Oct 21, 2010 19:05:29 GMT -5
Looking great, but I'd expect nothing less.
|
|
|
|
Post by tanyafrench on Oct 21, 2010 20:22:46 GMT -5
Wow Adrian, that is so special. Your Mom will never be able to put a price on that cane. She will love it even more because you made it instead of buying it. It's looking pretty awesome.
Tanya
|
|
|
|
Post by rockmanken on Oct 21, 2010 20:38:17 GMT -5
Alright...another follow along project from Adrian. GREAT. I love to watch your progress.
The dolphin is going to look fantastic.
I hope you are going to incorporate stones in the shaft of the cane, also.
Ken
|
|
|
|
Post by Bikerrandy on Oct 21, 2010 20:45:04 GMT -5
You sure do have some skills bud, that's too cool!!  |
|
|
|
Post by NatureNut on Oct 21, 2010 21:22:16 GMT -5
That handle looks like it's real comfortable in the hand. This will be fun to follow...
|
|
adrian65
Cave Dweller  Arch to golden memories and to great friends.
Member since February 2007
Posts: 10,790
|
Post by adrian65 on Oct 21, 2010 22:35:06 GMT -5
Thank you everyone. Sara, you're very kind, thank you for the stones offer but I think I already have some rocks to choose from. ... I hope you are going to incorporate stones in the shaft of the cane, also. Ken Ken, I'm affraid that upper cab would be the only stone: mom doesn't want stones on the cane, she's affraid of breaking them. I will put that one only because it will be protected due to its top position, even if the cane will be falling down. Adrian |
|
|
|
Post by Woodyrock on Oct 22, 2010 0:29:44 GMT -5
Adrian:
All ready, this is a piece of art. We can only dream of what you could do with a machine shops tools at your disposal..
Woody
|
|
|
|
Post by Jack ( Yorkshire) on Oct 22, 2010 2:52:59 GMT -5
Hi Adrian,
Looks good
Pleased to see it when you get it finished
Mum will be very pleased !!
Jack
Yorkshire uk
|
|
NDK
Cave Dweller 
Member since January 2009
Posts: 9,440
|
Post by NDK on Oct 22, 2010 20:30:24 GMT -5
It's gorgeous already Adrian! And so much more satisfying knowing you made it I'm sure!
Nate
|
|
|
|
Post by rockrookie on Oct 22, 2010 21:09:08 GMT -5
you are a creative Master , Adrian !
can't wait to see the final results .
--paul
|
|
steelandstone
has rocks in the head
  
Member since September 2008
Posts: 500
|
Post by steelandstone on Oct 23, 2010 1:13:41 GMT -5
A true artesian you are. I know this one is going to turn out fantastic just as all of your creations do.
|
|
drjo
fully equipped rock polisher
   Honduran Opal & DIY Nut
Member since May 2008
Posts: 1,581
|
Post by drjo on Oct 23, 2010 6:26:13 GMT -5
Very ambitious! but then again, it wouldn't be you if it wasn't would it  . You do your Mother proud. You're not hiding a sword in this creation are you?  I did an inlay for my Dad's cane but it has disappeared over the years  Please keep us posted on the progress. Dr Joe . |
|
|
|
Post by frane on Oct 23, 2010 8:16:45 GMT -5
I am always so impressed by your talent Adrian! After all the drill holes, did you use a saw to separate the handle from the host metal? It already look comfortable to hold in the hand! I am looking forward to the rest of your posts!
Fran
|
|
SteveHolmes
fully equipped rock polisher
  
Member since July 2009
Posts: 1,900
|
Post by SteveHolmes on Oct 23, 2010 12:12:41 GMT -5
Theres nothing Master Adrian can't do!!!! Looking forward to following another creation from the Master Artisan.
Steve
|
|
adrian65
Cave Dweller  Arch to golden memories and to great friends.
Member since February 2007
Posts: 10,790
|
Post by adrian65 on Oct 23, 2010 12:15:13 GMT -5
Thank you again. Fran, I cut the steel between the holes with a hand grinder and with a hand saw. Time for a new update. I kinda brought the handle to its final shape. There could be small further adjustments to get rid of the flat spots, but basically that's the final shape: 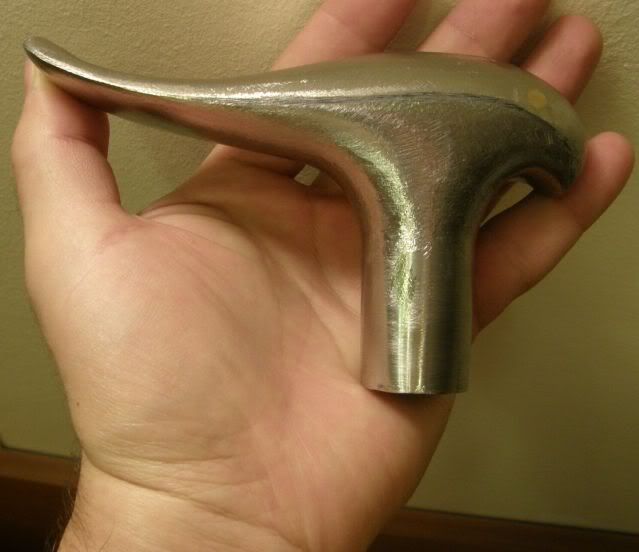 I also inserted the brass rod for the "eyes" . I am also glad the shape is balanced, it can stand as you can see here: 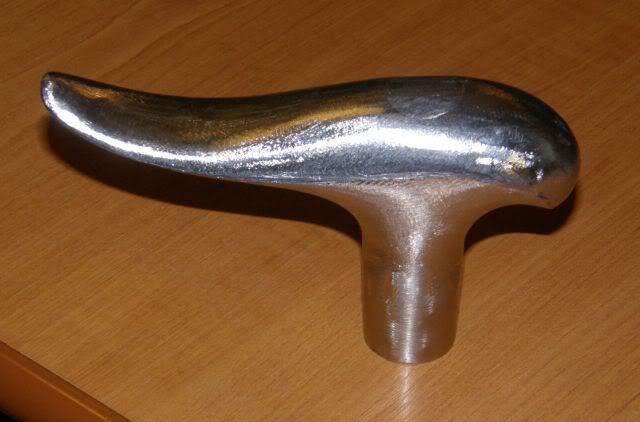 I brought the lower end to a cylindrical shape using firstly a grinder for rough shaping and then I attached the handle to the drill press ... 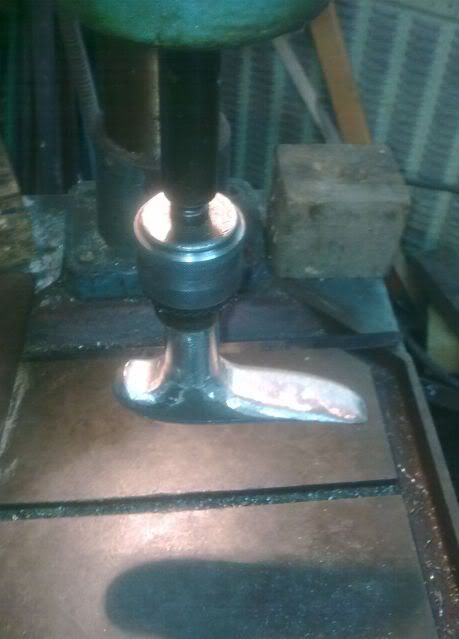 ... and held a file against it, while rotating (VERY careful not to be hit by the rotating handle): 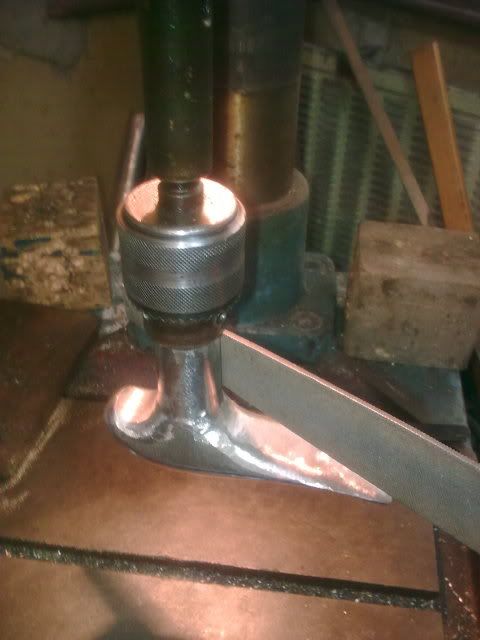 Holding the handle in the drill press was pretty easy, due to the threaded hole you see inside here (bad focus): 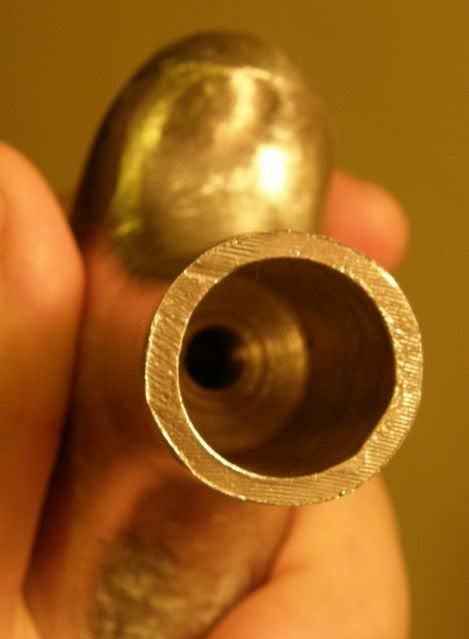 In that threaded hole will be attached this threaded rod, which will hold the stick securely: 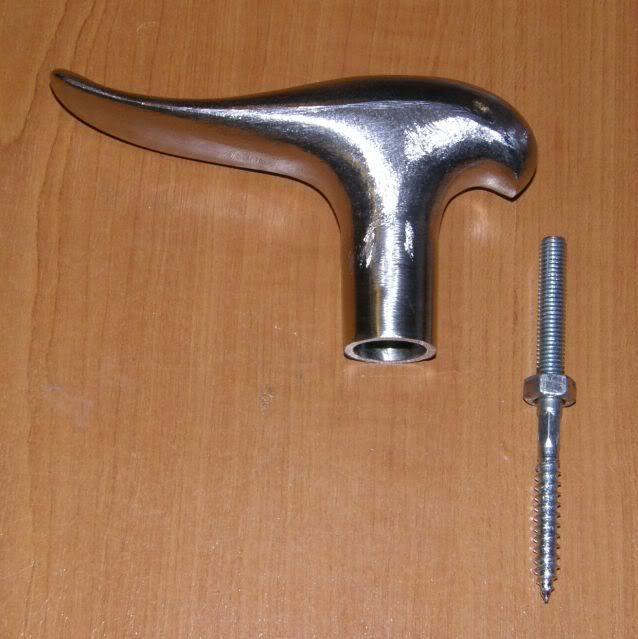 As the handle gets to its final shape by now, the clamping directly in the vice would leave indents (marks). So I built this wooden clamp for holding the handle for further filing , sanding and polishing: 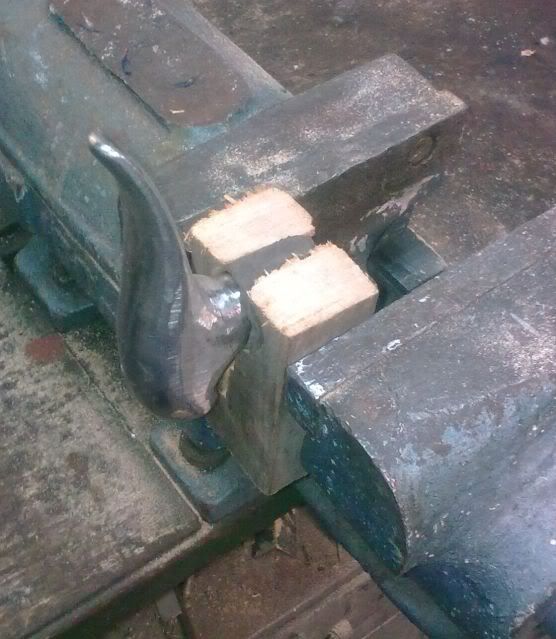 Thanks for looking, Adrian |
|
|
|
Post by rockmanken on Oct 23, 2010 13:35:40 GMT -5
The pictures say it all.
WTG Adrian.
|
|
|
|
Post by drocknut on Oct 23, 2010 23:27:12 GMT -5
Wow! Another beautiful creation in the works. Adrian you are a craftsman.
|
|




 . You do your Mother proud.


